
Flowers
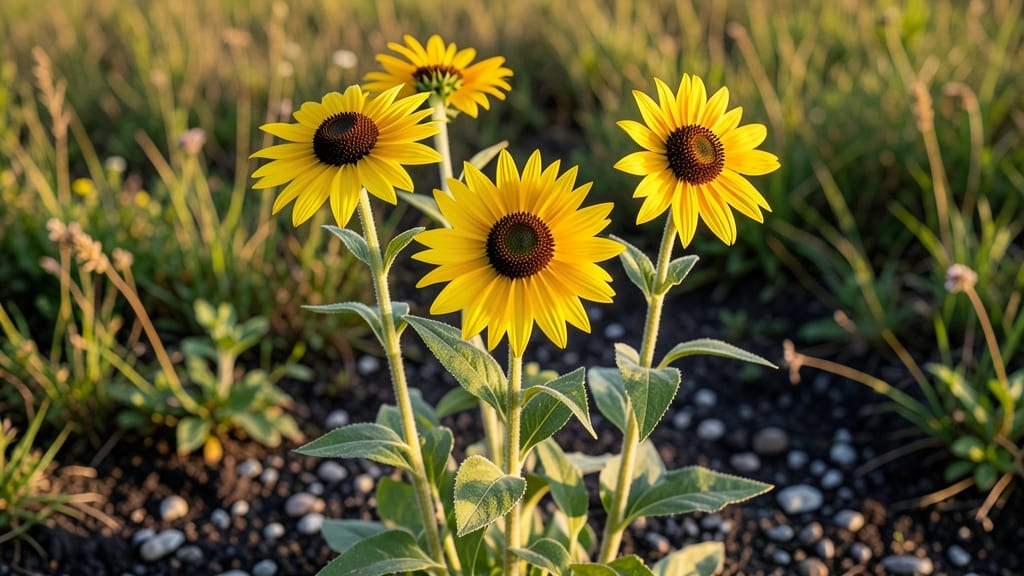
Black-eyed Susan perennials thrive where others fail—cold-hardy, drought-tolerant, and impossible to kill. 🌻 I’ve grown them through three winters in my Zone 5 garden, and they’ve only gotten more vibrant each year, blooming from early summer until frost. The secret? They love full sun and well-drained soil but won’t complain if you forget to water them once in a while.
These cheerful perennials spread effortlessly, filling garden gaps with their golden-yellow daisies and dark centers. Plant them in clusters for a wildflower meadow effect, or mix them with coneflowers and bee balm for a low-maintenance pollinator magnet.
Once established, they’ll return year after year, proving that beauty doesn’t require constant attention.
📚 In This Guide
- What you need
- Instructions
- Tips and common mistakes
- Wrapping up and next steps
What you need
- ● Black Eyed Susan plants: Seeds (if starting from scratch) – 1–2 lbs for a 100 sq. ft. area
- ● OR nursery-grown transplants – 1 plant per 1–2 sq. ft. (varies by variety)
- ● OR established clumps for division – 1–2 per desired planting spot
- ● Well-draining soil: Amend heavy clay with compost (2–3 inches mixed into top 6–12 inches) or sand (for sandy soils).
- ● Sunlight access: Full sun (6+ hours/day) for optimal blooms.
- ● Watering tools: Hose with adjustable nozzle OR watering can (for precision)
- ○ Drip irrigation system (optional but highly recommended for drought-prone areas)
- ● Gardening gloves (nitrile-coated for durability).
- ● Hand trowel or transplant spade (for digging small holes).
- ● Garden fork (for dividing mature clumps or aerating soil).
- ● Pruners or shears (for deadheading spent blooms or shaping plants).
- ○ Mulch (optional but helpful): 2–3 inches of shredded bark, straw, or pine needles to retain moisture.
- ● 🌡️ Best planting time: Early spring (4–6 weeks before last frost) or early fall (6–8 weeks before first frost).
- ● ✨ Soil pH: Aim for 6.0–7.0 (test with a soil kit if unsure).
- ○ 🎯 Fertilizer (optional): Balanced 10-10-10 or slow-release granular fertilizer at planting time.
Step-by-Step guide to planting and maintaining Black Eyed Susan perennials
These sun-loving perennials thrive with minimal effort once you get the basics right.
🌱 Step 1: Choose the Perfect Planting Location
Black Eyed Susans demand full sun—at least 6-8 hours of direct light daily—to produce their signature vibrant blooms. I always scout the sunniest spot in my garden first, because even partial shade leads to leggy stems and fewer flowers. The soil should drain well; they hate soggy roots, so avoid low-lying areas where water pools after rain.
Test your spot by observing how long sunlight lingers. If nearby plants cast afternoon shadows, this isn't ideal. Once you've found the right place, mark it with stakes so you don't accidentally dig in the wrong spot later. These perennials spread over time, so give them 2-3 feet of space between plants for optimal airflow and growth.
🪴 Step 2: Prepare the Soil for Healthy Growth
Black Eyed Susans tolerate a range of soil types but perform best in loamy, well-draining soil with a pH between 6.0 and 7.5. Before planting, work in 2-3 inches of compost into the top 12 inches of soil to improve fertility and structure. I like to mix in a handful of bone meal for extra phosphorus—this encourages strong root development and more robust blooms.
If your soil is heavy clay, amend it with sand or perlite to prevent compaction. You'll know the soil is ready when it crumbles easily between your fingers and holds moisture without becoming waterlogged. Avoid fresh manure, which can burn tender roots and disrupt the plant's natural growth cycle.
☀️ Step 3: Plant with Proper Spacing and Depth
Dig a hole twice as wide as the root ball but only as deep as the container's base. Gently remove the plant from its container and loosen any circling roots with your fingers—this prevents girdling as the plant matures. Place the perennial in the hole so the top of the root ball sits level with the surrounding soil, not buried deeper.
Backfill with native soil, pressing lightly around the edges to eliminate air pockets. Water deeply to settle the soil and encourage root contact. Space plants 2-3 feet apart—this gives them room to spread naturally and reduces competition for nutrients. If planting in fall, choose established plants rather than seeds to ensure strong root establishment before winter.
💧 Step 4: Water and Fertilize for Vibrant Blooms
Water newly planted Black Eyed Susans deeply once a week during the first growing season, ensuring moisture reaches 6 inches down. You'll know you've watered enough when the top 2 inches of soil feel damp but not soggy. Once established, these perennials are drought-tolerant, but consistent moisture produces larger, more abundant blooms.
Apply a balanced, slow-release fertilizer (10-10-10) in early spring and again after the first flush of blooms fades. I avoid high-nitrogen fertilizers, which encourage leafy growth at the expense of flowers. Instead, opt for a phosphorus-rich formula to support blooming. Deadhead spent flowers regularly to encourage reblooming and extend the season.
✂️ Step 5: Prune and Divide for Long-Term Health
Cut back dead or damaged stems in early spring before new growth begins. This removes winter-killed foliage and makes room for fresh shoots. In late summer or early fall, prune back one-third of the plant's height to promote a second flush of blooms. I always use clean, sharp pruners to avoid tearing stems and introducing disease.
Divide clumps every 3-4 years in early spring to prevent overcrowding. Dig up the entire plant, separate the roots into 3-4 inch sections, and replant the healthiest divisions. This rejuvenates the plant and gives you extra blooms for your garden. Discard any roots that look mushy or discolored—these are signs of rot or disease.
Tips & tricks for perfect Black Eyed Susan perennials
These sun-loving perennials reward patience with stunning blooms—here's how to maximize their potential.
Sunlight Strategy: While 6-8 hours of direct sunlight is ideal, I've found that Black Eyed Susans can tolerate up to 10 hours in cooler climates (zones 3-5). In hotter regions (zones 6-9), provide afternoon shade to prevent leaf scorch. Watch for yellowing leaves—this is your plant's way of saying "I need more sun" or "I'm getting too much."
Soil Prep Secret: The 2-3 inches of compost and bone meal in Step 2 should be thoroughly mixed into the top 12 inches of soil. I like to use a broadfork to loosen the soil without bringing up weeds. For clay-heavy soils, mix in equal parts sand and perlite by volume—this creates perfect drainage while maintaining moisture. Test your soil's pH before planting; if it's below 6.0, add lime to adjust.
Planting Precision: When planting, the hole should be twice as wide but only as deep as the root ball's base—this prevents burying the crown, which can cause rot. I press my fingers around the edges after backfilling to eliminate air pockets, then give the soil a gentle squeeze to check for proper compaction. For container-grown plants, remove the outer pot layer to encourage root spread.
Reblooming Hack: The late summer/early fall pruning in Step 5 is where the magic happens for reblooming. Cut back stems to about one-third their height, but leave some foliage to maintain photosynthesis. I've seen second flushes as late as October when I prune in early September. For even more blooms, consider a light application of bloom-boosting fertilizer like 5-10-10 after pruning.
Pro Tips for Black Eyed Susan Perennials
- These sun-loving perennials reward patience with stunning blooms—here's how to maximize their potential.
- Sunlight Strategy: While 6-8 hours of direct sunlight is ideal, I've found that Black Eyed Susans can tolerate up to 10 hours in cooler climates (zones 3-5).
- Soil Prep Secret: The 2-3 inches of compost and bone meal in Step 2 should be thoroughly mixed into the top 12 inches of soil.
Frequently asked questions
Got questions about growing black-eyed Susans? You’re not alone! These cheerful perennials are low-maintenance, but a few common concerns pop up—especially for new gardeners. Here’s what you need to know to keep your blooms thriving with minimal fuss.
How do I get black-eyed Susans to rebloom?
Reblooming often requires a little encouragement! Deadhead spent blooms regularly to prompt new flowers. For Rudbeckia varieties like ‘Goldsturm,’ fertilize lightly in early spring with a balanced 10-10-10 or compost. Cut back stems by ⅓ after the first flush of blooms to stimulate a second round—just avoid heavy pruning after midsummer, or you’ll delay fall color. Pro tip: Plant in full sun (6+ hours daily) and well-draining soil for the best results!
Are black-eyed Susans truly cold-hardy?
Most varieties thrive in USDA Zones 3–9, making them perfect for northern and southern climates alike. They handle frost like champs and often bloom well into fall. For extra winter protection in Zone 3, add a 2–3 inch layer of mulch around the base after the first hard freeze. Bonus: Their deep roots make them drought-tolerant once established!
What pests or diseases should I watch for?
Black-eyed Susans are generally pest-resistant, but keep an eye out for Japanese beetles (they love the flowers!) and aphids. Handpick beetles or spray with soapy water if needed. Fungal issues like powdery mildew can occur in humid climates—improve airflow by spacing plants 12–18 inches apart and avoid overhead watering. Prevention tip: Choose disease-resistant varieties like ‘Indian Summer’ for fewer headaches.
Can I grow black-eyed Susans in containers?
Yes! Dwarf varieties like ‘Little Goldstar’ (12–18 inches tall) are ideal for pots. Use a 5–7 gallon container with drainage holes and a high-quality potting mix. Place in full sun and water regularly—containers dry out faster than garden beds. Fertilize monthly with a balanced formula during the growing season. Container hack: Mix in slow-release granules at planting for easier care!
What’s a good alternative if my soil is too wet?
If your soil stays soggy, try coneflowers (Echinacea) or blanket flower (Gaillardia)—both handle moisture better and offer similar long-blooming beauty. For a Rudbeckia-like look, opt for ‘Autumn Sun’ (a hybrid with better moisture tolerance). Amend your soil with compost or sand to improve drainage, or plant black-eyed Susans on a slight mound for better root health.
Wrapping up and next steps
Black-eyed Susans are the perfect low-maintenance stars for any garden, offering vibrant blooms, resilience, and cheerful reblooming—all with minimal effort! 🌻 Whether you're a seasoned gardener or a beginner, these cold-hardy perennials deliver big personality with zero fuss.
Ready to transform your outdoor space? Start by choosing your spot, prepping the soil, and planting with confidence—your garden’s new favorite will thank you!
- Next step: Grab your gloves and get planting—your Black-eyed Susans will reward you with months of sunshine! 🌿
- Pro tip: Snap a photo of your first bloom to track their growth and share your progress!