
Flowers
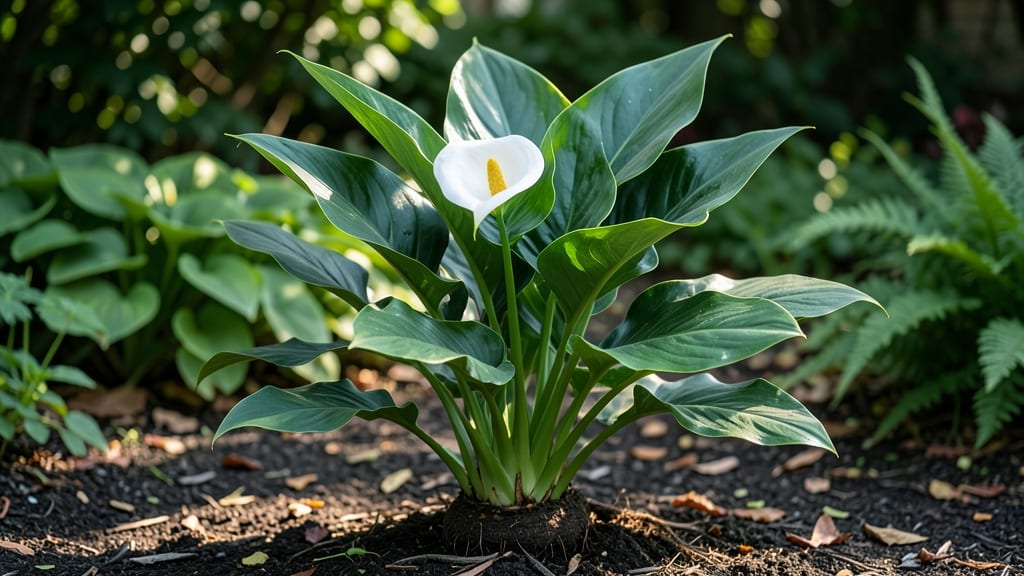
Growing calla lilies as perennials means those dramatic blooms come back every year—no replanting, no fuss. 🌿 I’ve learned the simple tricks that keep my callas thriving through heat, humidity, and even winter dormancy, so they burst into bloom again and again.
The secret lies in mimicking their natural tropical habitat while adapting to your climate, whether you’re in a warm zone or a cooler region with proper protection.
These plants love rich, moist soil and partial shade, which means they’re perfect for garden beds near trees or containers on patios where they get morning sun and afternoon shade.
In my zone 7 garden, I plant them in well-draining soil mixed with compost, about 4 inches deep and spaced 12-18 inches apart—this gives them room to spread without competing for nutrients. Watering is key: keep the soil consistently moist but never soggy, especially during their growing season.
By late fall, you’ll notice the leaves yellowing—that’s their natural signal to rest. In colder zones, I cut back the foliage and mulch heavily to protect the rhizomes, while in warmer areas, they stay dormant naturally.
When spring arrives, new shoots emerge, and with a little fertilizer at planting time and mid-season, you’ll see those iconic white (or pink, red, or purple!) blooms returning within 6-8 weeks. The payoff? A garden that feels luxurious with almost no extra effort.
Propagation is easy too—just divide the rhizomes every few years to keep them vigorous. And if you ever spot yellowing leaves or brown spots, it’s usually a sign of overwatering or fungal issues, which fix with better drainage and less frequent watering.
With these simple steps, your callas will reward you with season after season of effortless elegance.
📚 In This Guide
- What you need
- Instructions
- Tips and common mistakes
- Wrapping up and next steps
What you need
- ● Calla lily tubers or bulbs: 3–5 per plant (choose healthy, firm tubers with visible "eyes" or growth points).
- ● Well-draining potting mix or garden soil: 1–2 bags (amend with compost for richer soil).
- ○ Containers (optional for pots): 12–16" diameter pots with drainage holes (or in-ground planting space).
- ● Organic mulch: Shredded bark or straw (1–2 inches to retain moisture).
- ○ Slow-release fertilizer (5-10-5 or balanced): 1–2 tbsp per plant (optional but recommended).
- ● Watering can or hose with gentle spray nozzle: For even moisture without disturbing tubers.
- ● Soil moisture meter: To check humidity levels (calla lilies love consistency!).
- ● Plant supports (stakes or cages): If growing tall varieties (e.g., Zantedeschia aethiopica).
- ● Epsom salt (magnesium sulfate): 1 tbsp per gallon of water (monthly feed for vibrant blooms).
- ● Black plastic mulch: To warm soil and suppress weeds (great for cooler climates).
- ● Pruning shears: For trimming spent foliage or dividing overcrowded tubers.
Step-by-Step guide to planting and caring for calla lilies
Here's how to grow these striking perennials with minimal effort—once established, they’ll reward you with bold blooms for years.
🪴 Step 1: Choose the Perfect Planting Site
Calla lilies thrive in partial shade, especially in hotter climates, where they’ll avoid scorching and produce more blooms. I look for spots with morning sun and afternoon shade—think dappled light under tall trees or near a north-facing wall. The soil should drain well but retain moisture, so avoid rocky or sandy ground unless you amend it.
Test your soil’s moisture level by digging a 6-inch hole—if water pools at the bottom, your site drains too slowly. Amend heavy clay with 2-3 inches of compost to improve drainage. Callas hate soggy roots, so if your yard floods, plant them on a slight mound or in a raised bed.
🌱 Step 2: Plant Rhizomes at the Right Depth and Spacing
Plant calla lily rhizomes in early spring, after the last frost but before the soil warms above 60°F. Dig a hole 2-3 inches deep—deeper than most perennials, since the rhizome needs to stay cool. Place the rhizome horizontally, with the eyes (growth points) facing upward and 2-3 inches apart for single plants or 6-8 inches apart for clusters.
Cover lightly with soil, leaving the top of the rhizome exposed—it should look like a small hill, not buried. Press gently to remove air pockets but don’t compact the soil. Water deeply right after planting to settle the soil around the rhizome. Overwatering now can rot the rhizome, so wait until the top inch of soil feels dry before watering again.
💧 Step 3: Water and Feed for Strong, Reblooming Plants
Keep the soil evenly moist but not soggy—calla lilies need 1-1.5 inches of water weekly, more in extreme heat. I water deeply in the morning so the leaves dry quickly, preventing fungal diseases like leaf spot. Mulch with 2-3 inches of organic mulch (like shredded bark) to retain moisture and keep roots cool.
Feed lightly in early spring with a balanced, slow-release fertilizer (like 10-10-10) at half the recommended strength. Too much fertilizer encourages leafy growth at the expense of blooms. After the first flush of flowers, stop fertilizing until next spring—callas don’t need heavy feeding to rebloom.
✂️ Step 4: Deadhead and Divide for Long-Term Health
Once blooms fade, snip the spent flower stalks just above the leaf base with clean pruners. This redirects the plant’s energy into next year’s growth instead of seed production. Don’t cut back the leaves until they yellow naturally in fall—healthy foliage stores energy in the rhizome for spring reblooming.
Every 3-4 years, divide overcrowded clumps in early spring or fall. Dig up the rhizomes, separate the sections with a sharp knife, and replant the strongest pieces. Discard any mushy or shriveled rhizomes—these won’t regrow. Dividing prevents disease spread and keeps blooms abundant.
⏰ Step 5: Prepare for Winter Dormancy
When frost threatens, cut back the foliage to 2 inches above the soil line—this prevents rot and makes it easier to spot new growth in spring. Leave the mulch in place over winter to insulate the rhizomes. In USDA Zones 7 and colder, add an extra 2-3 inches of mulch or cover with a thick layer of straw for extra protection.
Calla lilies are hardy to Zone 7, but in colder areas, dig up the rhizomes after the first frost, store them in dry peat moss or vermiculite in a cool, dark place (40-50°F), and replant in spring. If you forget to dig them up, don’t worry—they’ll often survive winter in the ground with adequate mulch.
Tips & tricks for perfect calla lily planting and care
These simple strategies will help you grow stunning calla lilies with minimal effort—once established, they’ll thrive for years.
Soil Test Tip: Before planting, perform a simple soil test by digging that 6-inch hole—if water lingers for more than 10 minutes, your drainage needs improvement. I’ve found mixing in 2-3 inches of compost transforms heavy clay into perfect calla-friendly soil. For sandy soil, add a bit of peat moss to help retain moisture without suffocating the roots. The goal is a texture that holds water like a well-wrung sponge.
Planting Precision: When placing your rhizomes in Step 2, think "eyes up" and "hill, not hole." The rhizome should sit like a small pyramid with the growth points facing upward—this ensures they won't rot from sitting in water. I like to use a small garden trowel to create gentle mounds rather than digging holes, which prevents accidental over-deepening. The exposed top helps regulate moisture and prevents fungal issues.
Watering Wisdom: The 1-1.5 inches of water weekly is your baseline, but adjust for your climate. In extreme heat, I water every other day in the morning, checking soil moisture by sticking my finger 2 inches deep—if it's dry, it's time. The key is morning watering: wet foliage that sits overnight invites fungal diseases like leaf spot. Mulch with 2-3 inches of organic material right after planting to lock in moisture and keep roots cool.
Winter Protection: For Zone 7 and colder, that extra 2-3 inches of mulch makes all the difference. I use a mix of shredded bark and straw—it insulates like a blanket while allowing airflow. If you're unsure about your zone, check your last frost date and aim to have rhizomes protected by late October. The 40-50°F storage temp for overwintering is crucial: too warm and they'll sprout prematurely; too cold and they may not regrow.
Pro Tips for Calla Lily Perennial
- These simple strategies will help you grow stunning calla lilies with minimal effort—once established, they’ll thrive for years.
- Soil Test Tip: Before planting, perform a simple soil test by digging that 6-inch hole—if water lingers for more than 10 minutes, your drainage needs improvement.
- Planting Precision: When placing your rhizomes in Step 2, think "eyes up" and "hill, not hole."
Frequently asked questions
Are calla lilies truly perennials, or do they die back every year?
Calla lilies are perennials in USDA Zones 8–11, where they’ll regrow from their rhizomes each spring. In colder climates (Zones 6–7), they often die back to the ground but can be dug up, stored, and replanted. Think of them like a "sleeping beauty"—they’ll bounce back with the right care!
When is the best time to plant calla lilies for reblooming?
Plant rhizomes in spring (after the last frost) or early fall (6–8 weeks before the first frost). For continuous blooms, stagger plantings every 2–3 weeks. Pro tip: If you’re in a warm climate, they can bloom year-round with minimal care!
How do I protect calla lilies from frost or extreme cold?
In colder zones, mulch heavily with straw or leaves (4–6 inches) after foliage dies back. For extra protection, lift rhizomes, trim foliage, and store them in dry peat moss or vermiculite in a cool (40–50°F), dark place until spring. Never store them in the fridge—they’ll rot!
Why aren’t my calla lilies blooming, even though they’re healthy?
Bloomless callas are often overcrowded, underfed, or not getting enough light. Try these fixes:
- Divide rhizomes every 2–3 years (spring is best).
- Feed with a balanced fertilizer (10-10-10) in spring and summer.
- Ensure they get 4+ hours of sunlight daily.
Can I grow calla lilies in containers, and what’s the best setup?
Use a large container (12+ inches deep) with drainage holes and rich, well-draining potting mix. Place in bright, indirect light and water when the top inch of soil is dry. In winter, move pots indoors to a cool, bright spot (like a garage) and reduce watering.
Are there calla lily varieties that rebloom more easily?
Yes! Look for reblooming varieties like ‘Black Star,’ ‘Cream Caress,’ or ‘Pink Fantasy.’ These produce multiple blooms per season with proper care. For best results, deadhead spent blooms and fertilize regularly to encourage repeat flowering.
Wrapping up and next steps
The calla lily perennial is your secret weapon for effortless garden beauty—its striking blooms and low-maintenance charm make it a must-have for any landscape. With the right care, you’ll enjoy reblooming magic year after year, turning your outdoor space into a lush, elegant retreat.
Ready to dive in? Grab those gloves, pick your spot, and let your calla lilies thrive with confidence! 🌿✨
Next steps:
- Pick your favorite variety (e.g., Zantedeschia aethiopica or Zantedeschia rehmannii).
- Check your zone and soil—then plant with ease!
- Join gardening forums to share your progress and tips!