
Flowers
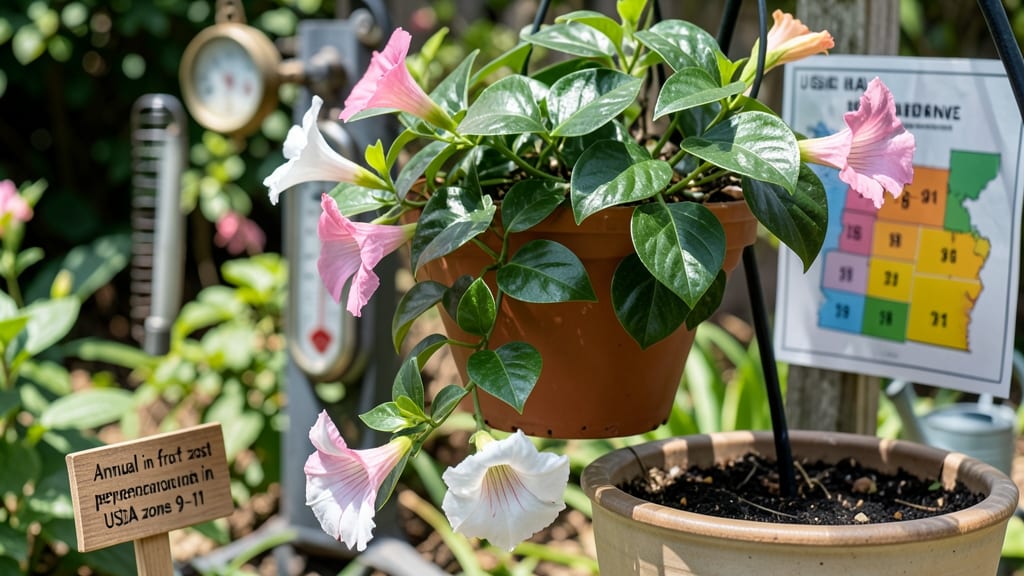
Deciding whether your dipladenia acts as an annual or perennial depends entirely on your winter temperatures. 🌱 In zones 9-11, this tropical beauty thrives year-round, but gardeners in colder climates must treat it like an annual—or master overwintering tricks to keep it alive for another season.
The difference between a one-year showstopper and a multi-year treasure comes down to how you handle the cold months.
Start with the right conditions: dipladenia craves 6+ hours of sunlight daily, well-draining soil, and containers that can move indoors when needed. Plant in spring after frost danger passes, spacing them 12-18 inches apart—close enough for dramatic clusters but far enough to prevent overcrowding.
The key to longevity? Mimicking its natural tropical habitat, even if you’re in zone 5.
With proper care, you’ll enjoy continuous blooms from spring to frost, and in warmer zones, even through winter. Prune lightly after each flush of flowers to encourage bushier growth, and always use clean, sharp shears to avoid disease.
The payoff? A plant that rewards patience with vibrant, trumpet-shaped blooms for years to come.
For colder climates, overwintering indoors is the game-changer—just move pots before temperatures dip below 40°F. Reduce watering and provide bright light to keep it alive until spring. Even in tough zones, this strategy turns a "one-and-done" plant into a reliable perennial that pays dividends every summer.
📚 In This Guide
- What you need
- Instructions
- Tips and common mistakes
- Wrapping up and next steps
What you need
- ● Dipladenia plants: 1–3 nursery-grown plants (choose cold-hardy varieties like Dipladenia sanderi or Mandevilla ‘Alice Duke’)
- ○ Optional: Seeds (if starting from scratch—requires patience for slower growth!)
- ● Well-draining potting mix: 50% premium cactus/succulent mix
- ● 30% perlite or pumice (for aeration)
- ● 20% compost or worm castings (for nutrients)
- ● Quantity: Enough to fill pots (6–12 inches deep) or garden beds with at least 6 inches of amended soil.
- ● Containers (if potted): 1–3 pots with drainage holes (12–18 inches in diameter for mature plants)
- ● Material: Terracotta (breathable) or plastic (retains moisture longer).
- ● Fertilizer: Balanced liquid fertilizer (10-10-10 or 20-20-20)
- ○ Slow-release granules (optional for convenience)
- ● Mulch: 2–3 inches of organic mulch (e.g., shredded bark or pine straw) to insulate roots.
- ● Watering can or hose with gentle spray nozzle (avoid overhead watering to prevent fungal issues).
- ● Pruning shears or sharp scissors (sterilized with rubbing alcohol).
- ● Cold protection (for perennials): Burlap wraps or frost cloth (if temps dip below 25°F/-4°C)
- ● Plastic milk jugs (DIY cloches for young plants)
- ● Grow lights or shade cloth (for indoor overwintering or high-heat areas).
- ● Rooting hormone (if propagating from cuttings).
- ● Soil moisture meter (to avoid over/under-watering).
- ● Epsom salt (occasional foliar spray for magnesium boost).
- ● Trellis or stakes (for climbing varieties—Dipladenia can grow up to 10 feet!).
Step-by-step instructions for growing cold-resilient dipladenia
Here's how to coax vibrant, frost-tolerant dipladenia blooms year after year—no matter your climate.
🌱 Step 1: Select the Right Variety for Your Zone
Dipladenia (Mandevilla) thrives in USDA Zones 9-11 as a perennial, but cold-hardy hybrids like 'Alice du Pont' or 'Bella' can survive brief dips to 25°F with proper care. For colder zones, treat it as an annual or overwinter indoors. Choose plants labeled "cold-resistant" at nurseries—they’ve been bred to handle 30-35°F temperatures.
I always check the plant tag for the exact variety name—some dipladenia hybrids tolerate 10°F for short periods, while others wilt below 40°F. If you’re in Zone 8 or colder, opt for the hardiest cultivars and prepare for overwintering. The key is selecting a variety that matches your lowest expected winter temperature.
☀️ Step 2: Plant in Full Sun with Sheltered Protection
Dipladenia craves 6-8 hours of direct sun daily, but it also needs afternoon shade in scorching climates to prevent leaf scorch. Plant in a spot where it gets morning sun and afternoon dappled light—think east-facing or partially shaded patio. If growing in containers, place them near a south-facing wall for winter warmth.
Dig a hole twice as wide as the root ball but only as deep as the container’s drainage holes. Amend the soil with 2-3 inches of compost to improve drainage—dipladenia roots rot easily in soggy soil. Press the soil firmly around the roots to eliminate air pockets, then water deeply to settle everything.
💧 Step 3: Water Deeply but Infrequently
Water dipladenia once a week during the growing season, soaking the soil to 12 inches deep. Let the top 2 inches of soil dry out between waterings—this prevents root rot while encouraging deep root growth. Overwatering is the #1 killer of dipladenia, so I always check moisture with my finger before reaching for the hose.
In containers, water when the soil feels dry to the touch at the base. Mulch with 2 inches of shredded bark to retain moisture and protect roots from temperature swings. During winter dormancy, reduce watering to every 3-4 weeks, only enough to keep the soil slightly moist.
✂️ Step 4: Prune for Cold Hardiness and Blooms
After the first frost, cut back one-third of the plant’s height to encourage bushier growth in spring. Remove any dead or yellowing leaves, and trim leggy stems to just above a leaf node. This pruning shock forces the plant to redirect energy into root development, making it more resilient for the next growing season.
In warmer zones, deadhead spent blooms weekly to prolong flowering. For overwintering indoors, prune again in early spring to half its size before bringing it back outside. The goal is to shape the plant into a compact, sturdy form that can handle temperature fluctuations without stress.
⏰ Step 5: Overwinter Strategically
In Zones 8 and below, dig up container-grown dipladenia before the first frost and trim back by 50%. Store the pots in a cool (50-60°F), dark garage or basement with minimal watering—just enough to prevent the soil from drying completely. Check monthly for signs of rot or pests.
For in-ground plants in marginal zones, mound 4-6 inches of mulch around the base to insulate roots. Wrap the plant in burlap or frost cloth if temperatures are forecasted to drop below 30°F. In spring, uncover gradually over 2-3 weeks to avoid shocking the plant with sudden warmth.
Tips & tricks for growing cold-resilient dipladenia
Took me years to master these tricks—here's how to keep your dipladenia thriving through cold snaps and still enjoy those stunning blooms.
Variety Selection Matters: When shopping for cold-hardy dipladenia, look for labels mentioning "cold-resistant" or "Zone 8 tolerant" varieties. I've found that plants labeled for 30-35°F tolerance actually handle brief dips to 25°F when properly mulched, but never trust the label alone—always ask the nursery about their specific cold-testing. The difference between a plant that survives winter and one that doesn't often comes down to this single selection step.
Sunlight Strategy: The 6-8 hours of sun requirement is non-negotiable, but how you position your dipladenia makes all the difference. Place containers against south-facing walls where they'll benefit from reflected warmth during winter months. In extreme heat zones, I've had success using shade cloth (30-50% coverage) during peak afternoon hours to prevent leaf scorch while still getting that crucial morning sun exposure.
Watering Wisdom: The once-weekly watering schedule works perfectly when temperatures are moderate, but I adjust this dramatically in winter. During dormancy, I check soil moisture by pushing my finger 2 inches deep—if it's still damp, I wait another week. The key is preventing soggy soil which leads to root rot, especially during cold months when roots aren't actively growing. A moisture meter becomes your best friend during winter watering.
Overwintering Insulation: For container plants in Zones 8 and below, I've developed a layered insulation system that works wonders. After trimming back 50% and storing in a cool 50-60°F space, I wrap the pots in bubble wrap before placing them in cardboard boxes. This extra insulation layer helps maintain more stable temperatures during any unexpected cold snaps that might occur even in indoor storage spaces.
Pro Tips for Dipladenia Annual Or Perennial
- Took me years to master these tricks—here's how to keep your dipladenia thriving through cold snaps and still enjoy those stunning blooms.
- Variety Selection Matters: When shopping for cold-hardy dipladenia, look for labels mentioning "cold-resistant" or "Zone 8 tolerant" varieties.
- Sunlight Strategy: The 6-8 hours of sun requirement is non-negotiable, but how you position your dipladenia makes all the difference.
Frequently asked questions
Got questions about keeping your dipladenia blooming like a pro?
Whether you're a first-time grower or a seasoned plant parent, these frequently asked questions will help you navigate care—from cold snaps to long-term growth. Let’s dive in!
Is dipladenia truly cold-hardy, or do I need to bring it inside during winter?
Most dipladenia varieties (like Dipladenia sanderi) are tender perennials, meaning they can’t survive freezing temps (<32°F/0°C). In colder zones (USDA 9-11), treat them as annuals or overwinter indoors near bright light. In milder climates (Zones 10-11), they may survive light frosts with mulch protection—but expect leaf drop until spring.
How long does dipladenia bloom, and can I extend the season?
With proper care, dipladenia blooms continuously for 6–8 months (spring to frost). To extend blooms:
- Deadhead spent flowers regularly to encourage new buds.
- Water deeply but avoid soggy soil—consistent moisture (not drought) triggers more blooms.
- Provide 4–6 hours of morning sun (afternoon shade prevents stress).
Can I grow dipladenia from cuttings, or should I buy new plants every year?
Yes! Dipladenia roots easily from stem cuttings—a cost-effective way to propagate. Here’s how:
- Take 4–6-inch cuttings from healthy stems (just below a leaf node).
- Dip in rooting hormone (optional) and plant in moist perlite or water.
- Keep in bright, indirect light and mist daily until roots form (4–6 weeks).
Why are my dipladenia leaves yellowing or dropping, and how do I fix it?
Yellowing leaves usually signal overwatering, underwatering, or pests. Check these fixes:
Issue
Solution
Soggy soil (root rot)
Let soil dry 1–2 inches deep between waterings; repot if roots smell foul.
Sunburn (brown crispy edges)
Move to dappled shade or filter afternoon sun with sheer curtains.
Spider mites/mealybugs (sticky leaves)
Wipe leaves with neem oil or rinse off pests with water; isolate the plant.
What’s a low-maintenance alternative to dipladenia for long-lasting color?
If dipladenia’s care feels high-maintenance, try these equally stunning, cold-sensitive perennials:
- Mandevilla – Similar trumpet-shaped blooms; thrive in containers.
- Bougainvillea – Drought-tolerant and vibrant (but needs winter protection).
- Angel’s Trumpet (Brugmansia) – Fragrant night-blooming flowers; toxic but dramatic.
- Plumbago – Hardy to Zone 8; blooms blue/purple all season.
Wrapping up and next steps
Deciding whether your dipladenia is annual or perennial comes down to your climate and care routine—but with the right strategies, you can enjoy its stunning blooms year-round! 🌸 Whether you’re overwintering tender varieties or embracing cold-hardy types, a little planning goes a long way.
Now that you’re armed with tips on protection, propagation, and placement, why not take the next step?
Ready to transform your garden? Start by selecting a dipladenia variety that thrives in your zone, then experiment with containers or mulching to test what works best. Your future self—and your garden—will thank you! 🌿✨