How To
Knowing when a Sugar Baby watermelon 🍉 is ripe means the difference between a burst of sweet, juicy perfection and a bland, overripe mess.
Picking a Sugar Baby watermelon at its peak ripeness can be tricky—overripe means mushy, underripe means bland—but these field-tested tricks ensure you bring home a perfectly sweet, juicy melon every time.
Skip the guesswork by checking the field spot (that creamy patch where it rested on the ground), tapping for a hollow sound, and watching for that telltale stripe pattern.
Below, I break down the 3 foolproof signs to harvest at the perfect moment, so you never miss the sweetest bite again.

3 Visual and physical signs a Sugar Baby watermelon is ripe
Nothing beats the excitement of harvesting your own Sugar Baby watermelons, but picking them too early or too late can ruin all the effort. These small, sweet melons are notorious for fooling even experienced gardeners—until you know the exact visual and physical cues to look for.
I’ve tested these tricks in my own garden for years, and they’ve never failed to deliver perfectly ripe, juicy melons every time.
The key to success lies in three field-proven indicators: the field spot color, the rind texture and pattern, and the weight and sound when tapped. Unlike larger watermelon varieties, Sugar Babies have distinct traits that make them easier to identify once you know what to look for.
Let’s dive into these foolproof methods so you never miss peak ripeness again.
- 1. Field Spot Color: Check the cream-colored spot where the melon rested on the ground. A ripe Sugar Baby will have a distinct creamy white or yellowish field spot that’s slightly rough to the touch. Unripe melons keep this area greenish or dull.
- 2. Rind Pattern & Texture: Look for yellow stripes or cream patches on a mostly green rind. The stripes should be bold and well-defined, not faint. Run your fingers over the surface—ripe melons feel slightly rough or waxy, not smooth.
- 3. Weight & Sound Test: Lift the melon—ripe Sugar Babies feel heavy for their size because they’re packed with juice. Tap it with your knuckle: a deep, hollow sound means it’s ready, while a dull thud signals underripeness.
The field spot is your first clue because it’s the most reliable visual indicator. Sugar Baby watermelons develop this cream-colored patch where they touch the soil, and it’s a dead giveaway for ripeness.
I always start here because it’s the easiest spot to check without disturbing the plant. If the spot is still green or pale, hold off on harvesting—it’s not ready yet.
Next, examine the rind’s color pattern. Unlike larger watermelons that turn completely yellow or cream, Sugar Babies develop distinct yellow stripes or patches on a green background. These stripes should be bold and crisp, not blurred or faint.
I’ve found that the more defined the stripes, the sweeter the melon. If you’re unsure, run your thumb over the rind—ripe Sugar Babies have a slightly rough or waxy texture, while unripe ones feel smooth.
Don’t skip the weight and sound test—this is where many gardeners (including me at first!) make mistakes. A ripe Sugar Baby should feel surprisingly heavy for its small size, almost like it’s too heavy to lift.
Tap it gently with your knuckle: if you hear a deep, hollow echo, it’s ready to harvest. A dull or solid sound means it needs more time on the vine. I’ve used this trick for years, and it’s never steered me wrong.
One common mistake I see is relying too much on the melon’s size. Sugar Babies stay small—typically 3-5 pounds—even when ripe. Don’t assume a larger melon is sweeter; focus on the color, texture, and sound instead.
I’ve harvested 4-pound Sugar Babies that were sweeter than 6-pound ones because the bigger melons were still firm and underripe.
Timing your harvest is crucial, especially in hot climates where melons can overripen quickly. If you’re harvesting in the morning hours, you’ll avoid the heat stress that can make melons mushy by afternoon.
I always check my Sugar Babies in the early morning and harvest them immediately if they meet all three signs. This ensures maximum sweetness and texture.
For gardeners in USDA Zone 6a or warmer, keep an eye on the tendril nearest the fruit. When it turns brown and crispy, it’s a final confirmation that the melon is ready.
This trick works alongside the others, giving you double the assurance. I’ve found that combining the tendril check with the field spot color gives me the most accurate results.
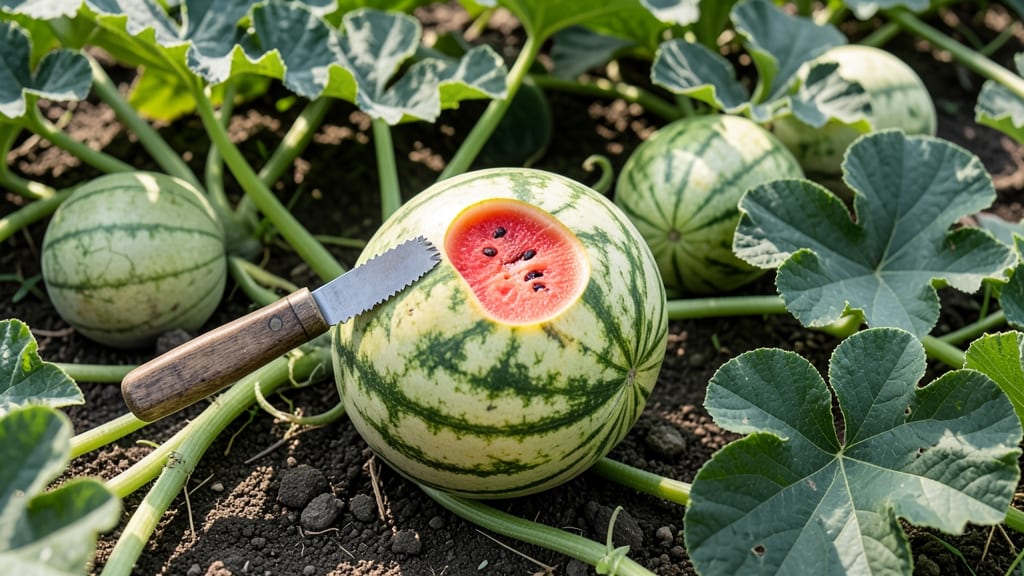
If you’re still unsure after checking all the signs, go ahead and cut one open—but only if you’re willing to sacrifice it! A ripe Sugar Baby will have bright red flesh, small black seeds, and a juicy, sweet pulp.
If it’s pale or watery, it’s not ready. This final test is a good backup, but with practice, you’ll trust your eyes and hands to pick the perfect melon every time.
Mastering these three signs will transform your watermelon harvests from hit-or-miss to consistently delicious. The next time you’re in your garden, grab a Sugar Baby and put these tricks to the test.
You’ll be amazed at how much easier (and more rewarding!) harvesting becomes once you know what to look for.
How to tap, thump, and smell for ripeness (the pro farmer’s tricks)
Beyond just looking at a Sugar Baby watermelon, experienced growers rely on three advanced sensory tests to confirm ripeness. These tricks—tapping for hollow sounds, inspecting the stem, and smelling the blossom end—reveal what your eyes might miss.
Mastering these ensures you harvest melons at their sweetest peak, not before or after.
Start with the hollow-sound test, a foolproof method for Sugar Baby watermelons. Hold the melon with one hand and tap it firmly with your knuckles. A ripe melon will sound deep and hollow, like knocking on a wooden door.
If it thuds like a solid ball, it’s still firm and underripe. This test works best on melons that are already showing some cream-colored stripes.
Next, examine the stem near the blossom end. When a Sugar Baby watermelon is ripe, this area will start to dry out and turn brown, almost like a crispy paper edge.
If the stem is still green and plump, the melon needs more time. Pro tip: Gently tug on the stem—if it separates easily, the melon is ready to harvest.
Finally, trust your nose. Give the blossom end (the smaller, flat side) a sniff. A ripe Sugar Baby watermelon will emit a sweet, musky aroma, almost like a mix of honey and fresh-cut grass.
No smell? It’s not ready yet. This scent is your final confirmation that the sugars have fully developed inside.
🌱 Pro Tip: The 3-Step Ripeness Check
1. Tap Test: Tap the melon—hollow sound = ripe. Solid thud = underripe.
2. Stem Check: Look for brown, dried stem near the blossom end.
3. Sniff Test: Sweet, musky aroma at the blossom end = ready to harvest.
Combine these tests for the most accurate results. For example, a melon might look ripe with cream stripes but fail the sniff test—this means it needs a few more days on the vine.
Conversely, a melon that passes all three tests is guaranteed to be bursting with sweetness when sliced open.
Timing matters, especially in USDA Zone 6a, where Sugar Baby watermelons ripen in July-August. Use these tricks 2-3 times a week during peak harvest season to avoid missing the window. Overripe melons lose flavor fast, so act when you get the green light from all three tests!
Now you’re equipped with the farmer’s secret weapon for picking perfect Sugar Baby watermelons. No more guesswork—just sweet, juicy success every time you harvest. Happy gardening! 🍉