
Planting
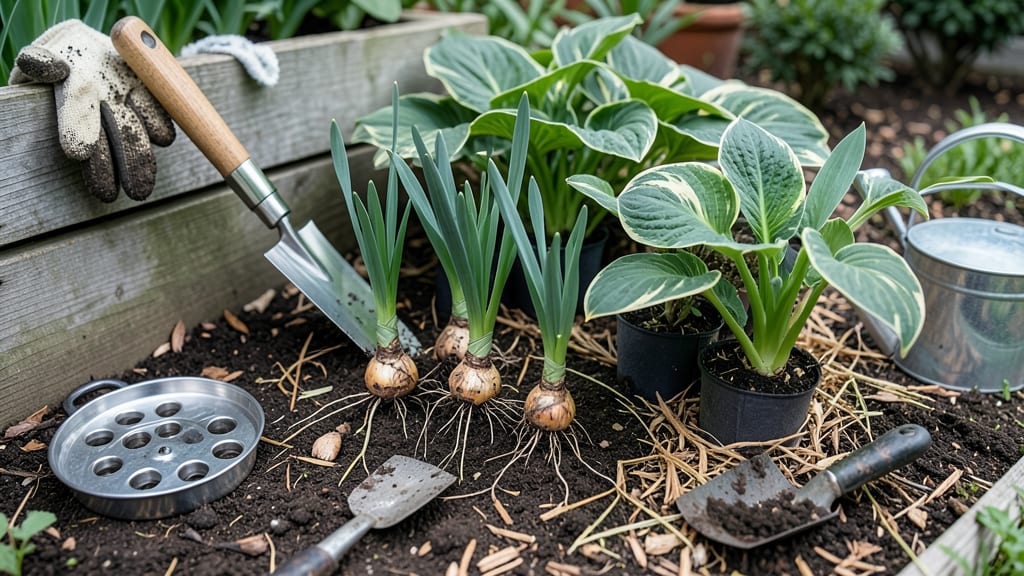
Planting bulbs and perennials together creates a garden that blooms from early spring through fall. 🌱 I learned this trick after watching my first daffodils emerge through last year’s hosta leaves—now I layer them intentionally for continuous color and less work.
The secret lies in matching growth habits, sunlight needs, and bloom times so everything thrives without competing. Start with a well-drained bed in partial to full sun, then plant bulbs first (6-8 inches deep) followed by perennials.
Choose companions like tulips with daylilies or alliums with peonies—their different heights and bloom cycles create natural layers. This combo reduces maintenance because perennials hide bulb foliage as it dies back, while bulbs provide early-season color when perennials are still dormant.
By late summer, your bed will look fuller than ever, with perennials taking over as bulbs fade. The roots establish deeper, the soil stays healthier, and you get three seasons of interest—spring blooms, summer foliage, and fall texture. Fewer gaps mean fewer weeds too.
Works in borders, under trees, or even containers. Here’s how to pair them perfectly for your space.
📚 In This Guide
- What you need
- Instructions
- Tips and common mistakes
- Wrapping up and next steps
What you need
- ● Bulbs: Choose spring-flowering bulbs (e.g., tulips, daffodils, crocuses) and summer-flowering bulbs (e.g., alliums, dahlias). Aim for 3–5 bulbs per square foot for a lush look.
- ● Perennial plants: Select clumping perennials (e.g., hostas, daylilies) or spreading perennials (e.g., sedum, salvia). Plan for 3–5 mature plants per 10 sq. ft.
- ● Garden soil: 1–2 cubic yards (depending on garden size) for amending with compost or organic matter.
- ● Compost or aged manure: 1–2 bags (5–10 gallons) to enrich soil fertility.
- ● Garden gloves: A durable pair to protect your hands.
- ● Hand trowel: A 5–7-inch model for precise planting.
- ● Garden fork or spade: For digging and loosening soil to a depth of 12–18 inches.
- ● Measuring tape or ruler: To ensure proper spacing (bulbs: 4–6 inches apart; perennials: 12–24 inches apart).
- ● Watering can or hose with a gentle spray nozzle: For post-planting hydration.
- ○ Mulch (optional but recommended): 2–3 inches of shredded bark, straw, or pine needles to retain moisture and suppress weeds.
- ● Plant markers: Wooden or biodegradable labels to track varieties.
- ● Soil pH test kit: To check and adjust soil acidity (ideal pH: 6.0–7.0 for most bulbs and perennials).
- ● Slow-release fertilizer: 10–15-10 NPK ratio for a nutrient boost.
- ● Knee pad or cushion: For comfort during long planting sessions.
- ● Pruners: For trimming perennials before planting.
Step-by-Step instructions for layering bulbs and perennials
This method creates a natural, low-maintenance garden that blooms from early spring through fall. Here's how to combine them for stunning seasonal layers.
🌱 Step 1: Plan Your Planting Layers by Height and Bloom Time
Start by sketching your design with the tallest perennials at the back and shortest at the front. I like to use tall ornamental grasses (3-4 feet) as backdrops, medium-height perennials like coneflowers (2-3 feet) in the middle, and low-growing perennials like heucheras (6-12 inches) at the front. Place spring-blooming bulbs like tulips or daffodils where they'll peek through the perennials' foliage in early spring.
For a truly layered effect, add bulbs that bloom at different times. Plant early spring bulbs (crocus, snowdrops) near the front where they'll catch the eye first, then mid-spring bulbs (tulips, hyacinths) slightly deeper, and late-spring bulbs (alliums, daffodils) at the back. This creates a cascading bloom sequence that keeps your garden vibrant for months.
🪴 Step 2: Prepare the Soil and Plant Bulbs First
Dig a hole about 2-3 times wider than the bulb's diameter but only 6-8 inches deep—deeper planting delays flowering. Loosen the soil with a garden fork to improve drainage, then mix in 2-3 inches of compost to enrich the planting area. This ensures both bulbs and perennials have the nutrients they need to establish strong roots.
Place bulbs with their pointed ends facing up, spacing them 4-6 inches apart for smaller varieties and 6-8 inches apart for larger ones. Cover them with soil, leaving about 1-2 inches of space between the bulbs and the surface. This gap prevents soil from smothering the bulbs when perennials are planted later.
🌿 Step 3: Plant Perennials Around the Bulbs
Wait until the bulbs have sprouted and started growing—usually about 4-6 weeks after planting—before adding perennials. This ensures you don’t disturb the bulbs' emerging shoots. Dig holes for perennials twice as wide as their root balls and the same depth. Gently loosen the roots if they're pot-bound before placing them in the hole.
Fill the hole with soil, pressing lightly to remove air pockets, and water deeply to settle everything. Space perennials according to their mature size—12-18 inches apart for medium-sized plants and 2-3 feet apart for larger varieties. Mulch the area with 2-3 inches of organic mulch to retain moisture and suppress weeds, but keep the mulch 2 inches away from bulb crowns to prevent rot.
⏰ Step 4: Water and Maintain Through the Seasons
Water the newly planted area deeply once a week for the first month, then taper off to every 2-3 weeks once established, depending on rainfall. Bulbs and perennials both need consistent moisture, but avoid overwatering—soggy soil can cause bulb rot. You'll know you're doing it right when the soil feels moist but not waterlogged.
In late summer or early fall, after perennials have finished blooming, cut them back to 3-4 inches tall to allow sunlight to reach the bulbs for next year's growth. This also prevents disease and pests from overwintering in dead foliage. Fertilize lightly in early spring with a balanced, slow-release fertilizer to support both bulbs and perennials as they wake up from dormancy.
💧 Step 5: Enjoy Year-Round Interest and Plan for Next Year
Watch as your garden transforms through the seasons—bulbs burst into bloom in early spring, perennials take over in summer, and ornamental grasses add texture in fall. The key to long-term success is to leave bulb foliage until it yellows and dies back naturally, as this replenishes the bulb's energy for next year's flowers.
Each fall, add a layer of 2-3 inches of compost around perennials and a light top-dressing of bulb fertilizer to keep everything thriving. Over time, your layered design will become more established, with bulbs naturalizing and perennials filling in beautifully. Real talk: the first year might look sparse, but by year two, your garden will be lush and full of life.
Tips & tricks for perfect layered bulb and perennial gardens
Confession: I spent years planting bulbs and perennials separately, never realizing how much more dramatic—and low-maintenance—their combination could be. These tricks will help you create a garden that looks intentional from day one.
Seasonal Bloom Layering: The key to year-round interest lies in strategic bloom timing. In Step 1, when planning your design, consider adding fall-planted bulbs like crocuses or snowdrops that bloom in late winter—these will emerge before your perennials even think about waking up. This creates a natural progression where each plant takes center stage at its peak moment. Think of it like a floral performance where every act has its spotlight.
Soil Preparation Pro Tip: In Step 2, when mixing in 2-3 inches of compost, I like to add a handful of bone meal fertilizer specifically for the bulbs. This gives them an extra phosphorus boost for root development, which translates to bigger, more vibrant blooms next year. The perennials will benefit from the general compost, but the bone meal ensures the bulbs get the specialized nutrition they crave. (This is optional but makes a noticeable difference!)
Timing is Everything: The 4-6 week wait before planting perennials in Step 3 is crucial—this gives bulbs time to establish roots without disturbance. I've learned the hard way that rushing this step often results in stunted bulb growth. If you're planting in early fall, you might need to adjust this timing slightly, as some bulbs will sprout sooner. Watch for those first green shoots before adding perennials.
Mulch Placement Matters: When applying that 2-3 inch layer of organic mulch in Step 3, remember that bulbs need to breathe. Keeping mulch 2 inches away from bulb crowns prevents moisture buildup that can cause rot. I use a small rake to create a neat circle around each bulb crown where I keep the soil bare. This also makes it easier to spot emerging shoots in early spring.
Pro Tips for Plant Bulbs And Perennials Together
- Confession: I spent years planting bulbs and perennials separately, never realizing how much more dramatic—and low-maintenance—their combination could be.
- Seasonal Bloom Layering: The key to year-round interest lies in strategic bloom timing.
- Soil Preparation Pro Tip: In Step 2, when mixing in 2-3 inches of compost, I like to add a handful of bone meal fertilizer specifically for the bulbs.
Frequently asked questions
Got questions about layering bulbs and perennials? You’re not alone! Here are answers to the most common concerns—so you can confidently create a stunning, low-maintenance garden that blooms all season long.
When is the best time to plant bulbs and perennials together?
The ideal window is early fall (6-8 weeks before the first frost) for spring-blooming bulbs (like tulips or daffodils) and early spring (after the last frost) for perennials. This gives bulbs time to root before winter, while perennials establish themselves before summer heat. For summer-blooming bulbs (like dahlias), plant them in late spring after the soil warms.
Can I plant bulbs and perennials too close together?
Yes, but with strategy! Bulbs need 6–12 inches of space (depending on variety), while perennials vary (check labels). Place bulbs in the center of the planting hole and surround them with perennials, leaving 2–3 inches of space between roots to avoid crowding. Over time, perennials will spread, but bulbs will have room to naturalize.
What if my perennials don’t bloom in the same season as the bulbs?
No problem! This is the magic of layering. Choose perennials that complement the bulb’s bloom time—for example, pair spring bulbs (like crocuses) with early bloomers like Hepatica or Bleeding Heart. For summer bulbs (like lilies), add perennials like Catmint or Black-Eyed Susans for continuous color. Foliage contrast (like ferns or ornamental grasses) keeps the garden interesting even when flowers fade.
How do I keep bulbs from rotting under perennials?
Good drainage is key! Plant bulbs in well-draining soil and avoid low spots where water pools. If your soil is heavy clay, amend it with compost or sand. When planting, place bulbs 2–3 inches deeper than their height (pointy end up!) and mulch lightly (1–2 inches) with organic matter. Avoid smothering bulbs with thick mulch—it can trap moisture and cause rot.
What are some easy bulb-and-perennial combos for beginners?
Start with these foolproof pairings:
- Spring bulbs: Tulips + Russian Sage (purple blooms in late summer)
- Summer bulbs: Dahlias + Daylilies (tough perennials that thrive in heat)
- Fall bulbs: Crocuses + Sedum (early bloomers with winter interest)
- Year-round structure: Alliums + Ornamental Grasses (bold foliage and late-season blooms)
These combos offer color, texture, and low maintenance—perfect for busy gardeners!
Wrapping up and next steps
Planting bulbs and perennials together isn’t just a clever trick—it’s a game-changer for vibrant, low-maintenance gardens that bloom from early spring to late fall. 🌱 By layering their growth cycles and complementary heights, you create a dynamic, ever-evolving landscape that feels like magic.
The key? Plan ahead, dig deep, and embrace patience—your future garden will thank you!
Ready to transform your outdoor space? Start small—pick one bed or corner, gather your supplies, and dive in! Whether you’re a seasoned gardener or a curious beginner, every bulb and perennial you plant is a step toward a stunning, year-round masterpiece. Happy digging! 🌸