
How To
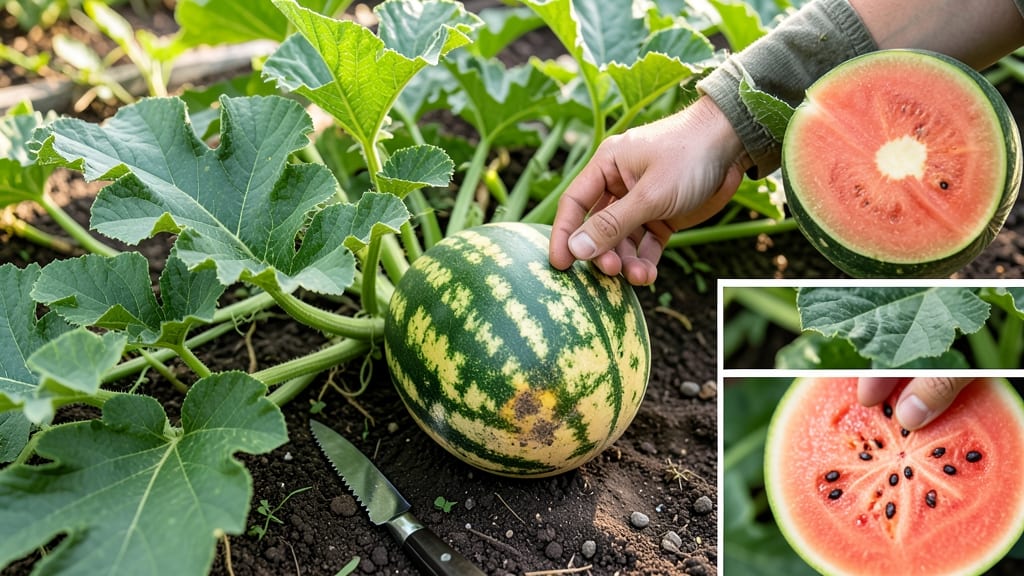
Telling when a watermelon is ready to harvest is all about the right cues—and skipping any one of them can leave you with fruit that’s either too hard or disappointingly bland.
Picture this: you’ve been waiting all summer for that first juicy slice, only to cut into a watermelon that’s either rock-hard or mushy. The good news?
With just a few simple tricks—like checking the tendril, thumping the rind, and spotting the field mark—you can avoid that gut-punch of disappointment every time.
In this guide, I’ll walk you through the three foolproof methods to test for ripeness, whether you’re picking from your garden or grabbing one at the store. No guesswork, just science-backed techniques that work every time.
You’ll learn how to read the color, texture, and sound of a watermelon like a pro, plus what to do if you accidentally pick one too early (or too late). Let’s get started!

Watermelon ripeness tests: 3 proven methods to check before buying
Selecting the perfect ripe watermelon requires more than just guessing—it’s a science! Whether you're shopping at the farmers market or harvesting from your own backyard garden, these three watermelon ripeness tests will help you pick fruit at its sweetest peak.
I’ve used these methods for years, and they’ve never failed me.
First, let’s address the biggest misconception: size doesn’t guarantee ripeness. A small watermelon can be sweeter and more flavorful than a giant one that’s still hard and unripe.
The key lies in visual cues, sound tests, and tendril conditions. Master these three techniques, and you’ll never overpay for an underripe melon again.
| Test Method | How to Perform | Ripe Indication | Unripe Indication |
|---|---|---|---|
| Thump Test | Tap the watermelon with your knuckle. Listen for a deep, hollow sound. | Hollow, echoing sound (like a drum). | Dull, flat sound (like thumping a watermelon-shaped rock). |
| Curly Tendril Check | Inspect the small curly tendril near the stem. Gently tug if needed. | Brown, dry, and crispy (easily snaps off). | Green, flexible, and attached firmly. |
| Field-Spot Inspection | Look for the field spot (cream/yellow patch) on the side that touched the ground. | Bright, creamy yellow with a defined shape. | Pale, greenish, or unevenly colored. |
The thump test is my go-to method when shopping at the grocery store. A ripe watermelon will produce a deep, hollow sound when tapped with your knuckle—almost like knocking on a drum.
If it sounds more like you’re thumping a rock, walk away. This test works because ripe watermelons have drier, denser flesh that vibrates differently than underripe ones.
Next, check the curly tendril near the stem. This tiny vine is a reliable ripeness indicator because it dries out as the watermelon matures. A ripe tendril will be brown, crispy, and easily detachable.
If it’s still green and flexible, the watermelon needs more time on the vine. Pro tip: Give it a gentle tug—if it snaps off without resistance, you’ve found a winner!
Don’t overlook the field spot, the cream-colored patch where the watermelon rested on the ground. A ripe field spot should be bright yellow or cream-colored and well-defined.
Avoid melons with pale, greenish, or uneven field spots—they’re likely underripe. This cue is especially useful for dark-skinned varieties, where color changes are harder to spot.
For homegrown watermelons, combine all three tests for the most accurate results. I once picked a watermelon that passed the thump test but had a green tendril—only to find it was still rock-hard inside.
Lesson learned: never trust one test alone. Use them together to ensure you’re bringing home the sweetest, juiciest melon possible.
If you’re harvesting from your own watermelon patch, timing is everything. Most varieties take 70-90 days to mature, but environmental factors like temperature and rainfall can speed up or slow down ripening. Keep an eye on these signs, and you’ll know exactly when to harvest for peak flavor.
One final tip: avoid watermelons with soft spots or cracks, even if they pass the ripeness tests. These are signs of overripeness or damage, which can lead to a mushy texture.
A ripe watermelon should feel heavy for its size and have a hard, taut rind that resists pressure from your thumbnail.
Now that you’re armed with these watermelon ripeness tests, you’ll never second-guess your next purchase again. Whether you’re a beginner gardener or a seasoned pro, these methods will save you time, money, and frustration. Happy melon hunting!
Common mistakes that trick you into picking unripe watermelons
Even experienced gardeners can fall for common traps when selecting ripe watermelons. The biggest mistake? Trusting just one clue—like size or color—without verifying other signs. A watermelon that looks perfect on the outside might still taste bland or underripe inside.
I’ve personally wasted money on overripe melons that were mushy or underripe ones that were sour, and I know I’m not alone in this struggle.
Another frequent error is misinterpreting the thump test. Many assume a hollow sound means ripeness, but this can be misleading. A watermelon with a dry, hard rind might sound hollow even if it’s overripe.
Similarly, checking the curly tendril near the stem is helpful, but a brown tendril doesn’t always guarantee sweetness—it’s just one piece of the puzzle. Let’s break down these pitfalls and learn how to avoid them.
⚠️ Warning: False Ripeness Signs
Size ≠ Ripeness: A large watermelon isn’t necessarily ripe—some varieties grow big but stay bland. Always check other clues.
Color Tricks: Some melons develop deep color before ripening, while others stay pale even when sweet. Don’t rely on rind shade alone.
Weight Misjudgment: A heavy watermelon might just be waterlogged, not necessarily ripe. Lift it to feel density, not just weight.
Let’s start with the thump test, a classic but often misunderstood method. The key is to tap the watermelon with your knuckles near the blossom end (the side that faced the ground). A ripe melon should sound deep and hollow, like a drum.
However, if the sound is dull or flat, it’s likely underripe. Pro tip: Tap near the field spot (the yellowish patch where the melon rested on the ground) for the most accurate reading.
Next, the curly tendril near the stem is a critical clue, but it’s easy to misread. A brown, crispy tendril is a good sign, but a green tendril doesn’t automatically mean the melon is unripe—it just needs more time. Some varieties naturally have green tendrils even when ripe.
To confirm, also check the stem end: if it’s dry and brown, the melon is likely ready. Pair this with the field spot (a creamy yellow patch) for extra confidence.
Don’t overlook the rind texture either. A ripe watermelon’s rind should be hard and difficult to dent with your thumbnail. If it yields easily, it’s underripe. Conversely, if the rind feels soft or spongy, the melon may be overripe.
For extra accuracy, combine all three tests: thump, tendril, and rind texture. This trio gives you the best chance of picking a perfectly ripe watermelon every time.
Finally, avoid the temptation to judge by symmetry or stem appearance. A perfectly round melon isn’t always the ripest, and a dry stem doesn’t guarantee sweetness.
Instead, focus on the field spot, tendril color, and sound. With these expert tips, you’ll never be fooled by a false ripe watermelon again!