
Light Requirements
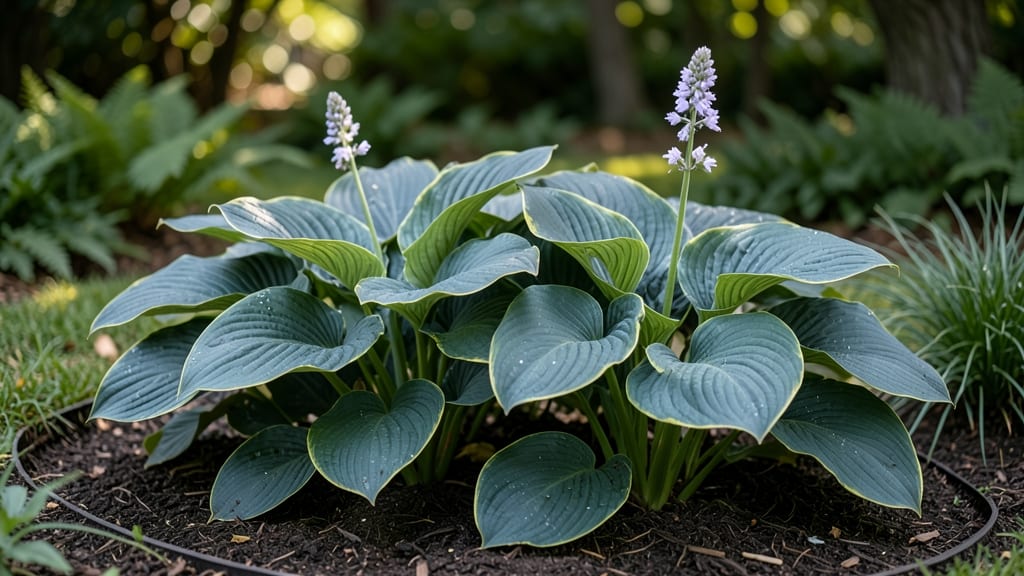
Partial shade perennials turn shady spots into showstoppers—bold blooms that outshine sun-loving plants while demanding almost no effort from you. 🌿 I’ve designed entire garden beds with these tough beauties, and they’ve never let me down, even in those tricky spots where full sun plants wilt and annuals struggle.
The magic lies in their layered approach: hostas for lush foliage, astilbes for feathery plumes, and bleeding hearts for delicate charms. These plants thrive with just 3-6 hours of dappled light, making them perfect for under trees, north-facing walls, or the back of borders where sunlight barely reaches.
You’ll end up with a garden that stays vibrant from spring’s first bleeding heart blooms through fall’s fiery heuchera leaves—no dead zones, no constant fussing. The best part? These perennials multiply over time, creating natural drifts that look like they belong in a designer’s portfolio, not just your backyard.
Mix heights, textures, and bloom times for year-round interest: start with low ajuga as a ground cover, add mid-height coral bells for color, and top with towering foxgloves for drama. Once planted, they’ll reward you with minimal care and maximum impact.
📚 In This Guide
- What you need
- Instructions
- Tips and common mistakes
- Wrapping up and next steps
What you need
- ● Partial shade perennials: Choose from 5–10 varieties (e.g., Hosta, Astilbe, Heuchera, Bleeding Heart, or Japanese Painted Fern). Buy 3–5 plants per type for a lush look.
- ● High-quality potting soil or garden loam: 1–2 cubic yards (or 10–20 bags) for in-ground planting, or 1–2 gallons per plant for containers.
- ● Organic compost or slow-release fertilizer: 5–10 lbs to enrich soil and support root growth.
- ● Mulch (shredded bark or pine straw): 2–3 inches to retain moisture and suppress weeds.
- ● Garden trowel or hand shovel for transplanting.
- ● Pruners or shears for trimming dead foliage.
- ○ Garden gloves (optional but recommended for comfort).
- ● Watering can or hose with a gentle spray nozzle for hydration.
- ● Measuring tape or ruler to space plants 12–36 inches apart (depending on variety).
- ● A partial shade location: 3–6 hours of filtered sunlight daily (e.g., under trees or near north-facing walls).
- ● Well-draining soil—amend clay soil with compost if needed.
- ● Patience! Most perennials establish roots in 1–2 seasons before blooming fully.
Instructions for designing a stunning partial shade perennial garden
Here's how I transform shady spots into vibrant, low-maintenance perennial displays that bloom reliably year after year.
🌱 Step 1: Choose the Right Perennial Varieties for Your Shade Level
First, assess your shade: dappled sun (filtering light through trees) allows more sun-loving perennials, while deep shade (no direct sun) requires true shade-tolerant plants. I always start with hostas and heucheras for deep shade, then add astilbes and foxgloves for brighter spots. Check the mature height of each plant—tall varieties like ligularia belong at the back, while coral bells and ajuga work as ground covers.
For bold color, I incorporate bleeding heart and tiarella for spring blooms, Japanese painted ferns for summer texture, and toad lilies for late-season drama. Mix evergreen perennials like sweet woodruff with deciduous ones to maintain year-round interest. I always group plants with similar moisture needs together to simplify watering.
☀️ Step 2: Prepare the Soil for Optimal Drainage and Fertility
Partial shade gardens often have compacted soil from years of tree roots. I start by removing weeds and loosening the top 6-8 inches with a broadfork. For heavy clay soil, I blend in 2-3 inches of composted leaf mold or well-rotted manure to improve drainage without adding too much nitrogen. Test your soil pH—most shade perennials prefer 6.0-7.0, but rhodoendrons and azaleas need 4.5-5.5.
I never skip the mulch layer. Spread 2-3 inches of shredded hardwood mulch or leaf litter to retain moisture and suppress weeds. This is especially critical in partial shade where soil stays damp longer. I always keep mulch 2 inches away from plant stems to prevent rot. Water deeply after planting to help roots establish in the enriched soil.
🪴 Step 3: Plant with Proper Spacing and Layering
Dig holes twice as wide as the root ball but only as deep as the top of the root ball. This prevents settling that buries stems too deeply. I plant in clusters of 3-5 plants for a natural, full look rather than single specimens. For 4-inch pots, space perennials 12-18 inches apart, while gallon-sized plants need 24-36 inches of space. Larger plants like ligularia can go 3-4 feet apart.
Layer plants by height and texture: place tall grasses and ferns at the back, medium-height bloomers in the middle, and spreading ground covers in front. I always stagger plants so no one spot looks empty. After planting, water thoroughly and apply a 2-inch layer of mulch, keeping it clear of stems. This creates a protective microclimate that maintains even moisture.
💧 Step 4: Establish a Consistent Watering Routine
Newly planted perennials need 1 inch of water weekly for the first 2-3 months to encourage root growth. I water deeply in the morning so foliage dries quickly, reducing fungal diseases. In partial shade, soil stays moist longer, so I check with my finger—if the top 1 inch feels dry, it's time to water. Overhead watering can spread diseases, so I use soaker hoses or drip irrigation for established plants.
Once established, most shade perennials are drought-tolerant, but I still monitor during heatwaves. You'll know plants are stressed when leaves yellow or wilt slightly in the afternoon. At this point, I give them a deep soaking rather than frequent light watering. Mulch helps retain moisture, so I top up the layer annually in spring to maintain its protective benefits.
✂️ Step 5: Prune and Maintain for Season-Long Interest
I start pruning in early spring by removing any dead or damaged foliage from the previous year. For bleeding heart and foxglove, I cut back stems to 6 inches above the ground once flowering finishes to encourage new growth. For heucheras and hostas, I remove only the dead leaves, leaving the crown intact. I never prune ferns or grasses until early spring—they provide winter interest.
Throughout the season, I remove spent blooms from astilbes and coral bells to encourage more flowers. In fall, I cut back all herbaceous perennials to 2-3 inches above the ground, leaving the protective mulch layer intact. This prevents winter heaving and gives roots a head start in spring. I also divide crowded perennials like hostas and heucheras every 3-4 years to maintain vigor.
Tips & tricks for perfect partial shade perennial gardens
Creating a thriving partial shade garden takes more than just planting—it's about understanding the subtle balance between light, soil, and plant selection.
Plant Selection Wisdom: When choosing perennials for your shade level, consider the mature height and spread of each plant. For example, ligularia can reach 3-4 feet tall, making it perfect for the back of borders, while ajuga stays low and spreads beautifully as a ground cover. I always check the plant tags for light requirements—some labeled "partial shade" actually need more light than others. For deep shade areas, pair heucheras with hostas for a foolproof combination that thrives in low light.
Soil Preparation Secret: The 6-8 inch soil loosening in Step 2 is crucial for breaking up compacted layers caused by tree roots. For clay-heavy soils, I blend in 2-3 inches of composted leaf mold—it improves drainage without overloading with nitrogen. Pro tip: Test your soil pH before planting. Most shade perennials prefer neutral soil (6.0-7.0), but acid-loving plants like rhodoendrons need a lower pH (4.5-5.5). You can adjust pH by adding sulfur for acidification or lime for raising pH, but do this 2-3 months before planting to avoid root burn.
Layering Technique: The height layering in Step 3 creates visual depth that makes small gardens appear larger. I start with tall grasses and ferns at the back (3-4 feet), then medium-height bloomers like astilbes (18-24 inches) in the middle, and finally spreading ground covers like ajuga in front. This arrangement also improves airflow, reducing fungal diseases that thrive in dense, shaded conditions. When planting in clusters of 3-5, I stagger the positions slightly to create a more natural, full look rather than a grid pattern.
Watering Strategy: The 1 inch of water weekly for new plants in Step 4 is a baseline, but how you deliver it matters. I use soaker hoses for established plants to avoid wetting foliage, which prevents fungal diseases like powdery mildew. For newly planted perennials, water deeply in the morning so leaves dry quickly. In partial shade, soil stays moist longer, so I check moisture by feeling the top 1 inch of soil—if it's dry, that's your cue to water. Mulch plays a crucial role here, keeping soil temperature stable and reducing evaporation.
Pro Tips for Partial Shade Perennials
- Creating a thriving partial shade garden takes more than just planting—it's about understanding the subtle balance between light, soil, and plant selection.
- Plant Selection Wisdom: When choosing perennials for your shade level, consider the mature height and spread of each plant.
- Soil Preparation Secret: The 6-8 inch soil loosening in Step 2 is crucial for breaking up compacted layers caused by tree roots.
Frequently asked questions
Got questions about growing partial shade perennials? You’re not alone! Here are answers to the most common queries to help you garden with confidence.
What’s the difference between partial shade and full shade?
Partial shade means 3–6 hours of sunlight daily (morning sun + afternoon shade works best), while full shade gets less than 3 hours. Perennials like hostas or astilbes thrive in partial shade but may struggle in deep shade where light is scarce.
When is the best time to plant partial shade perennials?
Plant in early spring or fall when soil is workable but not frozen. Avoid extreme heat—spring planting gives roots time to establish before summer stress. Pro tip: Water deeply after planting to reduce shock!
Can I grow partial shade perennials in containers?
Choose compact varieties like heucheras or fuchsias and use well-draining soil. Ensure containers get 3–4 hours of light and water consistently—containers dry out faster than garden beds.
Why aren’t my partial shade perennials blooming?
Blooms may fade if plants get too little light or poor nutrition. Check sunlight exposure—some (like impatiens) need bright indirect light. Feed with balanced fertilizer in spring and trim dead flowers to encourage new blooms.
What are some low-maintenance alternatives to high-drama perennials?
Try carex sedges (tough and drought-tolerant), lamium (spreading ground cover), or coral bells (heuchera) for color without fuss. These handle partial shade beautifully and need minimal pruning.
Wrapping up and next steps
Partial shade perennials are the secret weapon for gardeners who want stunning, low-maintenance blooms without the full-sun commitment. From the delicate charm of Hosta to the bold drama of Astilbe, these plants prove that beauty thrives in balance—even in dappled light.
Whether you're a beginner or a seasoned pro, adding these perennials to your garden will bring color, texture, and effortless elegance year after year.
Ready to transform your space? Start small—pick one or two plants from our list, test their vibe in your garden, and watch your partial-shade oasis come to life! 🌿✨