
Vegetables
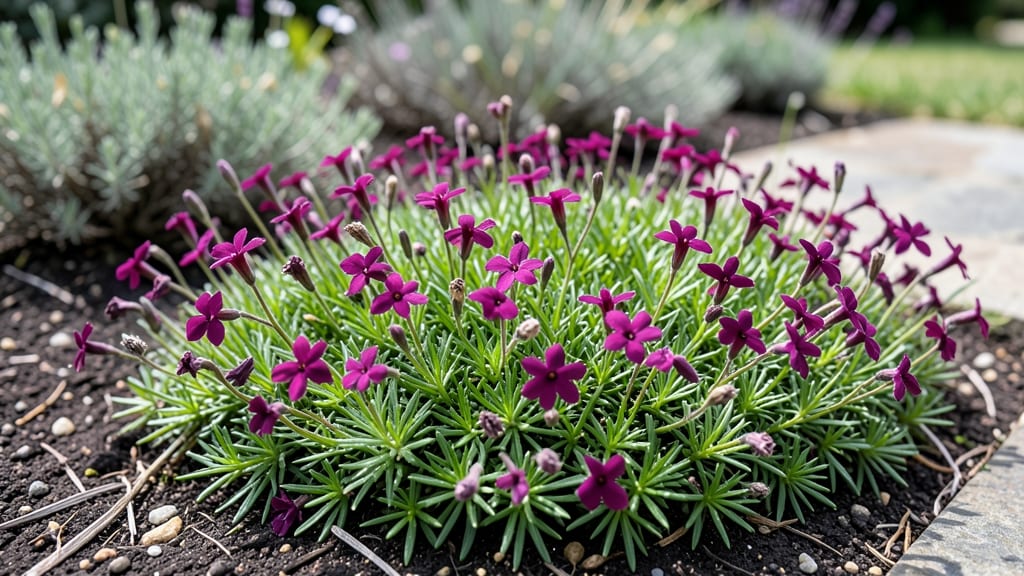
The perennial creeping phlox in winter survives better than most gardeners realize—it thrives under snow and rebounds with vibrant purple blooms by spring. 🌿 I’ve watched mine push through frozen ground every year, proving this groundcover is the ultimate cold-hardy workhorse. The key isn’t coddling; it’s protecting roots from extreme cold and giving them a head start when temperatures dip. Mulching with 3-4 inches of straw or shredded leaves in late fall keeps roots insulated, while avoiding heavy mulch prevents rot. Prune back faded foliage in early spring—never in fall—to prevent disease. Frost won’t kill it, but wet, heavy snow can weigh down stems, so brush off accumulations gently. By March, you’ll see fresh green shoots pushing through the soil, signaling the plant’s natural resilience. The blooms arrive earlier than most perennials, giving you weeks of color before summer. This is the plant that proves winter prep pays off in spectacular spring displays. Works in zones 3-8 with minimal fuss—ideal for slopes, borders, or as a living carpet. No fuss, no failure, just reliable beauty year after year.
📚 In This Guide
- What you need
- Instructions
- Tips and common mistakes
- Wrapping up and next steps
What you need
- ● Pruning shears or hedge clippers – Sharp, clean tools to trim back foliage (avoid dull blades that tear stems).
- ● Garden gloves – Heavy-duty gloves to protect hands from thorns or rough stems.
- ● Mulch (2–3 inches thick) – Use shredded bark, straw, or pine needles for insulation.
- ○ Garden fork or trowel – For gently aerating soil around the plant base (optional but helpful).
- ● Watering can or hose – To hydrate plants before mulching (if soil isn’t already moist).
- ○ Frost cloth or burlap (optional but recommended for harsh winters) – Lightweight fabric to drape over plants for extra protection.
- ● Slow-release fertilizer (low nitrogen) – Apply in early spring to encourage new growth.
- ● Plant support stakes or small rocks – To weigh down frost cloth if winds are strong.
- ● Soil amendment (compost or peat moss) – Improves drainage if your garden is prone to soggy winters.
Step-by-Step instructions for winterizing perennial creeping phlox
Here’s how to protect your creeping phlox through winter so it bursts back with vibrant color every spring.
🪴 Step 1: Inspect and Clear Debris from the Plant
Start by removing any dead foliage or debris from the base of your creeping phlox. This prevents rot and pests from taking hold over winter. Use your hands or a small hand rake to gently pull away withered stems—you’ll notice healthy stems still have a slight green tint at the base.
Cut back only the dead or browned stems, leaving about 1-2 inches of growth above the soil. This ensures the plant retains some energy reserves for spring regrowth. Avoid cutting back healthy stems, as creeping phlox stores nutrients in its roots and crown.
☀️ Step 2: Apply a Layer of Mulch for Insulation
Spread a 2-3 inch layer of organic mulch (like shredded bark or straw) over the soil around the phlox. This acts like a blanket, protecting roots from extreme cold and temperature fluctuations. Focus on the root zone, keeping mulch 2-3 inches away from the crown to prevent moisture buildup.
If your winters are particularly harsh (below 10°F), consider adding an extra layer of mulch or even a lightweight frost cloth over the crown. Check the mulch in early spring—if it’s compacted or soggy, fluff it up to allow airflow and prevent rot.
💧 Step 3: Water Deeply Before the First Frost
Give your creeping phlox a deep watering about 1-2 weeks before the first hard frost. This ensures the roots are hydrated and can withstand dry winter conditions. Water until the soil is 6 inches deep—you’ll know it’s enough when moisture reaches that depth without pooling.
Avoid overwatering, as soggy soil can lead to root rot. After watering, let the top layer dry slightly before winter sets in. This balance keeps the roots hydrated but prevents waterlogged conditions that can harm the plant.
✂️ Step 4: Monitor for Snow and Ice Buildup
During heavy snowfall, gently brush off excess snow from the foliage to prevent branches from breaking under the weight. Creeping phlox is tough, but too much snow can damage stems. Use a broom or your hands to clear snow gently—never pull or tug at the stems.
If ice forms on the mulch or soil, avoid breaking it up with tools. Instead, let it melt naturally or use a plastic shovel to carefully remove it in sections. This protects the roots from sudden temperature shocks that can occur when ice is disturbed.
🌱 Step 5: Prepare for Spring with Minimal Intervention
In early spring, once the ground thaws and new growth appears, remove any remaining mulch and debris. You’ll see tiny green shoots emerging from the soil—this is your signal that the plant is waking up. Avoid pruning at this stage; let the plant focus on regrowing.
Once the phlox has fully leafed out (usually by late spring), trim back any dead or leggy stems to encourage bushier growth. This step ensures your creeping phlox stays dense and vibrant for the next season.
Tips & tricks for protecting perennial creeping phlox through winter
Winterizing your creeping phlox doesn't have to be complicated—just a few key tricks will make all the difference for next spring's vibrant blooms.
Timing is Everything: That 1-2 inch growth you leave above the soil in Step 1 is crucial—it acts as a natural insulator while still allowing the plant to store energy for spring. I've seen gardeners accidentally trim too much and end up with sparse growth. Look for that subtle green tint at the stem base to know what to keep.
Mulch Matters: When applying your 2-3 inch mulch layer in Step 2, focus on the root zone but keep it 2-3 inches away from the crown. Too much mulch piled against the crown can trap moisture and cause rot. I like to use straw because it breaks down slowly and adds organic matter to the soil as it decomposes.
Deep Watering Wisdom: The deep watering in Step 3 should reach 6 inches deep, but don't water again until you see signs of spring growth. I've learned the hard way that soggy soil over winter leads to root rot. Let that top layer dry slightly before winter sets in—this balance is what keeps your phlox happy through the cold months.
Spring Prep Strategy: In Step 5, resist the urge to prune too early. Those tiny green shoots are your plant's way of saying "I'm waking up!" Let it focus on regrowth before you start shaping it. I wait until the plant has fully leafed out in late spring before doing any serious trimming—this gives it the best chance to establish strong new growth.
Pro Tips for Perennial Creeping Phlox In Winter
- Winterizing your creeping phlox doesn't have to be complicated—just a few key tricks will make all the difference for next spring's vibrant blooms.
- Timing is Everything: That 1-2 inch growth you leave above the soil in Step 1 is crucial—it acts as a natural insulator while still allowing the plant to store energy for spring.
- Mulch Matters: When applying your 2-3 inch mulch layer in Step 2, focus on the root zone but keep it 2-3 inches away from the crown.
Frequently asked questions
about keeping perennial creeping phlox thriving through winter—your go-to guide for troubleshooting and care!How cold can creeping phlox tolerate?
Creeping phlox is extremely cold-hardy, surviving USDA Zones 3–8 (as low as -30°F/-34°C)! In harsh winters, mulch with 2–3 inches of shredded bark or leaves to protect roots. Snow acts as natural insulation—no extra fuss needed.
Should I cut back creeping phlox in winter?
Nope! Leave the foliage until early spring (late winter). Dead stems protect roots from freeze-thaw cycles. Trim only when new growth appears (Feb–March in most regions). Pro tip: If you must tidy up, wait until temps stay above freezing for a week.
Are pests a problem for winter-dormant phlox?
Winter pests are rare, but watch for slugs or voles nibbling on tender new shoots in early spring. Apply diatomaceous earth or row covers if needed. No fungicides—phlox diseases (like powdery mildew) are summer concerns, not winter ones!
Can I plant creeping phlox in fall for winter prep?
Yes! Fall planting (6–8 weeks before first frost) gives roots time to establish. Choose bare-root plants or containers, water deeply, and mulch after planting. Bonus: Fall-planted phlox often blooms earlier the next spring!
What if my phlox looks dead in winter?
Don’t panic! Creeping phlox is evergreen in mild climates but may look dormant in freezing temps. Check for green stems at the base—if alive, it’ll bounce back. If no green remains, it may have died back (replace in spring). Patience pays off!
Wrapping up and next steps
Perennial creeping phlox is a low-maintenance, cold-hardy superstar that thrives even in winter’s chill—proving nature’s resilience at its finest! 🌿 With the right prep (like mulching, pruning, and protecting young plants), you’ll set the stage for a vibrant spring comeback.
Whether you’re a seasoned gardener or just starting out, this hardy groundcover rewards patience with lush, colorful carpets year after year.
Ready to transform your winter garden? Start by reviewing your supplies or browsing common questions—then roll up your sleeves and give your phlox the care it deserves! 🌱