
Flowers
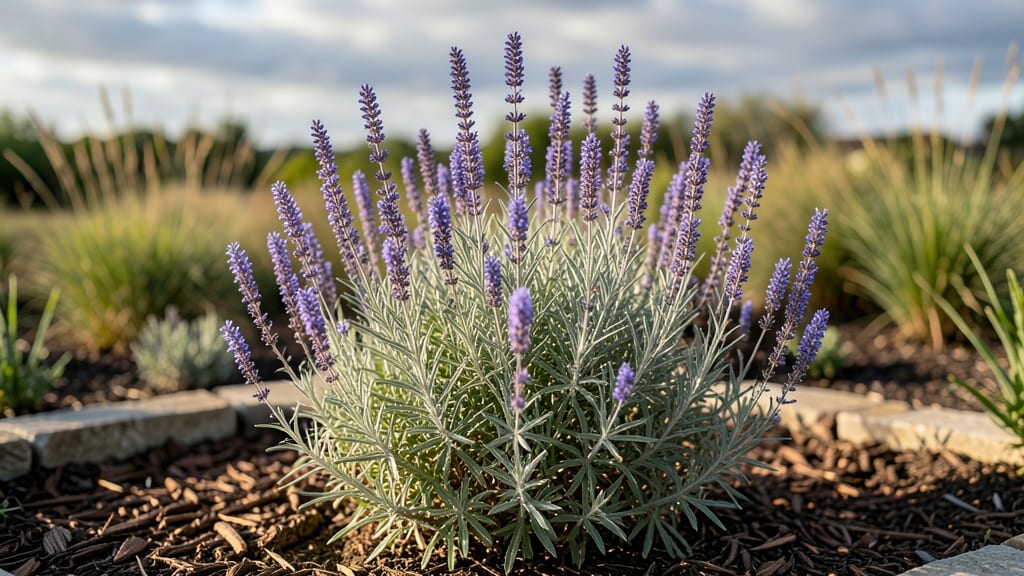
Russian sage thrives where most perennials give up—dry, sunny spots that would leave other plants wilting. 🌿 I’ve grown it through three winters in my Zone 5 garden, and every spring it bursts back with those signature lavender-blue spikes that hummingbirds can’t resist.
The secret to its resilience? Full sun and well-draining soil—it tolerates drought once established, but the first year needs consistent moisture to root deeply. Plant in early spring or fall, spacing them 3-4 feet apart to give their woody stems room to spread.
By mid-summer, you’ll have 3-4 feet of airy blooms that last until frost, with almost no maintenance. The fragrance alone—like crushed mint—makes it worth growing, but the pollinators will thank you too. Works in borders, cottage gardens, or even containers with proper drainage.
Here’s how to keep it thriving for years.
📚 In This Guide
- What you need
- Instructions
- Tips and common mistakes
- Wrapping up and next steps
What you need
- ● Russian sage plants: 3–5 nursery-grown plants (mature size: 3–5 ft tall, 3–4 ft wide) 🌿
- ● OR seeds (if starting from scratch—germination can take 2–4 weeks!) 🌱
- ● Soil: Well-draining, slightly alkaline soil (pH 6.5–7.5). Mix in 1 part compost to 2 parts native soil for optimal growth.
- ○ Fertilizer: Slow-release, low-nitrogen granular fertilizer (5-10-5 ratio) to encourage blooms over foliage. Optional: Organic options like bone meal or worm castings.
- ● Garden trowel or transplant spade
- ● Garden gloves (to protect your hands from prickly stems!)
- ● Watering can or hose with a soaker nozzle (for deep, gentle watering)
- ○ Optional but helpful: Mulch (2–3 inches of gravel or straw to retain moisture and deter weeds)
- ● Pruning shears (for shaping or deadheading spent blooms in late summer)
- ● Plant markers (to label varieties if mixing types)
- ● Sunlight: Full sun (6+ hours daily). Russian sage thrives in USDA Zones 5–9—perfect for cold-hardy gardens!
- ● Watering schedule: Water deeply 1–2 times per week (more in extreme heat). Once established, it’s drought-tolerant!
- ● Spacing: Plant 3–4 feet apart to allow airflow and prevent overcrowding.
How to plant and establish Russian sage for reliable seasonal color
This hardy perennial thrives with minimal fuss once you get the spacing and soil right.
🌱 Step 1: Choose the Perfect Planting Site
Russian sage demands full sun exposure—at least 6-8 hours daily—to develop its signature lavender-blue spikes. I always test the spot by observing how long nearby plants stay in sunlight during summer's shortest day. A south-facing location with afternoon sun works best in most climates.
Check soil drainage by digging a 12-inch deep hole and filling it with water. If it drains in under 30 minutes, the site is ideal. Heavy clay? Amend with 2-3 inches of compost mixed into the top 6 inches of soil. This plant despises soggy roots, and poor drainage will shorten its lifespan by years.
🪴 Step 2: Plant at Proper Spacing for Airflow
Dig holes twice as wide as the root ball but only as deep—never deeper—to prevent crown rot. Russian sage thrives when planted 3-4 feet apart in rows, giving each plant room to develop its signature upright form. Crowding leads to weak stems and fewer blooms, so resist the urge to squeeze them closer.
Loosen the root ball gently if roots are circling (a common nursery habit). Place the plant so the top of the root ball sits just below soil level. Backfill with native soil mixed with 1 cup of slow-release fertilizer per plant. Water deeply immediately after planting to eliminate air pockets.
☀️ Step 3: Water Deeply but Infrequently
First year is critical—water once weekly during dry spells, delivering 1-1.5 gallons per plant until roots establish. You'll know it's enough when water runs out the drainage holes. After the first year, Russian sage becomes remarkably drought-tolerant, but deep watering every 2-3 weeks maintains peak vigor.
Never water overhead after planting. Wet foliage invites powdery mildew, which can defoliate plants by mid-summer. Use a soaker hose or drip irrigation instead. Mulch with 2-3 inches of gravel or coarse bark to conserve moisture and regulate soil temperature.
✂️ Step 4: Prune Strategically for Next Season's Blooms
Cut back stems to 12-18 inches tall in early spring before new growth appears. This removes dead foliage and encourages bushier growth. I always prune just above a healthy leaf node—never at a bare stem. The plant will send out multiple new shoots from that point, creating a fuller plant.
Deadhead spent blooms throughout summer only if you want to encourage a second flush of flowers. Russian sage often reblooms naturally in fall without intervention. Never prune more than 1/3 of the plant's height at any time, or you'll sacrifice next year's flowers.
⏰ Step 5: Prepare for Winter Dormancy
Russian sage handles cold beautifully, but a light mulch of 2-3 inches of straw or leaves protects the crown in Zone 5 and colder winters. Remove mulch in early spring before new growth appears. The plant's silvery foliage provides natural winter interest, so I rarely cover it unless temperatures dip below -10°F.
Watch for early spring growth—you'll spot fresh green shoots emerging from the base in late winter. This is your cue to stop watering entirely until temperatures consistently stay above 50°F. Russian sage stores moisture efficiently and resents soggy soil during dormancy.
Tips & tricks for perfect Russian sage planting
Between us, establishing Russian sage isn't rocket science—but these details make all the difference between a struggling plant and one that thrives for years.
Sunlight Secret: That 6-8 hours of daily sun in Step 1 isn't negotiable. I've seen Russian sage in partial shade produce sparse, weak blooms—it needs that full sun to develop its signature lavender-blue spikes. For maximum impact, plant on the south or west side of your garden where it gets afternoon sun, which is when the light is strongest and most beneficial for flowering.
Drainage is Non-Negotiable: The 30-minute drainage test in Step 1 is your best friend. I once planted Russian sage in heavy clay soil without amending it first, and within two years, the plant declined from root rot. If your soil drains slowly, mix that 2-3 inches of compost into the top 6 inches—this creates the perfect aerated environment Russian sage craves.
Pruning Precision: When cutting back to 12-18 inches in Step 4, always look for that healthy leaf node. I learned this the hard way—pruning at a bare stem can leave the plant vulnerable to disease. The plant will reward you with bushier growth and more abundant flowers the following season if you make clean cuts just above those leaf nodes.
Winter Protection Strategy: That 2-3 inches of mulch in Zone 5 or colder isn't just for show. I've seen Russian sage survive -10°F winters with just its natural silvery foliage, but adding that extra protection gives you peace of mind. For extra insurance, consider wrapping young plants with burlap during their first winter—they're more sensitive than mature plants.
Pro Tips for Russian Sage Perennial
- Between us, establishing Russian sage isn't rocket science—but these details make all the difference between a struggling plant and one that thrives for years.
- Sunlight Secret: That 6-8 hours of daily sun in Step 1 isn't negotiable.
- Drainage is Non-Negotiable: The 30-minute drainage test in Step 1 is your best friend.
Frequently asked questions
Is Russian sage easy to grow for beginners?
Russian sage thrives in full sun and well-drained soil, making it a great choice for beginners. It’s drought-tolerant once established and rarely bothered by pests—just plant it in spring or fall, water occasionally, and watch it flourish with minimal fuss. Pro tip: Avoid overwatering; soggy soil can lead to root rot.
When is the best time to plant Russian sage?
Plant Russian sage in early spring (after the last frost) or early fall for best results. This gives roots time to establish before extreme heat or cold. If you’re transplanting, do it on a cloudy day to reduce transplant shock. Bonus: Fall planting often leads to earlier blooms the following year!
How cold-hardy is Russian sage, really?
Russian sage is one of the toughest perennials out there, surviving USDA Zones 4-9. It handles freezing temps (down to -30°F/-34°C) and even light frost. In colder zones, mulch around the base in winter to protect roots. Fun fact: It often blooms later in the season when other plants have faded!
Can I grow Russian sage in containers or small gardens?
Yes! Russian sage adapts well to containers (use pots at least 12 inches deep) or small gardens, but choose a spot with full sun. Prune back by 1/3 in early spring to encourage bushier growth. For containers, ensure drainage holes are present to prevent waterlogging. Space tip: Plant near tall grasses or ornamental grasses to create a striking vertical display.
Why isn’t my Russian sage blooming as much as expected?
If your plant is leafy but not flowering, it may need more sunlight (aim for 6+ hours daily) or a light spring pruning to encourage new growth. Over-fertilizing can also reduce blooms—use a balanced, low-nitrogen fertilizer sparingly. Troubleshoot: Deadhead spent blooms to prompt more flowers!
What are some great companion plants for Russian sage?
Pair Russian sage with lavender, catmint, or black-eyed Susans for a low-maintenance, pollinator-friendly garden. It also complements grasses like fountain grass or salvias. Avoid planting near competitive perennials like daylilies, which may steal nutrients. Design tip: Use it as a backdrop for shorter annuals like marigolds!
Wrapping up and next steps
Russian sage is a low-maintenance, drought-tolerant superstar that rewards gardeners with stunning purple-blue blooms year after year—even in harsh winters! 🌿 With its resilience, pollinator-friendly appeal, and minimal care needs, it’s the perfect addition to any landscape.
Whether you’re a seasoned gardener or just starting out, this perennial proves that beauty and ease go hand in hand.
Ready to transform your garden? Start by selecting a sunny spot, prepping the soil, and planting your Russian sage this season. Watch it thrive—and return stronger every spring! 🌸