
How To
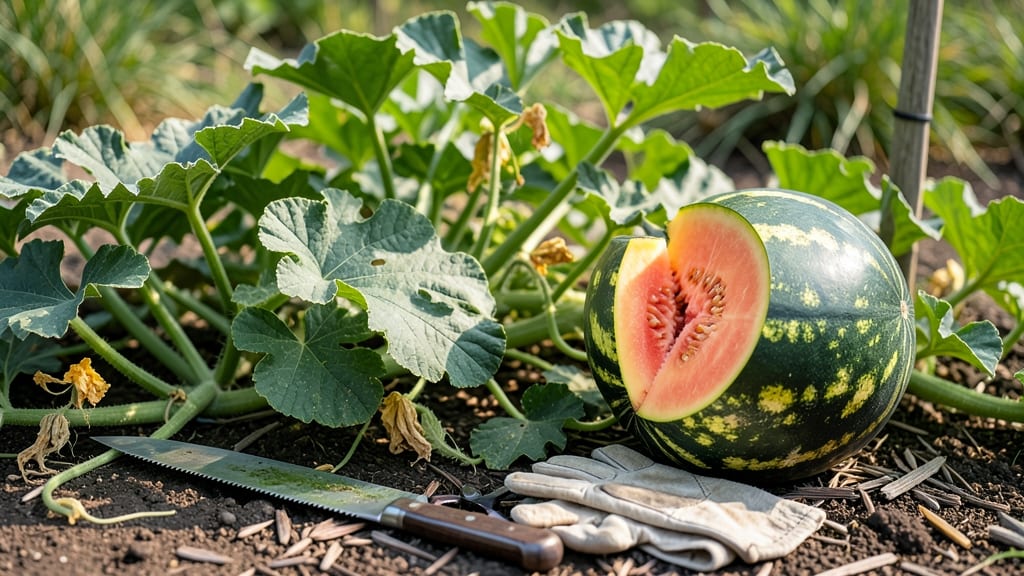
Harvesting watermelon at the right time turns a gamble into a guaranteed sweet reward 🍉 — and these three foolproof signs will tell you exactly when to pick for peak flavor.
Picture this: you’ve spent months nurturing your vines, only to cut into a watermelon that’s still pale and bland inside. Or worse, you wait too long and end up with a mushy, overripe mess. The difference between these two outcomes? Knowing the perfect moment to harvest.
Most gardeners rely on the classic "thump test," but there are hidden clues in the stem, tendrils, and even the field spot that give away ripeness before the melon sounds hollow. I’ll show you how to spot them—and why timing matters more than you think.
By the end, you’ll harvest watermelons that are bursting with juice, store them longer, and avoid the most common mistakes that waste your hard work. Let’s get started.

Watermelon ripeness guide: the thump test & 3 science-backed signs
There's nothing worse than biting into a watermelon that's either seedy and bland or overripe and mushy. The classic thump test is a great starting point, but it's not foolproof—especially in humid conditions where melons can sound hollow even when underripe.
To guarantee perfect ripeness, combine the thump test with these three science-backed cues that reveal when your watermelon is truly ready for harvest.
Most gardeners focus only on the thump test, but the real magic happens when you pay attention to visual and tactile clues that indicate the fruit's internal sweetness and texture.
These signs—often overlooked—can save you from harvesting too early or too late. Let's break down the most reliable ripeness indicators and how to use them together for foolproof results.
🌱 numbered-highlights
How to Know When to Harvest Watermelon
- 1 Field Spot Color: Look for the cream or yellow spot where the watermelon rested on the ground. A white spot means it's not ready, while a tan or brown spot signals ripeness.
- 2 Tendril Drying: Check the small vine (tendril) near the stem. When it turns brown and crispy, the watermelon is ready. A green tendril means it needs more time.
- 3 Stem Separation: Gently twist the stem near the fruit. If it snaps cleanly with minimal force, the melon is ripe. A tough stem means it's not ready yet.
- 4 Thump Test (Revised): Tap the watermelon with your knuckles. A deep, hollow sound (like a drum) means it's ripe. However, skip this test if the weather is humid or rainy, as it can give false results.
The field spot color is one of the most reliable indicators because it reflects the internal sugar development of the fruit. When the spot near the stem turns from white to cream or yellow, it’s a clear sign that the watermelon has reached peak sweetness.
This change happens because the fruit’s chlorophyll breaks down as it ripens, revealing the natural color beneath.
Don’t overlook the tendril drying near the stem—this is a biological cue that the plant is shutting down nutrients to the fruit. When the tendril turns brown and crispy, it means the watermelon has absorbed all the nutrients it needs to reach full maturity.
Many gardeners skip this step, but it’s one of the most consistent signs of ripeness.
The stem separation test is often underrated but incredibly effective. When the stem near the fruit snaps easily with a slight twist, it indicates that the fruit has fully detached from the vine’s nutrient supply.
This happens because the plant seals off the stem as the fruit matures, making it easier to harvest without damaging the melon.
While the thump test is popular, it has limitations, especially in humid climates. A watermelon can sound hollow even when underripe if there’s excess moisture in the air. To compensate, always combine the thump test with the three visual cues above.
For example, if the field spot is yellow and the tendril is brown, but the thump sounds dull, wait a day or two before harvesting.
Another pro tip: Lift the watermelon gently from the vine. A ripe watermelon will feel heavy for its size because it’s packed with juice and sugar. If it feels light or hollow, it’s not ready yet.
This simple trick works especially well for large heirloom varieties, which can take longer to mature.
Timing your harvest correctly also depends on your climate zone. In hot, dry regions, watermelons may ripen faster, while cooler or cloudy conditions can slow the process.
If you’re in a shorter growing season, keep a close eye on these ripeness signs to avoid missing the harvest window entirely.
Once you’ve confirmed ripeness using these methods, harvest your watermelon by cutting the stem with a clean, sharp knife or pruners. Leave about 1–2 inches of stem attached to help the fruit store longer. Store it in a cool, dry place (around 50–55°F) to preserve its sweetness for weeks.
Mastering these four ripeness indicators will ensure you never pick a watermelon too early or too late again. The next time you’re standing in your garden with a ripe-looking melon, take a moment to check all four signs—your taste buds will thank you!
How to harvest watermelon without damaging the vine (step-by-step)
Once your watermelon passes the thump test and shows all the ripeness signs, it’s time to harvest—but how you remove it makes all the difference.
A rough cut or yanked vine can stress your plant, reducing future yields. Follow these gentle techniques to protect your vine while securing that perfect melon.
Start by gathering your tools: a sharp pruning shears or clean knife (sterilized with rubbing alcohol), a glove for grip, and a tarp or basket to cushion the melon. Avoid using dull tools or pulling—this can tear the vine and leave jagged edges that invite pests or disease.
After harvesting, your vine may still produce 2–3 more melons if cared for properly. Water deeply every 3–5 days and apply a balanced fertilizer (like 10-10-10) to encourage new growth. Mulch around the base to retain moisture and prevent weeds from competing for nutrients.
Proper storage extends your watermelon’s shelf life to 2–4 weeks at room temperature. Once cured, store it in a cool, dark place (50–55°F) away from ethylene-producing fruits like apples. For longer storage, refrigerate after cutting to preserve texture and flavor.
With these steps, you’ll protect your vine’s health while enjoying sweet, ripe watermelons all season long. Happy harvesting! 🍉