
Flowers
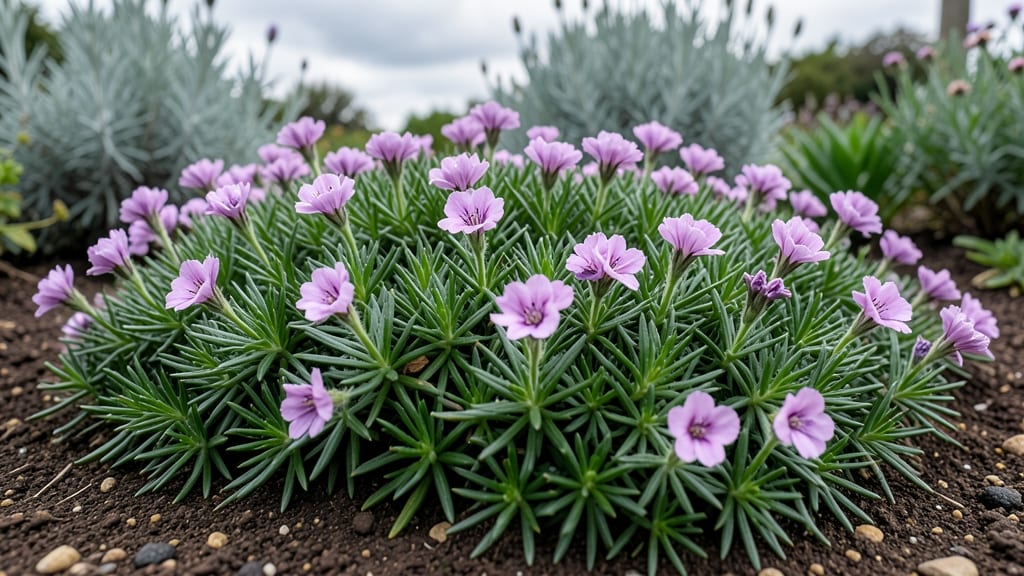
This creeping phlox perennial turns spring into a fragrant carpet of color that lasts for years. 🌸 I fell in love with this groundcover after my first patch spread effortlessly, filling gaps between rocks and along borders with its delicate blooms and evergreen foliage.
Unlike annuals, this perennial comes back stronger every year, even in cold climates where other plants struggle.
The secret to happy creeping phlox starts with well-draining soil and full sun—it thrives where many plants would bake or rot. Most gardeners overwater it, but this tough plant prefers dry conditions once established.
A simple spring feeding with slow-release fertilizer keeps the blooms coming for weeks, and the fragrance? Pure magic on warm mornings.
By mid-summer, you'll have a lush, low-maintenance groundcover that suppresses weeds and attracts pollinators. The blooms fade into seed heads that add winter interest, and the evergreen foliage stays attractive year-round. Perfect for slopes, rock gardens, or as a living edge along pathways.
Whether you're filling a shady corner or brightening a sunny slope, creeping phlox adapts beautifully. The key is patience—it takes a season or two to fully establish, but once it does, it's a self-sustaining star of the garden that needs almost no care after the initial setup.
📚 In This Guide
- What you need
- Instructions
- Tips and common mistakes
- Wrapping up and next steps
What you need
- ● Creeping phlox plants: 3–5 nursery-grown plants (check for healthy foliage and roots). Popular varieties include Phlox subulata 'Candy Stripe' or 'Emerald Blanket'.
- ● Well-draining soil: A mix of native soil + 2–3 inches of organic matter (compost or peat moss) per square foot. Avoid heavy clay.
- ● Mulch: 1–2 inches of shredded bark, pine straw, or pine needles to retain moisture and suppress weeds.
- ● Slow-release fertilizer: 5–10–10 or 10–10–10 (1 tbsp per plant at planting time).
- ● Watering can or hose with a gentle spray nozzle: For consistent moisture without disturbing roots.
- ● Garden trowel or spade: For digging planting holes (6–8 inches deep).
- ● Garden gloves: To protect hands from thorns (some varieties) and soil.
- ● Pruners or shears: Sharp, clean pair for trimming dead blooms or overgrowth.
- ● Rake: To level soil and remove debris.
- ● Measuring tape or ruler: For spacing plants 6–12 inches apart.
- ● Soil pH test kit: Creeping phlox thrives in slightly acidic soil (pH 6.0–7.0). Adjust with lime or sulfur if needed.
- ● Drip irrigation system: For automated watering in dry climates.
- ● Compost tea or liquid fertilizer: For a mid-season nutrient boost (mix 1 tbsp per gallon of water).
- ● Edging material: Stones or metal borders to define planting areas.
How to plant and maintain creeping phlox for year-round groundcover
This cold-hardy perennial thrives with minimal fuss—just follow these steps for vibrant blooms and dense coverage.
🌱 Step 1: Choose the Right Planting Site and Prepare the Soil
Creeping phlox loves full sun—select a spot that gets at least 6 hours of direct sunlight daily. Partial shade works, but blooms will be sparser. Test your soil: phlox prefers well-draining, slightly acidic soil (pH 6.0-7.0). If your soil is heavy clay, amend it with 2-3 inches of compost mixed into the top 6 inches of soil.
Work in a slow-release granular fertilizer (10-10-10 ratio) at planting time to give roots a nutrient boost. Avoid fresh manure—it can burn tender roots. Loosen the soil to a depth of 12 inches with a garden fork to improve drainage and root penetration. Real talk: phlox hates soggy roots, so if your yard floods, plant on a mound or raised bed.
🪴 Step 2: Plant Bare-Root or Container-Grown Phlox Correctly
For bare-root plants, soak the roots in lukewarm water for 1 hour before planting to revive them. Dig holes twice as wide as the root ball but only as deep—the crown (where roots meet stems) should sit just below soil level. If planted too deep, stems may rot; too shallow, and they’ll dry out.
For container-grown plants, gently remove the pot and tease apart any circling roots. Space plants 12-18 inches apart—closer spacing encourages faster groundcover but may reduce bloom size. Press soil firmly around roots to eliminate air pockets, then water deeply to settle everything. You’ll see new growth within 2-3 weeks if conditions are right.
☀️ Step 3: Water and Mulch for Establishment
Water deeply once a week for the first 4-6 weeks to encourage deep root growth. After that, phlox is drought-tolerant once established, but 1 inch of water per week keeps blooms vibrant. Water at the base—avoid wetting foliage to prevent fungal diseases like powdery mildew.
Apply a 2-inch layer of mulch (pine straw or shredded bark) around plants, keeping it 2 inches away from stems to prevent rot. Mulch conserves moisture and regulates soil temperature. In hot climates, mulch also protects roots from summer heat stress. Check soil moisture by sticking your finger 1 inch deep—if dry, it’s time to water.
✂️ Step 4: Prune and Maintain for Continuous Blooms
Deadhead spent blooms immediately after flowering to encourage a second flush of flowers in late summer. Use clean, sharp pruners and cut back to the first set of healthy leaves. Avoid cutting into old wood—phlox blooms on new growth, so prune just above fresh foliage.
In early spring, trim back one-third of the previous year’s growth to promote bushier, more compact plants. This also prevents woody stems from taking over. Fertilize lightly in early spring with a balanced 10-10-10 formula—too much nitrogen reduces flowering. Here’s the thing: phlox is low-maintenance, but this one step keeps it looking its best year after year.
⏰ Step 5: Overwinter and Prepare for Next Season
Creeping phlox is extremely cold-hardy (USDA zones 3-9), but a 2-inch layer of mulch in late fall protects roots from extreme temperature swings. Remove old mulch in early spring to prevent smothering new growth. If your winters are particularly harsh, a light frost blanket over young plants can prevent winter dieback.
Divide mature clumps every 3-4 years in early spring or fall to rejuvenate growth. Dig up the plant, separate sections with a sharp knife, and replant immediately. This prevents overcrowding and keeps blooms abundant. You’ll know it’s time to divide when flowers become sparse or stems look leggy.
Tips & tricks for perfect creeping phlox groundcover
Here's what nobody tells you about growing lush, vibrant creeping phlox that comes back year after year.
Sunlight Strategy: While phlox thrives in full sun, I've found that morning sun with afternoon shade in hot climates actually produces more abundant blooms. The intense afternoon heat can stress the plants, causing them to focus on survival rather than flowering. If you're in zone 7 or hotter, consider planting on the north or east side of structures to get that perfect balance of 6 hours of sunlight without the midday intensity.
Soil Depth Matters: When amending your soil with compost, focus on the top 6 inches as specified, but don't stop there. Use your garden fork to loosen soil down to 12 inches to create channels for roots to grow deeper. This prevents surface roots that dry out quickly and ensures your phlox establishes strong, drought-resistant growth. I've seen plants with roots reaching 18 inches deep after just one season when given this proper foundation.
Planting Depth Secret: The crown (where roots meet stems) should sit just below soil level, but here's the trick: create a small mound of soil when planting bare-root phlox. This ensures the crown stays at the right depth even as soil settles naturally. For container-grown plants, gently press soil around the roots to eliminate air pockets, then water deeply. The 2-3 weeks for new growth to appear will fly by - trust me, it's worth the patience!
Mulch Maintenance: That 2-inch layer of mulch we talk about isn't just for looks - it's a game-changer. In summer, it keeps roots cool, and in winter, it protects against temperature swings. Here's my pro move: refresh the mulch layer in early spring before new growth appears. This prevents smothering while still providing all the benefits. Just remember to keep it 2 inches away from stems to prevent rot.
Pro Tips for Creeping Phlox Perennial
- Here's what nobody tells you about growing lush, vibrant creeping phlox that comes back year after year.
- Sunlight Strategy: While phlox thrives in full sun, I've found that morning sun with afternoon shade in hot climates actually produces more abundant blooms.
- Soil Depth Matters: When amending your soil with compost, focus on the top 6 inches as specified, but don't stop there.
Frequently asked questions
Got questions about growing and caring for creeping phlox? You’re not alone! Here are some of the most common queries—plus straightforward answers to help you nurture a thriving groundcover.
When is the best time to plant creeping phlox?
Plant creeping phlox in early spring or early fall when soil temperatures are cool (50–60°F). This gives roots time to establish before summer heat. Avoid planting in peak summer—it can stress the plant! If you’re dividing existing clumps, spring is ideal for maximum regrowth.
How cold-hardy is creeping phlox, and does it survive winter?
Creeping phlox is highly cold-hardy, thriving in USDA zones 3–9. Most varieties handle winter well, but mulch heavily (2–3 inches of straw or leaves) in zones 3–5 to protect roots. In extreme cold, evergreen types may need extra insulation. Come spring, you’ll be rewarded with vibrant blooms!
What pests or diseases should I watch for with creeping phlox?
While creeping phlox is generally low-maintenance, watch for slugs, snails, and spider mites. Slugs love the tender new growth—use beer traps or diatomaceous earth if needed. Overwatering can lead to powdery mildew, so ensure good airflow. Deadhead spent blooms to encourage reblooming and reduce disease risk.
Can I grow creeping phlox in containers or hanging baskets?
Creeping phlox thrives in containers and hanging baskets, especially trailing varieties like ‘Mandy’ or ‘Sherwood Purple.’ Use a well-draining potting mix and a pot with drainage holes. Water consistently (containers dry out faster) and fertilize lightly in spring. Just avoid overcrowding—space plants 6–12 inches apart for optimal airflow.
How do I revive creeping phlox that’s looking leggy or sparse?
Leggy or sparse creeping phlox often needs rejuvenation. In early spring, trim back ⅓ of the foliage to encourage bushier growth. If the plant is overcrowded, divide clumps every 3–4 years in spring. For bare spots, fill gaps with new plants or grass seed until the phlox fills in naturally.
Wrapping up and next steps
Creeping phlox is a true garden gem—low-maintenance, fragrant, and packed with color—that transforms any space into a blooming paradise with minimal effort. Whether you’re a seasoned gardener or just starting, this hardy perennial delivers year after year, proving that beauty doesn’t have to mean backbreaking work. 🌸
Ready to bring the magic of creeping phlox to your yard? Start by picking your favorite variety, prepping your soil, and planting with confidence. Before you know it, your garden will be bursting with life, scent, and those dreamy spring blooms—so grab your gloves and get growing!