
Orchid Care
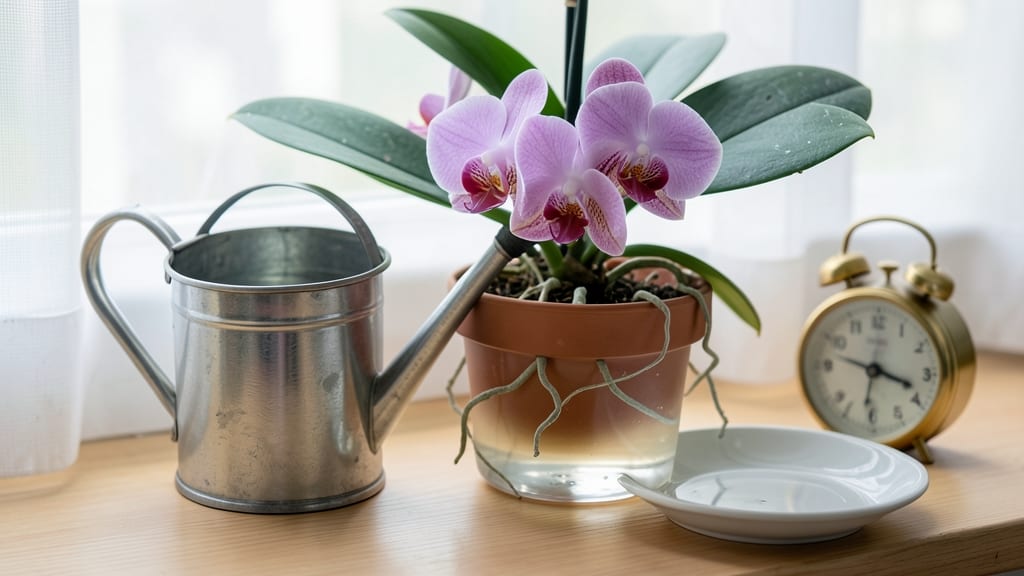
Watering orchids from the bottom is often the best way to nurture their delicate roots 🌸—but many gardeners still debate whether top or bottom watering wins.
Orchids are delicate beauties that thrive with the right care—but their watering method remains one of the biggest mysteries for plant parents. Get it wrong, and you risk root rot or dehydration. The truth? Science reveals a precise approach that keeps orchids blooming for years.
Bottom watering mimics their natural epiphytic habitat, where roots absorb moisture without sitting in soggy soil. This method reduces fungal risks and encourages stronger root growth, but it requires the right setup and timing. If you’ve ever struggled with orchid health, this could be the game-changer you’ve been missing.
In this guide, I’ll break down the science behind both methods, when to use each, and a step-by-step process for mastering bottom watering—so you can keep your orchids thriving for seasons to come.


Top vs bottom watering for orchids: what science says about root health
When it comes to orchids, watering technique isn't just about how much you give—it's about how you deliver it.
Science shows that orchid roots need both oxygen exchange and proper hydration, and the method you choose directly impacts these needs. Top watering mimics natural rainfall, while bottom watering promotes even moisture distribution. But which works best for your Phalaenopsis or Cattleya?
The answer depends on their unique root structures and environmental needs.
Orchid roots are specialized to absorb moisture and air simultaneously—a trait called velamen.
This spongy outer layer helps regulate water intake, but it also makes orchids vulnerable to root rot if overwatered from the top. Bottom watering, on the other hand, allows roots to absorb water at their own pace, reducing the risk of fungal infections.
However, not all orchids respond the same way. Phalaenopsis orchids, for example, thrive with bottom watering due to their thick pseudobulbs, while Cattleya orchids may benefit from occasional top watering to clean their leaves.
Here’s the science-backed breakdown of how each method affects orchid roots, including oxygen levels, moisture retention, and disease prevention:
Bottom watering is often recommended for orchids because it reduces the risk of root rot by preventing water from pooling on the leaves or crown. When you place the pot in a tray of water, the roots absorb moisture gradually, mimicking their natural epiphytic environment. This method is especially beneficial for Phalaenopsis orchids, which have thick, fleshy roots that store water efficiently. For these varieties, bottom watering ensures that the entire root system stays hydrated without suffocating the plant.
However, top watering isn’t entirely off the table. It’s particularly useful for Cattleya orchids, which often grow in drier conditions and benefit from occasional misting to clean their leaves. Top watering also helps simulate rainfall, which can encourage blooming in some varieties.
The key is to avoid overwatering—never let water sit in the saucer or on the leaves for more than a few hours. Always use room-temperature water to prevent shocking the roots.
Another critical factor is the orchid’s pot material. Plastic pots retain moisture longer, making bottom watering ideal to prevent soggy roots. In contrast, clay pots dry out faster, so top watering might be more practical.
If you’re using a wicking system, bottom watering becomes even more effective, as the wick draws water up to the roots consistently. This setup is a game-changer for orchid enthusiasts who travel frequently or have busy schedules.
Let’s talk about seasonal adjustments. During the growing season (spring and summer), orchids need more frequent watering—every 5-7 days—but bottom watering helps maintain the right balance.
In winter, when orchids enter dormancy, reduce watering to every 2-3 weeks and rely on bottom watering to ensure roots don’t dry out completely. Overwatering in winter can lead to root rot, so always check the moisture level by lifting the pot—if it’s light, it’s time to water.
One common misconception is that bottom watering is complicated or time-consuming. In reality, it’s a set-and-forget method once you set up a saucer or tray. Simply place your orchid pot in a shallow tray filled with 1-2 inches of water and let it soak for 10-15 minutes.
Drain any excess water afterward to prevent the roots from sitting in water. For top watering, use a watering can with a rose attachment to direct water to the roots and avoid wetting the leaves, which can promote fungal growth.
If you’re transitioning from top to bottom watering, do it gradually. Start by bottom watering every other time you water from the top, then phase out top watering entirely after 4-6 weeks.
Monitor your orchid’s roots for any signs of stress, such as yellowing leaves or mushy roots, and adjust accordingly. With the right technique, your orchids will reward you with vibrant blooms and healthier growth for years to come.
When to use each method: orchid varieties and environmental conditions
Not all orchids thrive with the same watering approach. Your choice between top and bottom watering depends on the orchid variety and growing conditions. For example, Phalaenopsis (moth orchids) often prefer bottom watering, while Cattleya orchids tolerate both methods.
Understanding these nuances ensures your orchids get just the right amount of moisture without stress.
The key factors influencing your decision include humidity levels, pot size, and seasonal changes. In high-humidity environments, orchids like Vandas may need top watering to prevent stagnant moisture. Conversely, Dendrobiums often benefit from bottom watering during dry seasons. Let’s break down the best practices for different scenarios.
- 🌸 Phalaenopsis (Moth Orchids) → Bottom watering preferred; thrives in consistent moisture without soggy roots.
- 🌿 Cattleya Orchids → Top or bottom watering works; tolerates brief drying periods between waterings.
- 🌺 Vandas → Top watering in high humidity; avoids root rot in compact pots.
- 🌳 Dendrobiums → Bottom watering during dry seasons; mimics natural rainfall patterns.
- High humidity (>60%) → Top watering for aeration; reduces fungal risks.
- Low humidity (<40%) → Bottom watering retains moisture; ideal for Paphiopedilums.
- Small pots (<4 inches) → Bottom watering prevents over-saturation; drains excess quickly.
- Large pots (>6 inches) → Top watering ensures even moisture distribution.
Seasonal shifts also play a critical role. During spring and summer, when orchids are actively growing, bottom watering helps maintain steady moisture without disturbing delicate roots.
In fall and winter, reduce watering frequency and switch to top watering if your orchid is dormant, like Cymbidiums, which prefer drier conditions.
For new orchid growers, start with bottom watering—it’s gentler on roots and reduces the risk of overwatering. Always check the moisture level by inserting your finger into the mix; if it feels dry up to your first knuckle, it’s time to water.
Over time, you’ll learn your orchid’s unique preferences.
Pro tip: Pair your watering method with the right orchid mix. A chunky bark blend drains faster than moss, so adjust your technique accordingly. For example, Cymbidiums in bark mixes benefit from bottom watering, while those in moss may need top watering to prevent compaction.
By matching your orchid’s variety, environment, and season to the right watering method, you’ll create an ideal growing condition that keeps your plants blooming year after year. Experiment with small adjustments—your orchids will thank you with vibrant flowers! 🌸