
Flowers
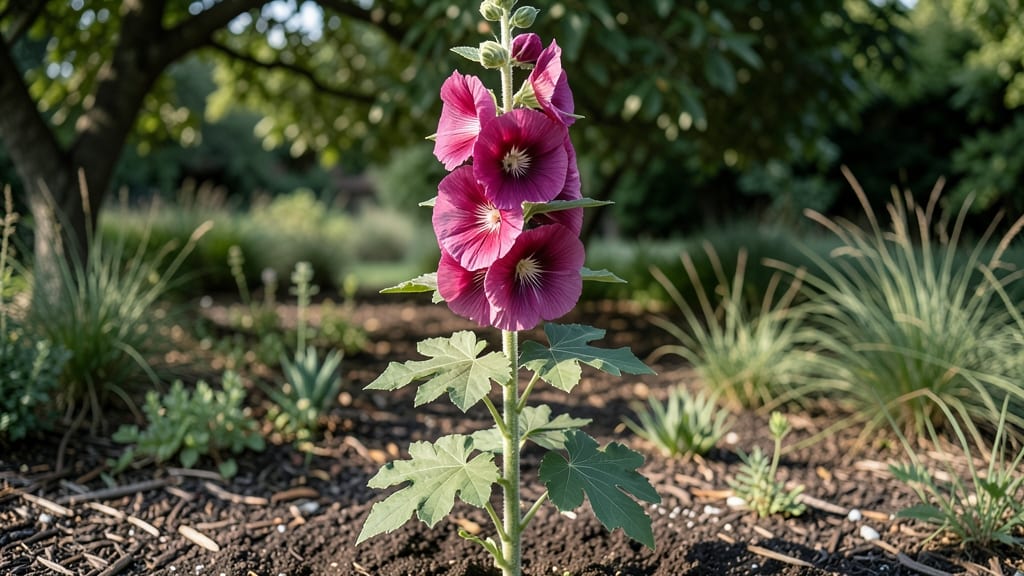
Those hollyhock perennial flowers return every spring with towering, velvety blooms—no replanting needed. 🌸 I’ve grown them for years, and the secret to their stubborn resilience lies in how you prep the soil and handle winter.
Most gardeners treat them as annuals, but with the right care, they’ll reward you with 5-7 foot stalks bursting with color for decades.
The key is cold-hardy soil prep: mix in compost before planting to improve drainage, since soggy roots mean floppy stems. Plant in full sun where they’ll get at least 6 hours daily, and water deeply but infrequently—hollyhocks hate wet feet.
Biennial varieties bloom the first year but fade; perennials like Alcea rosea ‘Happiness’ come back stronger each season.
By late summer, you’ll snip back dead blooms to encourage new growth, and in fall, cut stems to 6 inches before frost. The roots survive winters down to zone 3, then shoot up fresh shoots in spring. The payoff? Dramatic vertical interest that outshines annuals—and no replanting for years.
Works in cottage gardens, pollinator patches, or as a dramatic backdrop. Here’s how to keep them thriving through every season without the annual replanting hassle.
📚 In This Guide
- What you need
- Instructions
- Tips and common mistakes
- Wrapping up and next steps
What you need
- ● Hollyhock seeds, tubers, or young plants: Seeds: 10–20 per plant (varies by variety; check seed packet for spacing). Tubers: 2–3 per hole (plant 18–24 inches apart). Young plants: 1–2 per location (space 2–3 feet apart for mature size).
- ● Well-draining soil: Mix 50% native soil + 50% compost or aged manure for optimal growth.
- ○ Fertilizer (optional but recommended): Balanced 10-10-10 or organic options like bone meal (for tubers) or compost tea.
- ● Apply at planting and again in early spring.
- ● Mulch: 2–3 inches of straw, wood chips, or shredded leaves to retain moisture.
- ● Garden trowel or transplant spade (for digging holes 6–8 inches deep).
- ● Garden fork or hoe (to loosen soil and remove weeds).
- ● Watering can or hose with a gentle spray nozzle (hollyhocks hate soggy roots!).
- ● Pruners or shears (for deadheading spent blooms and shaping plants).
- ○ Stakes or cages (optional): Tall varieties (5–6 feet) may need support—use 3–4 ft stakes or tomato cages.
- ● Sunlight: Full sun (6+ hours daily) for vibrant blooms.
- ● Climate: Hardy in USDA Zones 3–9 (cold-hardy but may need winter mulch in colder regions).
- ● Spacing: Follow variety guidelines (dwarf types: 18 inches apart; giant varieties: 3+ feet).
- ● Patience: Hollyhocks from seed take 60–90 days to bloom; tubers sprout faster!
How to plant and maintain hollyhock perennial flowers
These towering beauties thrive with minimal fuss once you nail their sun and soil needs.
🌱 Step 1: Choose the Perfect Planting Site
Hollyhocks demand full sun—at least 6-8 hours of direct light daily—for those iconic, sturdy stems and vibrant blooms. I always scout the sunniest corner of my garden because they simply won’t tolerate shade. The soil should drain well but retain moisture; amending heavy clay with 2-3 inches of compost works wonders if your native soil is compacted.
Test your spot by digging a 6-inch hole—if water pools after 30 minutes, you’ll need to raise beds or mix in organic matter like aged leaves or coconut coir. Hollyhocks hate soggy roots, so prioritize drainage over anything else. I mark the area with stakes to visualize the 2-3 foot spacing they’ll need for mature growth.
🪴 Step 2: Plant Bare-Root Hollyhocks at the Right Time
Spring is ideal, but you can also plant in early fall in warmer climates. Start by soaking bare-root plants in lukewarm water for 1-2 hours to rehydrate the roots. Dig holes twice as wide as the root ball but only as deep—burying too deep suffocates the crown. The top of the root should sit just below soil level.
Gently spread the roots outward and backfill with native soil mixed with compost. Press lightly to eliminate air pockets, then water deeply until moisture seeps 6 inches down. Mulch with 2 inches of straw to retain moisture and suppress weeds. I always water again after 3 days to encourage root establishment.
☀️ Step 3: Provide Consistent Care for Strong Stems
Hollyhocks are drought-tolerant once established, but young plants need 1 inch of water weekly during their first growing season. Water at the base—never overhead—to prevent fungal diseases like rust, which loves damp foliage. I set a reminder for early morning watering to let leaves dry before evening humidity peaks.
Fertilize lightly in early spring with a balanced 10-10-10 formula or compost tea. Too much nitrogen produces lush foliage but few flowers. Watch for tall, weak stems—a sign of over-fertilization. Deadhead spent blooms to encourage more flowers, but leave some seed pods if you want self-seeding next year.
✂️ Step 4: Prune and Protect for Long-Term Health
Cut back dead or diseased stems in early spring before new growth starts. I use sterilized pruners to make clean cuts just above a leaf node. Hollyhocks often self-seed prolifically—thin seedlings to 12-18 inches apart to prevent overcrowding, which invites pests like aphids.
In late fall, cut stems down to 2-3 inches above ground level after the first hard frost. The roots are cold-hardy, but removing old stems tidies the garden and prevents disease buildup. I add a 2-inch layer of mulch after pruning to insulate roots through winter.
🌿 Step 5: Watch for Pests and Diseases Proactively
Hollyhocks are magnets for Japanese beetles and rust fungus. I spray preventive neem oil in early summer to deter beetles and apply copper fungicide if rust spots appear. Remove infected leaves immediately—don’t compost them. For beetles, handpick them into soapy water before they skeletonize the foliage.
Rotate plants every 3-4 years to prevent soil-borne diseases. If your hollyhocks struggle, it might be time to divide them. Dig up clumps in early spring, separate the roots, and replant the healthiest sections. This rejuvenates old plants and prevents decline.
Tips & tricks for perfect hollyhock perennial flowers
Here's what nobody tells you about growing these resilient perennials—details that make all the difference between average and spectacular blooms.
Sunlight Strategy: While 6-8 hours of sunlight is the minimum, I've found hollyhocks actually reward you with bigger blooms when they get full sun exposure (8+ hours daily). If your garden has partial shade, position them where they'll get the most direct morning sun—this prevents weak stems and leggy growth. I've seen hollyhocks in my own garden grow 3 feet taller in full sun compared to shaded spots.
Soil Test Tip: Before planting, do a simple soil test using a DIY kit (available at garden centers) to check your soil's pH. Hollyhocks prefer slightly acidic to neutral soil (pH 6.0-7.0). If your test shows alkaline soil (above 7.0), mix in 2-3 inches of peat moss when amending—this helps lower the pH naturally. I've had to do this with my clay soil, and the difference in plant health was noticeable within weeks.
Watering Wisdom: That 1 inch of water weekly recommendation is perfect for established plants, but young hollyhocks need more frequent watering—especially during their first growing season. I've learned to check soil moisture by sticking my finger 2 inches down; if it feels dry, water thoroughly. Overhead watering is tempting, but it spreads fungal spores. Instead, use a soaker hose or water at the base early in the morning to let foliage dry completely before evening.
Fertilizing Fine-Tuning: When applying that balanced 10-10-10 fertilizer, I've found hollyhocks actually respond better to a low-nitrogen formula (5-10-10) or even compost tea alone. The key is to fertilize only in early spring—never during flowering. Too much nitrogen at any time will give you lush foliage but sparse blooms. I've made this mistake and ended up with plants that looked healthy but produced almost no flowers.
Pro Tips for Hollyhock Perennial Flowers
- Here's what nobody tells you about growing these resilient perennials—details that make all the difference between average and spectacular blooms.
- Sunlight Strategy: While 6-8 hours of sunlight is the minimum, I've found hollyhocks actually reward you with bigger blooms when they get full sun exposure (8+ hours daily).
- Soil Test Tip: Before planting, do a simple soil test using a DIY kit (available at garden centers) to check your soil's pH.
Frequently asked questions
Got questions about growing hollyhock perennial flowers? You’re not alone! Here are answers to the most common queries—from planting tips to troubleshooting—so you can enjoy these towering beauties with confidence.
Are hollyhocks truly perennial, or do they die back in winter?
Hollyhocks are technically perennials in USDA Zones 3-9, but many gardeners treat them as short-lived perennials (3-5 years). Their woody stems die back to the ground in winter, then regrow from the root crown in spring. In colder climates, mulch heavily to protect roots!
When is the best time to plant hollyhocks for spring blooms?
Plant bare-root hollyhocks in early spring (as soon as soil is workable) or container-grown plants in fall (6-8 weeks before frost). For fastest results, start seeds indoors 8-10 weeks before your last frost date. Pro tip: Soak bare roots in water for 1-2 hours before planting to reduce transplant shock!
Why are my hollyhock leaves turning yellow or spotted?
Yellowing leaves often signal rust fungus (a common hollyhock nemesis) or aphids. Remove infected leaves immediately and space plants 2-3 feet apart for airflow. For rust, apply neem oil or copper fungicide. Avoid overhead watering to prevent spread.
Can I grow hollyhocks in containers, or do they need a garden bed?
Yes! Choose large containers (at least 12" deep) with drainage holes and a well-draining potting mix. Dwarf varieties like ‘Black Prince’ thrive in pots. Place containers in full sun and fertilize monthly with a balanced bloom booster. Just watch for root-bound stress—repot every 2-3 years!
What’s the secret to getting hollyhocks to rebloom all season?
Deadhead spent blooms regularly to encourage more flowers. Feed with a low-nitrogen, high-phosphorus fertilizer (like 5-10-10) every 4-6 weeks. Water deeply but infrequently—hollyhocks hate soggy soil. For extra blooms, prune back 1/3 of the plant after the first flush to promote bushier growth.
How do I propagate hollyhocks to share with friends?
Divide mature clumps in early spring or fall when plants are dormant. Dig up the root ball, separate crowns with 3-4 stems each, and replant immediately. You can also take stem cuttings in summer: dip in rooting hormone, plant in moist perlite, and keep humid until roots form (4-6 weeks).
Wrapping up and next steps
Hollyhock perennial flowers are a gardener’s dream—easy to grow, stunningly resilient, and packed with bold charm that returns year after year.
Whether you’re drawn to their towering heights, vibrant hues, or their ability to thrive in cooler climates, these flowers prove that beauty and durability go hand in hand. 🌸
Ready to bring their magic to your garden? Start by choosing the perfect variety, prepping your soil, and giving them the care they deserve. Your next step? Plant a few this season and watch them flourish—you’ll have a showstopper that keeps coming back stronger every spring!