
Picking
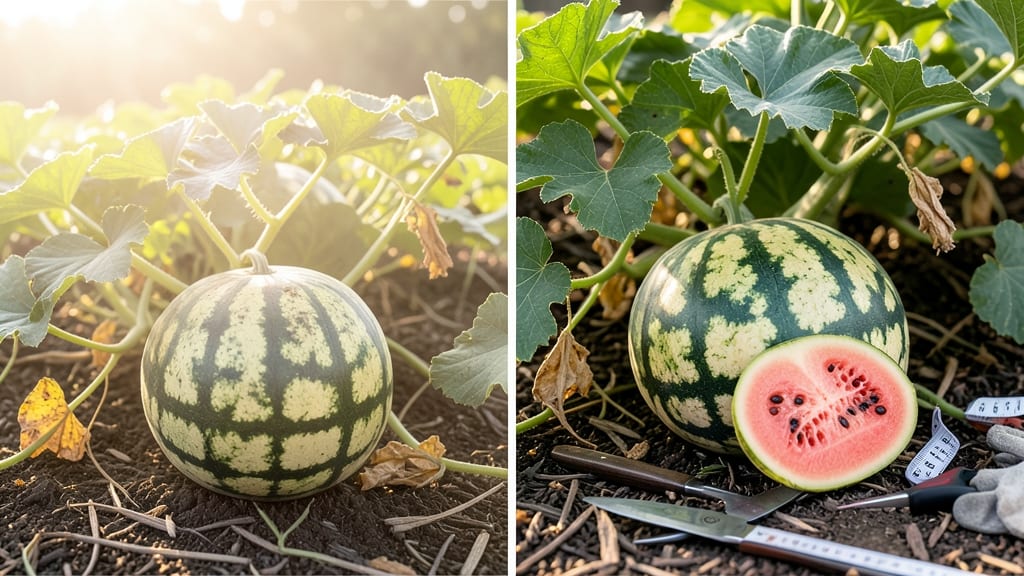
Knowing when your watermelon is ready to pick saves you from bitter disappointments and overripe messes—here’s how to nail the timing every time 🍉.
Picture this: you’ve nurtured your watermelon plants all season, and now the fruit is hanging heavy on the vine. But how do you know if it’s truly ripe? Picking too early means bland, seedy flesh, while waiting too long risks a mushy, flavorless pulp.
The good news? A few simple checks—like the classic thump test, the slide trick, and the curly tail sign—can tell you exactly when to harvest for that perfect balance of sweetness and crunch.
Beyond the tests, there are visual cues like rind color shifts, field patterns, and even the way the melon feels when pressed. These signs work together to give you a foolproof guide, whether you’re growing seedless varieties or heirloom types.
Plus, I’ll show you how to avoid common mistakes that lead to premature or overripe harvests—so you never waste another season’s effort.
By the end, you’ll confidently spot a ripe watermelon, every time. No more guesswork, just sweet, juicy perfection straight from your garden.

The 3 most reliable watermelon ripeness tests (thump, slide, and curly tail)
Nothing beats the thrill of harvesting your own homegrown watermelons, but timing is everything. A melon picked too soon tastes bland and seedy, while waiting too long means mushy, overripe disappointment.
These three field-tested methods—the thump test, slide test, and curly tail check—will help you nail that perfect harvest window every time. I’ve used them for years in my backyard garden, and they never fail.
Start by combining these tests for the most accurate results. For example, a hollow thump paired with a dry stem and curly tendril means your watermelon is ready to pick.
But don’t rely on just one method—each test has its quirks, especially in extreme weather or for different varieties. Let’s break down how to use them like a pro.
The thump test is my go-to because it’s quick and doesn’t require touching the melon. I tap near the blossom end (the opposite side of the stem) with two fingers. A ripe watermelon produces a deep, resonant thud, almost like knocking on a wooden door.
If it sounds dull or flat, it’s not ready yet. Pro tip: Do this test in the morning when the melon is cool—heat can make the rind sound deceptively hollow.
Next, try the slide test, which checks the stem’s readiness. Grasp the stem about an inch from the melon and give it a gentle twist. If it snaps off cleanly with minimal resistance, your watermelon is likely ripe.
Be careful not to yank too hard—you don’t want to damage the vine or leave a jagged stem that could rot. This test works best on dry, sunny days when the stem is fully matured.
Last but not least, the curly tail check is a visual cue that’s hard to miss. Look for the small vine (or tendril) near the stem. When ripe, this tendril will curl away from the melon, almost like a question mark.
Some gardeners call this the "curly tail" because it resembles a tiny, wilted tail. If the tendril is still straight or pointing toward the melon, it’s not ready to pick.
Here’s how to combine these tests for foolproof results: Start with the curly tail check to narrow down candidates, then use the slide test to confirm stem readiness. Finally, give it the thump test to ensure the flesh is fully developed.
If all three tests pass, congratulations—you’ve got a winner! For extra assurance, I also check the underside of the melon for a creamy yellow spot where it rested on the ground.
False positives happen, especially in hot climates or with overripe melons. For example, a melon might pass the thump test but feel soft when pressed—this means it’s past its prime. Similarly, some seedless varieties can trick you with a curly tendril before they’re truly ripe.
To avoid mistakes, always pair tests with a visual inspection of the rind. A ripe watermelon should feel hard and heavy for its size, with a deep, consistent color.
One of my biggest lessons came from a greenhouse-grown batch last summer. The melons passed all three tests but tasted bland. Turns out, the controlled environment slowed ripening. I learned to wait an extra day or two when growing indoors.
Adjust your tests based on your growing conditions—whether it’s backyard beds, raised beds, or even container gardening.
Now that you’ve mastered these tests, you’re ready to harvest like a pro. Grab a sharp knife, cut the stem about an inch above the melon, and enjoy the sweetest, most satisfying watermelon of the season.
And remember, the best time to pick is early morning when temperatures are cool—this preserves freshness and flavor. Happy harvesting!
Watermelon ripeness by color, size, and field patterns (what to look for)
Beyond the classic thump test, watermelon ripeness reveals itself through subtle color gradients and field patterns that often go unnoticed. The rind's transition from dull green to creamy yellow or deep red isn't just about aesthetics—it signals sugar development.
Even the vine's shady side can influence ripening speed, with melons maturing faster where sunlight is limited.
Start by examining the underside of the melon. A creamy yellow patch where it touched the ground is a classic sign of ripeness, but don't overlook the rind's texture. Run your thumb over the surface—if it feels hard and waxy (not soft or spongy), it's ready.
This tactile check works better than visual cues alone, especially for heirloom varieties with striped or mottled patterns.
| Ripeness Indicator | What to Look For | Varietal Notes |
|---|---|---|
| Rind Color | Deep, consistent hue (yellow/cream for light-skinned; red for dark-skinned) | Seedless: Often lighter green; Heirloom: May have stripes |
| Underside Spot | Creamy yellow where melon touched soil | All varieties; check even for black-skinned types |
| Field Patterns | Sun-exposed side often ripens 1-2 days earlier than shaded side | Shady-side melons may need 3 extra days to ripen |
| Size Benchmarks | Seedless: 4-8 lbs; Heirloom: 10-20 lbs | Never judge by size alone—some stay small but sweet! |
| Stem Condition | Dry, brown, and easily detachable (slide test) | Green stems = not ready; curly tails = ready |
Don't ignore the field's natural patterns. Melons growing on the sunniest side of the vine often ripen 1-2 days earlier than those on the shaded side. This happens because uneven sunlight exposure creates microclimates where sugars develop at different rates.
For heirloom varieties, pay attention to stripes or mottling—when they darken uniformly, it's a strong ripeness signal.
Size matters, but only as a secondary indicator. A seedless watermelon might reach harvest weight (4-8 lbs) before developing full sweetness, while heirloom varieties can stay small but still be perfectly ripe.
Always cross-reference size with rind color and stem condition. For example, a 10-pound heirloom with a dull green rind needs more time, even if it looks "big enough."
Pro tip: Check multiple melons on one vine—they often ripen at different rates. The first one to show three ripeness signs (color, stem, and spot) is your best bet for peak sweetness.
If you're growing in a container or greenhouse, these visual cues become even more critical since environmental controls can mask natural ripening signals.
Remember, overripe watermelons develop a sour, mushy texture and excessive seediness, while underripe ones stay crunchy and bland. Mastering these field patterns ensures you'll always pick melons at their sweetest, juiciest moment—no guesswork required. 🍉