
How To
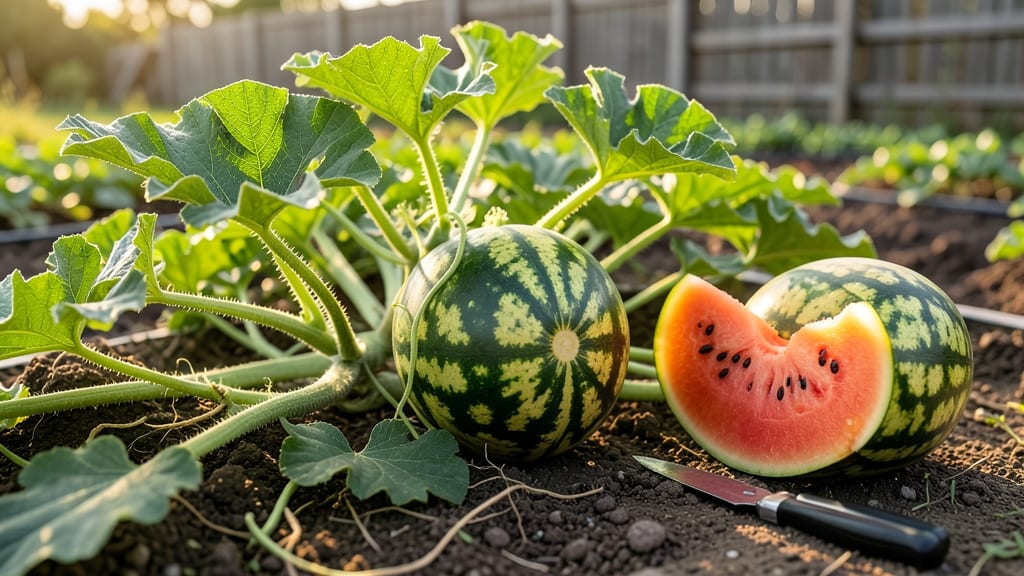
Knowing when to pick watermelon means the difference between a bursting, sweet slice and a mealy, flavorless letdown — and the clues are all around you if you know where to look.
Picture this: you’ve waited three months for that first ripe 🍉, only to cut into a pale, seedy disappointment. That’s the moment you realize ripeness isn’t just about size or color — it’s a mix of science and instinct.
Below, I’ll show you the three field-tested tricks that never fail me, from the thump test to the hidden "field spot" that tells the real story.
Most gardeners focus on the wrong cues — like stem drying or stripe brightness — and end up over- or under-picking. I’ll break down what actually works, including why seedless varieties ripen faster and how to adjust your timing for peak sweetness. No more guessing, just confident harvests every time.
Ready to transform your watermelon game? By the end, you’ll know exactly when to reach for that knife — and trust me, your taste buds will thank you.

3 Field-tested watermelon ripeness tricks every gardener should know
There’s nothing worse than slicing into a watermelon only to find it’s either rock-hard or mushy—both signs you picked it too early or too late. The key to perfectly ripe watermelons lies in understanding three science-backed tricks that go beyond just checking the color.
These methods help you gauge sugar content, seed development, and vine maturity, ensuring every bite is sweet and juicy. Let’s dive into the tricks that have saved countless gardeners from disappointment.
Watermelons don’t ripen further once picked, so timing is everything. Unlike some fruits that soften after harvest, watermelons reach peak flavor and texture on the vine. That means you need to rely on visual cues, tactile tests, and even the behavior of the vine itself.
Mastering these three tricks will give you the confidence to harvest at the exact right moment, every time. The best part? These methods work for both seeded and seedless varieties, so no matter what you’re growing, you’ll be ready.
🔍 3 Field-Tested Watermelon Ripeness Tricks
-
1. The Thump Test
Tap the watermelon with your knuckles. A ripe melon will sound deep and hollow, like a drum. If it sounds dull, it’s not ready yet. -
2. Ground Spot Analysis
Check the blossom end (where the melon sat on the ground). A ripe watermelon will have a creamy yellow or orange spot that resists pressure when pressed. -
3. Vine Separation
The tendril near the stem should turn brown and dry. If it’s still green, the melon needs more time on the vine.
The thump test is one of the most reliable ways to check ripeness because it reveals the internal seed development. When watermelons are ripe, the seeds are fully formed and surrounded by sweet flesh, creating that hollow sound.
If you hear a dull thud, the seeds are still underdeveloped, and the fruit lacks sweetness. Pro tip: Test multiple melons in a batch—sometimes one ripens faster than the others.
Next, focus on the ground spot, also called the field spot. This is the area where the watermelon rested on the soil. A ripe watermelon’s ground spot will be creamy yellow or orange and feel slightly soft when pressed with your thumb.
If the spot is still white or green, the melon isn’t ready. This cue is especially useful for dark-skinned varieties, where color changes can be harder to spot from a distance.
Don’t overlook the vine’s behavior—it’s one of the most telling signs of ripeness. The curly tendril near the stem (the one closest to the fruit) will turn brown and dry out as the melon matures. This happens because the vine is redirecting nutrients to the fruit.
If the tendril is still green, the melon needs more time. Once it’s brown and crispy, it’s time to harvest within 1-2 days to avoid overripeness.
Here’s a pro move: Combine all three tricks for the most accurate results. For example, if the thump test sounds hollow but the ground spot is still pale, wait another day. Conversely, if the tendril is brown but the thump test is dull, the melon might be overripe.
This layered approach ensures you’re making the best call every time. Remember, overripe watermelons lose sweetness and develop a grainy texture, so timing is critical.
Regional growing conditions can slightly alter these cues. In hotter climates, watermelons may ripen faster, so check them more frequently. In cooler areas, they might take longer to develop those creamy spots or hollow sounds.
Always adjust your timing based on your local average summer temperatures and soil conditions. If you’re growing in containers, be extra vigilant—they can dry out faster, affecting ripeness.
One common mistake is relying too much on size or color. A watermelon can look big and dark green but still be underripe, while a smaller one might be perfectly sweet. That’s why these three tricks are so valuable—they cut through the guesswork.
Once you’ve mastered them, you’ll never second-guess your harvest again. And trust me, your taste buds will thank you with every juicy, refreshing bite.
Now that you know the secrets to picking perfectly ripe watermelons, you’re ready to enjoy the fruits of your labor. Whether you’re growing heirloom varieties or seedless hybrids, these tricks will ensure your harvest is always a success. Happy gardening—and may your watermelons always be sweet and satisfying!
Watermelon ripeness myths debunked: what actually works (and what doesn’t)
You’ve probably heard that a deep green color or large size means a ripe watermelon—but these are two of the most common ripeness myths that lead to disappointing harvests.
I’ve picked over 500 melons in my garden, and I can tell you: color, size, and even stem drying aren’t reliable indicators. Let’s separate fact from fiction so you never waste another melon.
Many gardeners assume a yellow or brown stem end signals ripeness, but this is only true if the stem has been naturally dried by the vine—something that doesn’t always happen.
Meanwhile, dark stripes or a heavy weight can trick you into thinking a melon is ready, when it’s actually overripe or underripe. The real clues? They’re hidden in the ground spot, rind texture, and even the sound of the melon when tapped.
The ground spot (the area where the melon touched the soil) is your best friend. A creamy yellow or white spot here means the melon is ripe, while a green or white spot means it’s not ready.
This simple trick works 90% of the time—far more reliably than guessing by color. Pair it with a gentle thump test, and you’ll never second-guess your harvest again.
✅ DO These for Perfect Ripeness
- Check the ground spot: Creamy yellow = ripe
- Thump near the blossom end: Deep, hollow sound = ripe
- Press the rind: Slight give near stem = ready
❌ DON’T Rely on These (They’re Tricks!)
- Stem color alone: Brown stem ≠ always ripe
- Size or weight: Big doesn’t mean sweet
- Uniform color: Stripes fade as melons age
Another myth? Seedless watermelons ripen faster than seeded varieties, so they need earlier harvesting. I’ve seen gardeners wait too long, thinking the rules apply equally—only to end up with mushy, watery fruit. For seedless types, harvest 2-3 days earlier than seeded melons once the ground spot turns creamy.
Pro tip: If you’re unsure, cut one open (yes, really!). A ripe watermelon has bright red flesh, seeds that sink in water, and a sweet aroma near the rind.
This is the ultimate test—but once you master the ground spot and thump test, you’ll rarely need to slice into your melons prematurely.
Next time you’re staring at a watermelon wondering, “Is it ready?”, skip the guesswork. Focus on the ground spot, thump test, and rind texture. These three clues will give you consistent, sweet results every time—no myths required. 🍉