
How To
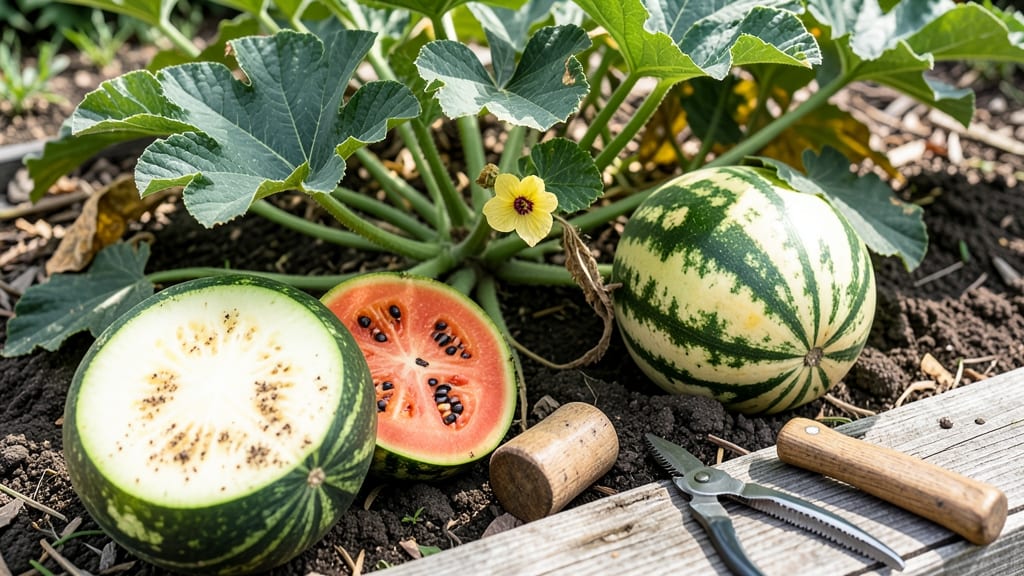
Knowing when to pick a watermelon off the vine means catching that perfect balance between sweetness and texture—before it turns mushy or seedy.
Picking too early means mushy, underripe fruit, while waiting too long risks overripe, seedy disappointments. Whether you're in Zone 6a or further south, these 5 foolproof ripeness tricks will help you harvest your 🍉 at peak flavor every time.
From the classic "thump test" to the often-overlooked field spot trick, I’ll walk you through the most reliable ways to tell when your watermelon is ready—no guesswork required.
You’ll also learn how to adjust for your region, when to pick for sweetness versus storage, and why some "old wives' tales" just don’t hold up. Let’s get started!

5 Visual and physical signs your watermelon is ripe and ready
Harvesting a watermelon at the perfect moment means the difference between juicy, sweet slices and a disappointing, seedy mess. I’ve learned the hard way that relying on days-to-maturity alone isn’t enough—you need to trust your senses.
The good news? Nature gives us clear visual and physical cues to know when that watermelon is ready to pick. These five signs work every time, whether you’re growing heirloom varieties or hybrid favorites.
First, let’s talk about the most reliable indicators: changes in the rind color, the condition of the tendrils, the appearance of the field spot, and even how the watermelon sounds when tapped.
Each of these signals tells a different part of the ripeness story, and when combined, they give you a foolproof way to time your harvest. The key is knowing what to look for—and what to ignore.
- 1 Check the tendril near the stem—it should be brown and dry, not green and flexible.
- 2 Inspect the field spot (where the melon touches the ground)—it should turn from white to cream or yellow.
- 3 Listen for a hollow sound when you thump the melon—a deep, resonant "thud" means it’s ripe.
- 4 Observe the rind color—it should be deep and consistent, not dull or patchy (e.g., dark green, yellow, or red).
- 5 Press your thumbnail into the rind—if it doesn’t dent easily, the melon is likely ripe.
The tendril test is my go-to method because it’s simple and nearly foolproof. Watermelons grow from vines with small, curly tendrils near the stem. When the melon is ripe, the tendril closest to the stem will turn brown and crispy.
This happens because the vine stops sending nutrients to that area once the fruit is fully developed. If the tendril is still green and flexible, give the melon a few more days.
Next, focus on the field spot, the area where the watermelon touches the ground. When ripe, this spot will change from white to cream or yellowish. This color shift indicates the melon has absorbed enough sugar and is ready to harvest.
Pro tip: If the field spot is still white, the melon needs more time on the vine—even if it looks big and heavy.
Now, let’s talk about the thump test, a classic trick that actually works if done correctly. Hold the watermelon with both hands and give it a firm thump with your knuckles. A ripe watermelon will sound deep and hollow, almost like a drum.
If it sounds dull or flat, it’s not ready yet. This test works because the seeds inside mature and dry out, creating air pockets that change the sound. Just don’t thump too hard—you don’t want to bruise the fruit!
The rind color is another critical clue, but it varies by variety. For example, dark green watermelons like 'Charleston Gray' should have a deep, glossy hue with a slight sheen. Yellow or striped varieties, like 'Yellow Doll', will turn a bright, consistent yellow.
Avoid picking melons with patchy or dull-colored rinds, as this often means they’re underripe or overripe. Pay attention to the stem end too—it should turn yellow or brown when the melon is ready.
Finally, the thumbnail test is a quick way to check the rind’s toughness. Press your thumbnail into the melon’s skin. If it doesn’t leave a dent and feels firm, the watermelon is likely ripe. If your thumbnail sinks in easily, the fruit is still too soft and needs more time.
This test is especially useful for smaller varieties like 'Sugar Baby', where other signs might be harder to spot.
Combine these five methods for the most accurate results. For example, I once picked a watermelon based solely on its size, only to find it was underripe and bland.
After that, I started using all five signs—and now I consistently harvest perfectly sweet, juicy watermelons every season. The key is patience and attention to detail.
Remember, watermelons continue to ripen slightly after picking, but they won’t improve dramatically. Once you’ve confirmed all five signs, grab your harvesting shears or a sharp knife, cut the stem about an inch above the melon, and enjoy the fruits of your labor! 🍉
Watermelon ripeness myths debunked: what actually works vs. what doesn’t
Not all watermelon ripeness tests are created equal. Some popular methods actually lead to disappointing harvests, while others consistently deliver sweet, perfectly ripe fruit. Let me break down the science-backed techniques versus the common myths that can trick even experienced gardeners.
First, let’s address the most persistent myth: heavier watermelons are always sweeter. This isn’t true—weight alone doesn’t indicate ripeness. A watermelon’s weight can vary based on size and water content, not sugar development. Always check other signs first before relying on weight.
Another misleading trick is the yellow stem test. While a yellow or brown stem can signal ripeness, a green stem doesn’t automatically mean the fruit is underripe. Some varieties naturally have green stems even when ripe, so combine this with other indicators.
The field spot test (looking for a cream-colored patch where the melon rests on the ground) is one of the most reliable methods. When this spot appears, it’s often a strong sign of ripeness, especially when paired with a dull rind and dry tendrils.
Now, let’s talk about the infamous thump test. Many gardeners swear by it, but here’s the catch: it only works if you know what to listen for.
A hollow, deep sound suggests mature seeds, but a dull thump can mean overripe or underripe fruit. This test is best used alongside other methods.
✅ Science-Backed Methods
Look for cream-colored patch where melon touches soil
Check the tendril near the stem—brown and crispy means ripe
Deep, dull color (not bright green) signals maturity
❌ Common Myths
Weight =/= sweetness; water content varies
Some varieties stay green even when ripe
Requires experience; ambiguous results
Effectiveness Rating: Science-backed methods score 80-90% accuracy, while myths often fail 50% of the time.
For the most accurate results, combine 3-4 ripeness tests. For example, check the field spot, tendril dryness, and rind color before deciding. This multi-method approach minimizes guesswork and maximizes your chances of harvesting watermelons at their sweetest.
Pro tip: If you’re still unsure, cut one open (away from the vine) to test the sweetness. This is the ultimate ripeness check, but it’s best reserved for a few melons to avoid wasting your harvest. Once you master these techniques, you’ll never second-guess your watermelon-picking skills again!