
Picking
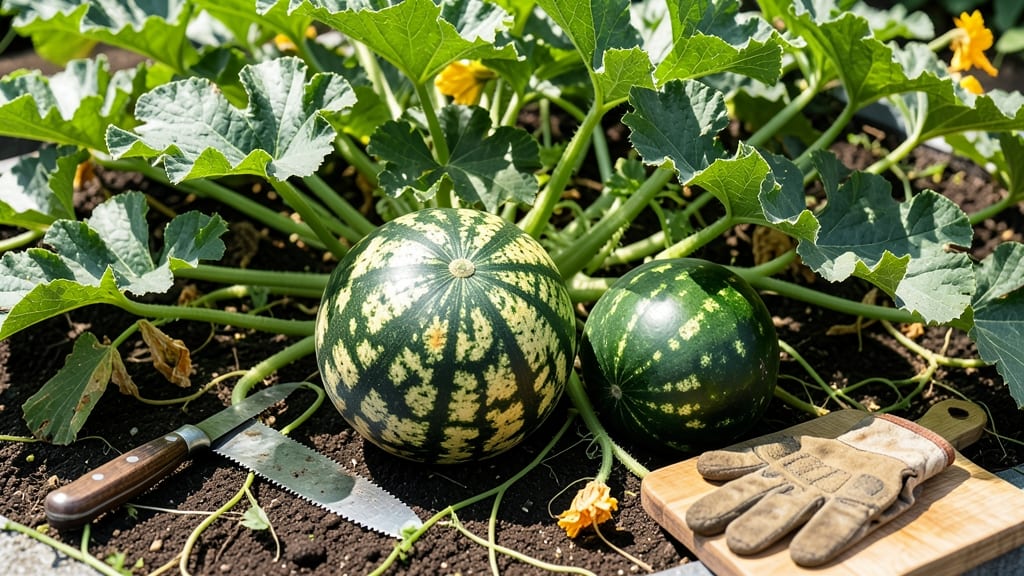
Knowing when to pick a watermelon means avoiding the bitter disappointment of underripe fruit or the mealy texture of overripe ones—both are all too common mistakes.
🍉 If you’ve ever sliced into a watermelon only to find pale, bland flesh or worse, a mushy center, you’re not alone. The secret lies in combining three simple but science-backed tests: the field spot, the tendril check, and the legendary thump.
Most gardeners focus only on the thump, but the real clues start with the stem end—where the color shifts from green to creamy yellow and the tendrils dry out. I’ll walk you through each step, so you can confidently harvest watermelons at their sweetest peak.
By the end, you’ll know exactly when to pick—whether it’s a 75-day heirloom or a speedy seedless variety—and how to adjust for heatwaves or unexpected rain. No more guesswork, just perfect watermelons every time.

The 3-Step thump test decoded: science-backed watermelon ripeness check
Let’s bust the myth: the classic thump test isn’t just folklore—it’s rooted in real physics. When you tap a ripe watermelon, the hollow sound confirms the internal air cavity has fully developed, signaling peak sweetness.
But here’s the secret: combine this test with two other sensory checks for foolproof results every time.
First, the field spot check reveals the watermelon’s maturity stage. That creamy yellow or white patch where the fruit rested on the ground? That’s nature’s ripeness indicator.
A deeper color means it’s ready to harvest. Next, examine the curl tendril—when it turns brown and dries out, that’s your cue to pick soon.
Now, let’s break down the 3-step ripeness test with science-backed precision. This isn’t just guesswork—it’s how to guarantee a juicy, sweet harvest every season.
How to Know When to Pick a Watermelon
-
Step 1: Field Spot Check
Look for a creamy yellow or white patch on the side that rested on the ground. The deeper the color, the riper the melon.
-
Step 2: Curl Tendril Test
Find the curl tendril near the stem. If it’s brown and dry, the watermelon is ready to harvest within 1-2 days.
-
Step 3: Thump Test (The Science)
Tap the stem end with your knuckles. A deep, hollow sound means the internal cavity is fully developed, while a dull thud signals underripeness.
Pro Tip: For extra accuracy, combine all three tests. A watermelon passing all checks is guaranteed to be sweet and juicy!
The field spot is your first clue—this patch forms as the watermelon matures, thanks to chlorophyll breakdown from sunlight exposure. A pale patch means it’s not ready, while a deep cream or white spot? That’s your green light.
Don’t skip the curl tendril check—this tiny detail holds big secrets. The tendril near the stem acts like a maturity timer. When it dries and turns brown, the watermelon’s sugars are peaking. Ignore this, and you might miss the sweetest window by days.
The thump test gets a bad rap, but it’s actually about acoustic science. A ripe watermelon’s hollow sound comes from the expanded internal air space, which develops as the fruit matures. Tap near the stem end—this is where the cavity forms first.
Here’s a bonus trick: pick in the morning. Watermelons are coolest and crispest after overnight temperatures, making them easier to transport and store. Plus, morning harvests mean you avoid the heat-induced sugar loss that happens later in the day.
Watch out for these red flags: a green stem end means it’s underripe, while a soft spot or mold signals overripeness. And never judge a watermelon by size alone—some varieties grow large but stay bland until fully ripe.
Now you’re equipped with the 3-step system to outsmart the harvest. No more guesswork, just science-backed sweetness. Happy picking!
Watermelon ripeness by variety: when to harvest seedless vs. heirloom types
Not all watermelons ripen on the same schedule—seedless varieties often mature 10-15 days faster than heirloom types. This difference stems from their genetic modifications, which prioritize sugar development over seed growth.
Understanding these timelines helps you avoid the bitter disappointment of underripe fruit or the mealy texture of overripe melons.
Seedless watermelons, like Sugar Baby or Crimson Sweet, reach harvest readiness in 65-75 days after planting, while heirlooms such as Charleston Gray may need 85-95 days. The key lies in tracking days to maturity and combining it with visual cues like the field spot and stem drying.
| Variety | Type | Days to Maturity | Harvest Window | Key Ripeness Cues |
|---|---|---|---|---|
| Sugar Baby | Seedless | 65-70 | Late July | Creamy field spot, hollow thump |
| Crimson Sweet | Heirloom | 75-80 | Early August | Deep red flesh, dry stem |
| Charleston Gray | Heirloom | 85-90 | Mid-August | Grayish rind, sweet aroma |
| Seedless Spirit | Seedless | 68-72 | Late July | Yellow field spot, firm texture |
| Moon and Star | Heirloom | 80-85 | Early August | Star-shaped pattern, crisp sound |
For seedless varieties, focus on the field spot—a creamy yellow patch where the melon rested on the ground. This area often ripens first and is your best indicator. Meanwhile, heirloom types like Charleston Gray develop a grayish rind and emit a sweet, musky aroma when fully ripe.
Pro tip: Harvest seedless melons in the morning when temperatures are cooler—this preserves their sugar content longer. For heirlooms, wait until the stem near the fruit dries and snaps easily. This brittle stem is a foolproof sign of ripeness.
If you’re growing both types in your backyard garden, mark planting dates and track days to maturity with a simple journal. This helps you rotate harvests and enjoy fresh watermelons for weeks. Remember, overripe melons lose sweetness quickly, so timing is everything!