
Planting
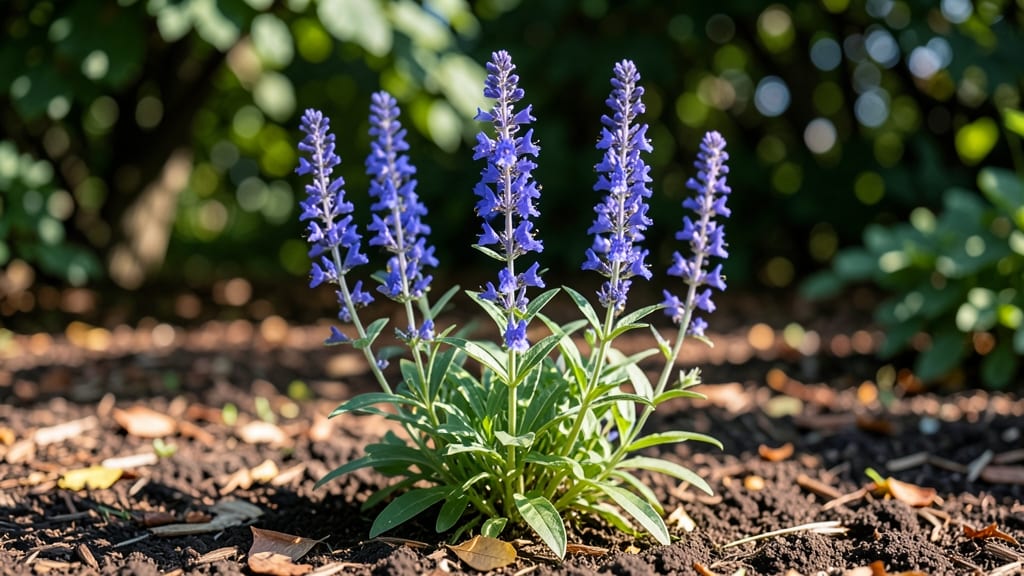
Perennial veronica thrives where others fail—drought-proof blooms that keep coming back year after year, no matter how hot or dry your summer gets. 🌿 I’ve grown these tough little plants through three consecutive droughts, and they’ve never skipped a beat, debunking the myth that they’re high-maintenance divas.
The key? Getting their light, soil, and water just right from day one. These plants love full sun to partial shade and well-draining soil—think sandy loam or amended clay. They’re hardy in zones 3-9, so whether you’re in a cold mountain climate or a scorching desert, veronica adapts.
Once established, they’ll spread like crazy, filling gaps in borders or cascading over walls with lavender-blue or pink blooms from late spring to fall. The real magic happens when you prune them right after flowering.
Snip back about a third of the plant to encourage bushier growth and more blooms next season. And here’s the secret: they hate soggy roots, so mulch well to keep moisture consistent but not soggy. For gardeners who want low-maintenance, high-impact plants, perennial veronica is a game-changer.
Let’s get yours thriving!
📚 In This Guide
- What you need
- Instructions
- Tips and common mistakes
- Wrapping up and next steps
What you need
- ● Perennial Veronica Plants: 3–5 healthy nursery-grown plants (e.g., Veronica spicata or Veronica longifolia). Choose varieties suited to your climate.
- ● Well-Draining Soil: 1–2 cubic yards of sandy loam or gravelly soil (mix in compost for fertility). Avoid heavy clay.
- ● Organic Mulch: 2–3 inches of pine bark or gravel to retain moisture and suppress weeds.
- ● Slow-Release Fertilizer: 10–20 lbs of balanced 10-10-10 or low-phosphorus fertilizer (e.g., Espoma Plant-Tone).
- ● Drip Irrigation or Soaker Hose: 50–100 feet of ¼-inch tubing for efficient watering.
- ● Garden Gloves: 1 pair of nitrile-coated gloves for protection.
- ● Hand Trowel or Spade: 1 stainless-steel trowel (for transplanting) or 1 round-point shovel (for larger plots).
- ● Pruners: 1 pair of bypass pruners (sharp and clean for trimming).
- ● Measuring Tape: 1 25-foot tape for spacing plants 12–18 inches apart.
- ○ Watering Can (Optional): 1 1-gallon galvanized can for seedlings or small patches.
- ● Sunlight: A full-sun to part-sun location (6+ hours of direct sunlight daily).
- ● Water Access: A nearby hose or irrigation source.
- ● Weather Check: Plant in early spring (after last frost) or fall for best root establishment.
Step-by-Step guide to planting and maintaining perennial veronica
Here's how I get these tough, drought-resistant beauties thriving with minimal fuss.
🌱 Step 1: Choose the Right Location and Soil
Veronica thrives in full sun to partial shade, with at least 4-6 hours of direct sunlight daily. I always pick a spot where the soil drains well—veronica hates soggy roots. If your garden has heavy clay, amend the area with 2-3 inches of compost mixed into the top 6 inches of soil to improve drainage.
Loosen the soil to a depth of 12 inches with a garden fork, breaking up any compacted layers. Veronica's shallow roots need loose soil to spread easily. If your soil is sandy, add 1 inch of organic matter to help retain moisture during dry spells. The ideal soil pH for veronica is slightly alkaline, between 6.5 and 7.5.
🌿 Step 2: Plant Veronica Correctly for Long-Term Success
Dig a hole that's just slightly wider than the root ball but no deeper than the container's depth. Gently remove the plant from its container and loosen any circling roots with your fingers. Place the veronica in the hole so the top of the root ball sits ½ inch below soil level—this prevents rot while encouraging strong root growth.
Backfill with the native soil, pressing lightly to remove air pockets. Water deeply right after planting to settle the soil around the roots. I like to add a 1-inch layer of mulch around the base, keeping it 2-3 inches away from the stem to prevent moisture buildup. This mulch layer helps retain soil moisture and keeps roots cool during summer heat.
☀️ Step 3: Water and Fertilize for Healthy Growth
Water newly planted veronica once a week for the first month, giving it 1 inch of water per week. After that, reduce watering to every 2-3 weeks unless your area experiences extreme heat or drought. Veronica is famously drought-tolerant once established, but young plants need consistent moisture to develop strong roots.
Feed your veronica in early spring with a balanced, slow-release fertilizer (10-10-10 works well). Apply it according to package instructions, then water thoroughly. I avoid high-nitrogen fertilizers—they encourage leafy growth at the expense of those stunning blooms. After the first year, veronica rarely needs additional fertilizer unless the soil is particularly poor.
✂️ Step 4: Prune and Maintain for Continuous Blooms
Deadhead spent flowers by pinching off the faded blooms with your fingers or clean pruners. This encourages more blooms and prevents the plant from seeding itself everywhere. I do this throughout the blooming season, which usually runs from late spring to early fall in most climates.
After the first flush of blooms fades in early summer, cut the plant back by one-third to encourage a second round of flowers. This rejuvenates the plant and keeps it looking tidy. In late fall, trim back any dead or damaged stems, but leave the healthy foliage to protect the crown over winter. Veronica is hardy in zones 3-9, so it handles cold well.
⏰ Step 5: Divide and Propagate Every Few Years
Veronica forms dense clumps over time, so I divide mine every 3-4 years in early spring or fall. Dig up the entire plant and gently separate the clumps with a sharp knife or your hands. Replant the divisions immediately in prepared soil, watering well to help them establish.
You can also propagate veronica from stem cuttings taken in early summer. Snip a 4-inch section of non-flowering stem, remove the lower leaves, and dip it in rooting hormone. Plant it in a pot of moist sand or perlite mix, keeping it in bright, indirect light until roots form—usually in 4-6 weeks. This is a great way to share plants with friends or expand your garden.
Tips & tricks for perfect perennial veronica planting
Here's what I've learned after years of growing these tough beauties—tricks that make all the difference between a struggling plant and one that thrives.
Sunlight Secret: While veronica handles partial shade, the most vibrant blooms come from those 4-6 hours of direct sunlight mentioned in Step 1. I've found that morning sun with afternoon shade works best in hotter climates—it prevents leaf scorch while still giving enough light for robust growth. If your garden has limited sun, choose a spot with at least 4 hours of morning sunlight for best results.
Soil Prep Game-Changer: The 12-inch deep loosening in Step 1 is crucial, but I take it further by adding a handful of perlite to the bottom of the planting hole. This creates instant drainage channels that veronica's shallow roots will love. For clay-heavy soils, I mix in 1 part sand to 3 parts native soil when amending with compost—this prevents compaction while still providing nutrients.
Watering Wisdom: That first month of weekly watering with 1 inch per week is non-negotiable, but I've discovered a trick to prevent overwatering: water deeply but less frequently. Instead of daily light watering, give your veronica a thorough soaking once a week. This encourages deeper root growth that makes the plant more drought-resistant over time. Use a rain gauge or tuna can to measure exactly 1 inch of water—eyeballing it often leads to overwatering.
Pruning Pro Tip: When cutting back by one-third in early summer (Step 4), I always make my cuts just above a set of leaves or buds. This encourages new growth from those nodes, giving you a bushier plant with more blooms. Use clean, sharp pruners and make cuts at a 45-degree angle to prevent water from pooling on the stem, which can cause rot. I also like to deadhead in the morning when the blooms are fully open—this gives you the freshest flowers for arrangements and keeps the plant looking tidy.
Pro Tips for Perennial Veronica Plant
- Here's what I've learned after years of growing these tough beauties—tricks that make all the difference between a struggling plant and one that thrives.
- Sunlight Secret: While veronica handles partial shade, the most vibrant blooms come from those 4-6 hours of direct sunlight mentioned in Step 1.
- Soil Prep Game-Changer: The 12-inch deep loosening in Step 1 is crucial, but I take it further by adding a handful of perlite to the bottom of the planting hole.
Frequently asked questions
Got questions about keeping your perennial veronica thriving? You’re not alone! Here are the answers to some of the most common concerns—from planting to long-term care.
How do I prevent my veronica from dying back in winter?
Perennial veronica is hardy—most varieties survive winter with minimal fuss! Mulch around the base (2–3 inches of straw or shredded leaves) to insulate roots. Avoid heavy mulching in wet climates to prevent rot. If your plant looks crispy in spring, don’t panic—new growth will emerge once temps rise above 50°F.
When is the best time to plant perennial veronica?
Spring (after last frost) or early fall (6–8 weeks before first frost) are ideal. Veronica thrives in cooler weather, so avoid planting in scorching summer heat. For container gardening, transplant anytime, but water deeply to reduce transplant shock.
How often should I water my drought-tolerant veronica?
Once established, veronica is truly drought-resistant—water only when the top 1–2 inches of soil feel dry. Overwatering is the #1 killer! In extreme heat, a weekly deep soak (1 inch) keeps blooms vibrant. Pro tip: Group plants with succulents or lavender to cut down on watering trips!
Are there pests or diseases I should watch for?
Veronica is pest-resistant, but watch for aphids (tiny green bugs) or spider mites in dry spells. Spray with water or neem oil if needed. Fungal issues like powdery mildew can occur in humid conditions—improve airflow and avoid overhead watering to prevent it.
Can I grow veronica in containers, or is it strictly a garden plant?
Dwarf varieties like Veronica ‘Sunny Border Blue’ thrive in pots (5+ inches deep). Use well-draining soil and a container with drainage holes. Bonus: Container veronica blooms earlier in spring and stays compact—perfect for patios or balconies!
How do I revive a leggy or floppy veronica?
Leggy growth? It’s often a sign of too much shade or overcrowding. Prune back 1/3 of the plant in early spring to encourage bushier growth. If roots are bound in containers, repot or divide clumps every 2–3 years to refresh vigor.
Wrapping up and next steps
Ready to transform your garden into a low-maintenance, drought-resistant paradise? Perennial veronica plants prove that stunning blooms aren’t just for high-maintenance gardens—these hardy beauties thrive with minimal fuss. Whether you’re a seasoned gardener or just starting, their resilience and vibrant colors make them a must-have for any outdoor space.
🌱 Next steps: Pick your favorite variety, grab your tools, and start planting! Need inspiration? Browse veronica cultivars or pair them with complementary perennials for a show-stopping display. Your garden’s future blooms are waiting—go get them! 🌸