
Tools
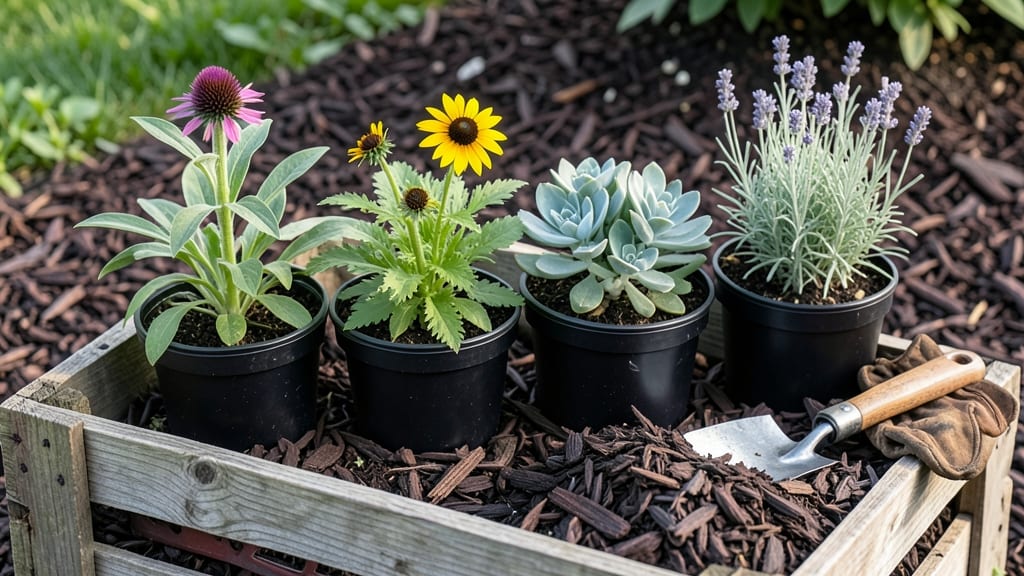
Planting a perennial garden means trading spring chores for years of effortless beauty—once established, these plants return stronger every season. 🌿 I learned this the hard way after digging up my first garden only to realize half the plants would be back next year anyway.
The real magic happens when you group plants by their natural habits: tall backbones like coneflowers, mid-height bloomers like black-eyed Susans, and low-spreading ground covers like creeping thyme. The secret to minimal work lies in soil prep and smart spacing.
Test your soil first—perennials thrive in well-draining, compost-rich beds (amend with 2-3 inches of compost). Space plants 12-18 inches apart to allow airflow and reduce weeds. My biggest mistake? Crowding plants too closely—now I use a tape measure and mark spots with sticks before digging.
By mid-summer, you’ll see why perennials earn their keep: no replanting, fewer pests, and seasonal interest from early spring bulbs to late-fall seed heads. Even in winter, dried stems add texture, and evergreens like heuchera keep the garden alive. The first year takes patience, but after that?
Just deadhead spent blooms and enjoy the show. This approach works for sunny borders, shady woodland edges, or even container gardens. Start small with 5-10 plants to test what thrives in your space—then expand next year. The payoff?
A garden that feels like it’s always in bloom, with 80% less work than annuals.
📚 In This Guide
- What you need
- Instructions
- Tips and common mistakes
- Wrapping up and next steps
What you need
- ● Perennial plants: Choose native or well-adapted varieties (e.g., coneflowers, black-eyed Susans, lavender, or hostas). Aim for 3–5 plants per square foot for full coverage.
- ● High-quality soil: 1–2 cubic yards (for a 10’x10’ garden) of compost-amended native soil or topsoil with 20–30% compost mixed in.
- ● Mulch: 2–3 inches of organic mulch (e.g., shredded bark, straw, or wood chips) to retain moisture and suppress weeds.
- ● Garden gloves: A pair of durable, breathable gloves (e.g., leather or nitrile-coated) to protect your hands.
- ● Hand trowel: A 5–6" stainless steel trowel for digging small holes and transplanting.
- ● Garden hose or watering can: With a spray nozzle for gentle watering.
- ● Pruners: Bypass pruners (for clean cuts) to trim dead foliage or shape plants.
- ● Measuring tape: A 25-foot tape for marking out garden beds accurately.
- ● Stakes or labels: 6–12 wooden or biodegradable plant markers per plant type to track varieties.
- ● Soil test kit: To check pH and nutrient levels (ideal range: 6.0–7.0 for most perennials).
- ● Wheelbarrow: For hauling soil, mulch, or plants efficiently.
- ● Knee pads: For comfort during long planting sessions.
- ● Organic fertilizer: A slow-release granular fertilizer (e.g., 10-10-10) to boost early growth.
- ● Drip irrigation system: For automated watering (especially in dry climates).
- ● Garden journal: To log plant varieties, planting dates, and maintenance notes.
Step-by-Step instructions for planting a perennial garden
Here’s the method I’ve used for years to create gardens that thrive with almost no annual replanting.
🌱 Step 1: Plan Your Layout for Season-Long Interest
Start by sketching your garden design on paper, focusing on height layers: place tall perennials like coneflowers or black-eyed Susans at the back, mid-height plants like catmint or Russian sage in the middle, and low-growing varieties like creeping thyme or sedum at the front. This ensures each season has visual appeal without overcrowding.
I always group plants by water needs—drought-tolerant varieties like lavender together, moisture-lovers like hostas near irrigation sources. Mark these zones on your sketch with colored pencils for clarity. Remember, perennials spread over time, so leave 18-24 inches between plants unless they’re known spreaders like asclepias (butterfly weed).
🪴 Step 2: Prepare the Soil for Long-Term Health
Test your soil’s pH and amend it 2-3 months before planting. For most perennials, aim for a neutral 6.0-7.0 pH. Work in 2-3 inches of compost and 1-2 inches of aged manure into the top 12 inches of soil. This feeds roots deeply and improves drainage—critical for perennials that live for years.
I like to till the area lightly, then rake smooth. Avoid compacting the soil; perennials hate dense roots. If your soil is heavy clay, mix in 1 part perlite to 3 parts soil to improve aeration. Water the amended soil thoroughly before planting to help nutrients settle.
☀️ Step 3: Plant at the Right Depth and Spacing
Dig holes twice as wide as the root ball but only as deep as the top of the root system. This prevents burying stems, which can cause rot. Gently remove plants from their containers and tease apart any circling roots—this encourages outward growth. Place each plant in its hole, then backfill with native soil mixed with a handful of compost.
Press soil firmly around the base to eliminate air pockets, but don’t pack it down. Water deeply to settle the soil and remove any air gaps. Mulch with 2-3 inches of organic mulch (like shredded bark) to retain moisture and suppress weeds. Keep mulch 2 inches away from stems to prevent rot.
✂️ Step 4: Water and Monitor for Establishment
Water newly planted perennials deeply every other day for the first 2 weeks, then taper to once a week once leaves show first true growth. Overwatering now causes root rot, while underwatering stresses plants before they establish. I check soil moisture by sticking my finger 2 inches down—if it’s dry, water again.
Watch for signs of stress: wilting leaves mean more water; yellowing leaves often signal overwatering. Fertilize lightly with a balanced 10-10-10 formula 4-6 weeks after planting to support root growth. Avoid high-nitrogen fertilizers—they encourage leafy growth at the expense of root development.
🌿 Step 5: Mulch and Maintain for Year-Round Success
Replenish mulch annually in early spring to maintain 2-3 inches of coverage. This protects roots from temperature swings and keeps weeds at bay. In late fall, cut back dead foliage but leave seed heads for winter interest and wildlife. I leave 6-8 inches of stems on perennials like coneflowers to overwinter.
Divide clump-forming perennials every 3-4 years in early spring or fall to rejuvenate growth. This prevents overcrowding and ensures vibrant blooms. With proper planning, your perennial garden will reward you with minimal effort and maximum beauty for decades.
Tips & tricks for perfect perennial gardens
Common pitfalls—and how to sidestep every one when creating a low-maintenance perennial garden.
Seasonal Timing Secret: The 2-3 month soil amendment window in Step 2 is non-negotiable for clay-heavy soils. In colder climates, start this process in late winter to ensure nutrients are fully incorporated before spring planting. I've seen gardeners rush this and end up with poor drainage—trust me, the extra patience pays off with healthier roots. For sandy soils, you can reduce this to 4-6 weeks since nutrients leach faster.
Planting Depth Technique: When digging holes in Step 3, the "twice as wide" rule prevents root competition, but depth is where most mistakes happen. I always use a small wooden stake to mark the original soil line on the root ball before removing it from the pot. This ensures I don't bury stems, which causes rot. For container-grown plants, the soil line is usually where the roots start to flare out.
Watering Strategy: The 2-inch soil moisture check in Step 4 is your best friend during establishment. I've learned the hard way that watering schedules vary wildly by season—spring showers might mean you only need to water every 3 days instead of every other day. Keep a small notebook near your garden to track patterns. Overwatering here is the #1 killer of new perennials, so when in doubt, wait an extra day.
Mulch Maintenance: That 2-3 inch mulch layer in Steps 3 and 5 serves double duty—keeping roots cool in summer and insulating them in winter. I use shredded hardwood mulch because it breaks down slowly, but avoid fresh wood chips which can steal nitrogen as they decompose. Replenish annually in spring before the growing season kicks in, and always keep it 2 inches away from stems to prevent moisture-related diseases.
Pro Tips for Planting A Perennial Garden
- Common pitfalls—and how to sidestep every one when creating a low-maintenance perennial garden.
- Seasonal Timing Secret: The 2-3 month soil amendment window in Step 2 is non-negotiable for clay-heavy soils.
- Planting Depth Technique: When digging holes in Step 3, the "twice as wide" rule prevents root competition, but depth is where most mistakes happen.
Frequently asked questions
Got questions about planting a perennial garden?
You’re not alone! Here are some of the most common queries—plus straightforward answers to help you design a low-maintenance, high-reward garden.
How do I choose perennials that thrive in my climate?
Start by researching your USDA Hardiness Zone (find it with a quick online search). Opt for native plants or proven varieties labeled for your zone—like coneflowers (Zones 3-9) or black-eyed Susans (Zones 3-11). Local nurseries are a great resource for climate-specific picks!
When is the best time to plant perennials?
Spring (after the last frost) and early fall (6-8 weeks before the first frost) are ideal. Fall planting gives roots time to establish before winter, while spring ensures a head start for blooms. Avoid planting in extreme heat or cold—roots need stable conditions to settle in!
Are perennials more expensive than annuals?
Upfront costs can be higher, but perennials pay off long-term. A $5 perennial might bloom for 5+ years, while annuals require yearly repurchases. Balance your budget by mixing pricier showstoppers (like hostas) with affordable workhorses (like salvia or sedum).
How do I prevent pests and diseases in a perennial garden?
Healthy soil and proper spacing are your best defenses! Ensure good drainage, mulch to retain moisture, and avoid overcrowding. Monitor for pests early—handpick slugs, use neem oil for aphids, or introduce beneficial insects like ladybugs. Rotate plant families occasionally to disrupt disease cycles.
Can I plant perennials in containers or raised beds?
Containers and raised beds work well for perennials like lavender, heuchera, or Russian sage. Use well-draining soil, larger pots (at least 12" deep), and fertilize regularly. Just note that container plants may need more frequent watering and winter protection in cold climates.
What’s the secret to a perennial garden that looks great year-round?
Layer plants with varying heights, textures, and bloom times. Include evergreens (like hebe), winter interest plants (e.g., ornamental grasses), and spring ephemerals (like bleeding heart). Add mulch for winter protection and early spring color with crocuses or hellebores.
Wrapping up and next steps
Planting a perennial garden is a rewarding way to enjoy year-round beauty with minimal effort—once established, your garden will thrive with vibrant blooms and lush greenery for seasons to come! 🌿 By choosing the right plants, preparing your soil, and planning for long-term care, you’ll create a low-maintenance oasis that keeps giving back.
Ready to dive in? Start small with just a few perennials, observe how they perform, and gradually expand your garden. Your future self will thank you! Happy planting! 🌸