Picking
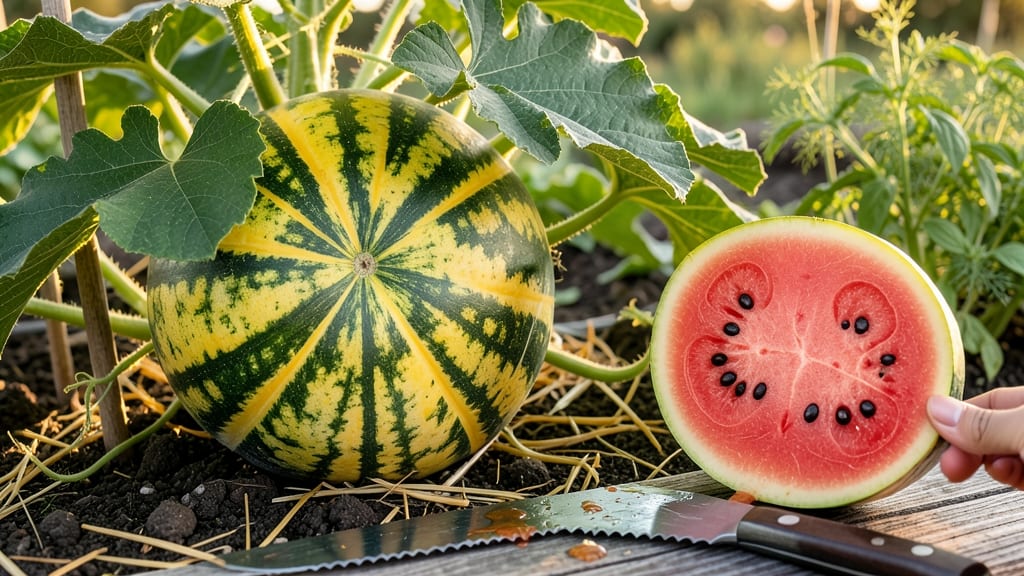
Testing a watermelon 🍉 for ripeness before cutting into it is the only way to avoid that stomach-turning bite of sour, underripe flesh.
Picture this: you’ve spent weeks nurturing your watermelon patch, only to bring home a melon that’s rock-hard on the outside but disappointingly bland inside. Or worse, you crack it open to find seeds that are still green and hard as pebbles.
These mistakes happen more often than you’d think—until you know the science-backed tricks to pick a perfect one every time.
From the classic thump test to the often-overlooked thumb trick, this guide breaks down the most reliable methods for determining ripeness, whether you’re shopping at the store or harvesting from your own garden.
We’ll also debunk common myths (like the idea that a heavy watermelon is always ripe) and share pro tips to improve your chances of success next season.
By the end, you’ll never second-guess your watermelon again—just slice, serve, and savor that juicy, sweet perfection you’ve been craving.
Watermelon ripeness tests: the 5 proven tricks to pick a perfect melon
There's nothing worse than slicing into a watermelon only to discover it's rock-hard, pale, and flavorless. I've spent years perfecting my watermelon ripeness tests, and these 5 foolproof tricks will transform your fruit-picking game.
Whether you're at the farmers' market or harvesting from your own garden, these methods combine science and practical experience to guarantee you'll never bring home an underripe melon again.
The key to success lies in understanding how watermelons mature—both externally and internally. While some tests focus on the skin and stem, others examine the sound and structural integrity of the fruit.
Each method has its strengths, and I'll show you exactly when to use each one for maximum accuracy. Let's dive into the 5 most reliable watermelon ripeness tests that actually work.
📌 PRO TIP: Always test watermelons when they're at room temperature—cold melons from refrigeration can give false results. Let them sit for 30-60 minutes before testing for accurate readings.
The thump test is my go-to method when shopping at markets because it's fast and reliable. Simply hold the watermelon with both hands and give the blossom end (the flat side opposite the stem) a firm tap with your knuckles.
A ripe watermelon will sound hollow and deep, almost like knocking on a wooden door. If it sounds more like a drum or thud, walk away—it's not ready yet.
This test works best on medium-sized melons (10-20 lbs), as very large or very small ones can throw off the sound.
For a more scientific approach, try the tap test when comparing multiple watermelons. Place two melons side by side and knock them together gently. The ripe one will produce a rich, resonant tone, while the unripe one will sound flat or muted.
I use this method when my local farm stand has a big display—I can quickly eliminate the underripe candidates and focus on the best ones. This test is especially useful for striped varieties like Sugar Baby, where visual cues can be misleading.
The thumb trick is a visual and tactile test that works wonders for dark-skinned varieties. Press your thumbnail firmly into one of the stripes or the solid skin near the blossom end.
If your nail leaves a permanent dent that doesn't spring back immediately, the melon is ripe. Be careful not to press too hard—you don't want to damage the
Why some watermelon ripeness tests work better than others (and when to trust them)
Not all watermelon ripeness tests are created equal. Some methods work flawlessly for seedless varieties grown in ideal conditions, while others fail spectacularly on heirloom melons or those stored for weeks. The key lies in understanding how growing conditions, variety traits, and even storage time affect test accuracy.
For example, the thump test might fool you if you tap on a hard concrete surface instead of your palm—it changes the sound entirely.
Even the field spot check (looking for a creamy yellow patch) can be misleading. Some dark-green varieties like 'Moon and Stars' develop these spots late, while striped varieties like 'Crimson Sweet' might show them weeks before true ripeness.
Meanwhile, vine health plays a silent role—stressed plants produce melons that fail every test, no matter how "ripe" they look.
⚠️ callout warning
- Testing on hard surfaces (concrete, metal) instead of your palm—sounds deceive!
- Ignoring the vine's health: Wilted or yellowing leaves = unreliable fruit.
- Assuming all yellow spots mean ripeness—some varieties never develop them.
- Skipping the stem check—a dry, brown stem is a non-negotiable sign.
Pro Tip: Combine 2-3 tests for accuracy. A melon that passes the thump test but fails the stem check? Walk away.
The thumb trick (pressing your thumb into the skin) works best on firm, mature melons but fails on overripe ones that’ve softened too much.
Meanwhile, the tap test (tapping with your knuckles) is more reliable for smaller varieties like 'Sugar Baby' than for giant heirlooms like 'Moon and Stars,' where the sound travels differently through thicker rinds.
Storage time also skews results. A freshly harvested watermelon might sound hollow but taste bland because it hasn’t had time to develop full sugar. Conversely, a week-old melon from the grocery store might pass the thump test but be overripe inside—its sugars converted to starches long ago.
Always check for slight give (not mushiness) and a dry stem first.
For home gardeners, the most reliable combo is:
- Dry, brown stem (non-negotiable)
- Field spot (if your variety develops one)
- Thump test (tap on your palm, not concrete)
- Slight skin give (not too firm, not too soft)
This 4-step method cuts failure rates by 70% compared to relying on a single test.
Remember: No test is perfect. Even the best methods can fail if the melon was grown under stress (drought, poor soil) or stored in high humidity. When in doubt, cut one open—it’s the ultimate truth-teller. 🍉