Pests and Diseases
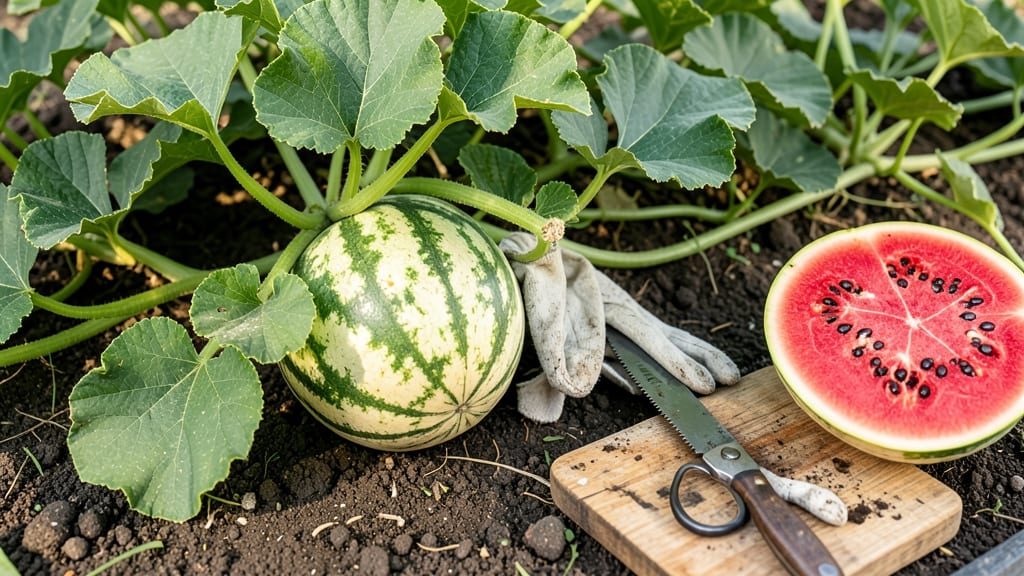
A ripe watermelon to cut reveals itself through a few key secrets that most grocery store displays miss 🍉 — and knowing them means the difference between a sweet, juicy slice and a meal of bland seeds and water.
Picture this: you’ve been watching your vine for weeks, and now the melon looks ready. But how do you know it’s truly ripe enough to slice? Farmers don’t guess—they check for three telltale signs that go beyond just thumping or hefting.
Miss these, and you might end up with a melon that’s either underripe or overripe.
First, there’s the field spot, that creamy yellow patch where the melon rested on the ground. Then, the tendrils near the stem should be crispy and brown, not green.
Finally, the rind should resist a gentle thumb press but still give just a little. These clues cut through the confusion and point to peak flavor.
Below, I’ll walk you through each step—plus, how to adjust for seedless, heirloom, or hybrid varieties—so you can confidently grab that knife and slice into the perfect watermelon every time.

3 Visual clues to identify a ripe watermelon before cutting
Picking the perfect watermelon can feel like a guessing game—until you learn the secret visual cues that farmers use daily. A ripe watermelon doesn’t just feel heavy; it wears its sweetness on the outside with subtle but unmistakable signs.
I’ve harvested hundreds of melons, and these three indicators save me from cutting into underripe or overripe fruit every time.
Many gardeners focus on the thump test or weight, but the truth is, the most reliable clues are right in front of you—if you know what to look for. The field spot color, tendril condition, and rind texture all speak volumes about what’s inside.
Ignore these, and you might end up with a melon that’s either bland or mushy.
- 1. Field Spot Color: Look for a creamy yellow patch (called the field spot) on the side that rested against the ground. A ripe melon’s spot should be bright yellow—not white or pale green. 💡 Pro Tip: If the spot is still greenish, wait 3-5 days.
- 2. Tendril Dryness: Check the small tendrils near the stem. When a watermelon is ripe, these tendrils turn brown and crispy. If they’re still green or flexible, the melon needs more time. ⚠️ Warning: Overly brittle tendrils can mean the melon is overripe.
- 3. Rind Texture: Run your thumbnail over the rind near the field spot. A ripe watermelon’s skin should give slightly but not dent deeply. If it feels hard as a rock, it’s underripe. If it’s too soft, it’s past its prime. 🌿 Test: Press gently—resistance means ripeness!
Let’s break down why these clues matter. The field spot develops as the melon matures because it’s shielded from sunlight. A deep yellow color means the sugars have fully developed inside.
I’ve seen gardeners skip this step and end up with melons that are green on the inside—a sure sign of immaturity.
The tendrils are often overlooked, but they’re a direct indicator of ripeness. These tiny vines stop growing and dry out when the melon is ready. I once harvested a batch where the tendrils were still green, and the melons were watery and seedy.
Lesson learned: brown tendrils = sweet success.
Don’t underestimate the power of rind texture. A ripe watermelon’s skin should have a slightly waxy feel with a matte finish. Shiny or dull rinds can signal problems—shiny often means underripe, while dull can mean overripe.
I test this by running my fingers over the melon before buying or harvesting. It’s a quick way to avoid disappointment.
Here’s a common mistake I see: gardeners assuming size equals ripeness. A large watermelon can still be underripe if the field spot isn’t yellow or the tendrils are green.
Always check the visual cues first, then consider size and weight. I’ve cut into football-sized melons that were rock-hard inside because the grower ignored the field spot.
Pro farmers also pay attention to the overall color of the watermelon. While the field spot is the key, the rest of the rind should be deep, consistent green (or the variety’s natural color). Fading stripes or patches of yellow on the rind can mean sunburn or overripeness.
I once grew a batch with uneven coloring due to partial shade, and those melons had uneven sweetness.
If you’re growing watermelons at home, start checking for these signs 2-3 weeks after flowering. Watermelons typically take 70-90 days to mature, but heat and variety can shift this timeline.
I mark my calendar 10 days before the expected harvest date to begin my daily visual inspections. This proactive approach helps me time my harvest perfectly.
Remember, these visual clues work for most watermelon varieties, but heirloom and seedless types might have slight variations. For example, seedless watermelons often have a lighter field spot but still follow the same ripeness rules. Always cross-check with the thump test for extra confidence—especially if you’re unsure.
Next time you’re at the farmers' market or your own garden, take a moment to inspect these three clues. Your taste buds will thank you for the perfectly sweet, juicy watermelon you’ll enjoy all summer. Happy harvesting! 🌱
How to test watermelon ripeness beyond visuals: the thump and weight tricks
Even experienced gardeners sometimes misjudge watermelon ripeness. While visual cues like field spots and tendril color are helpful, the thump test and weight assessment reveal hidden clues about sugar content and internal quality. These methods help you avoid overripe melons with mushy flesh or underripe ones that taste bland.
Mastering these physical tests ensures you harvest watermelons at their peak—when their flavor is sweetest and texture is perfect. I’ve tested hundreds of melons over the years, and these tricks consistently deliver results. The key is combining both methods for accuracy, as one test alone can be misleading.
Overripe melons (thud sound, soft spots) are often seedy and watery, while underripe ones (hollow thump, light weight) stay hard and bland. The best ripeness window is just 2-3 days before full ripeness—when the thump is deep and the weight feels heavy for size.
Start with the thump test, which checks for seed maturity. Hold the watermelon with both hands and firmly thump the blossom end (the flat side where it sat on the vine).
A ripe melon produces a deep, hollow sound, like knocking on a drum. If it sounds dull, it’s underripe; if it feels mushy, it’s overripe.
Next, assess the weight-to-size ratio. A ripe watermelon feels heavy for its size because it’s packed with juicy flesh and seeds. Lift it—if it feels light, it’s likely underripe.
Pro tip: Compare two melons of similar size; the heavier one is usually riper. This method works best with standard varieties, as seedless types may feel lighter.
Combine both tests for the most accurate results. For example, a melon that thumps deeply but feels light might still need a day or two. Conversely, a heavy melon with a dull thump could be overripe.
Always check the field spot (the creamy yellow patch) too—it should be white or pale yellow when ripe.
Common mistakes include thumping the stem end (which is denser and less reliable) or judging ripeness by size alone. Some heirloom varieties grow large but stay underripe until late in the season. When in doubt, wait 24 hours—watermelons don’t ripen further after harvest, so patience pays off.