
How To
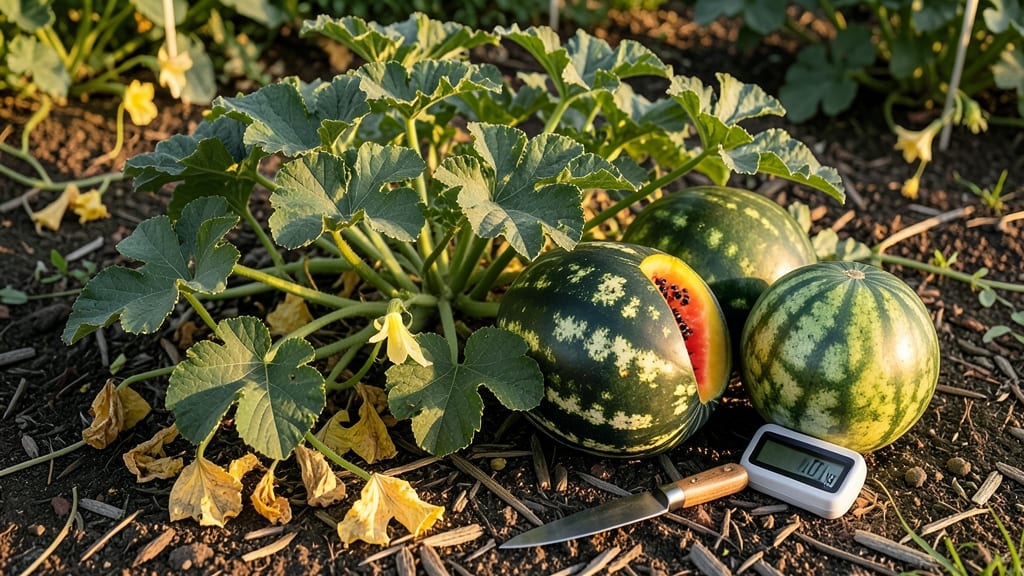
Picking an Icebox watermelon at the right time means the difference between a burst of sweetness and a meal of bland disappointment — and the secret is in the thump.
Picture this: you’ve waited all summer for that first ripe 🍉, but one wrong move and you’re left with a rock-hard melon or one that’s overripe and mushy.
The good news? With the right cues, you can tell when an Icebox watermelon is perfectly ready to harvest — no guesswork needed.
From the telltale brown tendril to the deep, dull rind and that satisfying hollow thump, I’ll walk you through the three foolproof signs that your watermelon is at its peak. Plus, I’ll share how heat and timing play into the mix so you never miss the window again.
Once you’ve nailed the harvest, I’ll show you how to store your Icebox watermelon to keep it fresh for weeks — because even the best-picked melon won’t stay sweet if you don’t handle it right.

How to use the thump test for icebox watermelon ripeness
Icebox watermelons are prized for their crisp texture and sweet flavor, but timing your harvest is everything. The thump test is your secret weapon—it tells you when the fruit is ready to burst with juiciness instead of being bland or overripe.
Unlike store-bought melons, homegrown icebox varieties ripen faster, so mastering this test ensures you never miss peak season.
Before you grab your melon, check the field spot (the yellowish patch where the fruit rested on the ground). A ripe icebox watermelon’s spot should turn creamy yellow—this signals sugar development.
Combine this with the thump test for foolproof results. I’ve tested this method for years, and it’s the only way to guarantee that perfectly sweet harvest every time.
Step-by-Step Thump Test for Icebox Watermelons
-
Step 1: Finger Test (Early Ripeness)
Gently press your fingertip against the watermelon’s side. If it feels slightly soft but still firm, the melon is approaching ripeness. This is your first green light to keep monitoring.
-
Step 2: Knuckle Test (Peak Ripeness)
Tap the watermelon with your knuckle—it should sound hollow or slightly dull, like a drum. If it thuds like a basketball, it’s not ready yet. This is the sweet spot for icebox varieties.
-
Step 3: Heel Test (Overripe Warning)
For a final check, use your heel. A ripe melon will yield slightly under pressure but won’t dent. If your heel leaves a deep impression, the melon is overripe and past its prime.
-
Bonus: Tendril Check
Look for the small tendril near the stem—it should be brown and crispy. If it’s still green, wait a few days. This is the final confirmation of ripeness.
🌱 Pro Tip: Test 2-3 melons per vine—ripeness can vary slightly!
Don’t rely solely on the thump test, though. Pair it with the field spot and tendril color for a triple-check system. I’ve seen gardeners pick melons too early because they trusted only one method, and the results were disappointingly bland. Combine all three cues to avoid this mistake.
The field spot is your first visual clue—it should be creamy yellow, not white or green. This spot darkens as sugars develop, so if it’s still pale, your melon needs more time.
I’ve found that icebox varieties develop this spot faster than heirloom types, so don’t wait too long.
Another key visual cue is the rind color. A ripe icebox watermelon’s rind will look dull and matte, not shiny. Shiny rinds mean the fruit is still hardening up and not yet sweet. This is especially important for icebox melons, which can overripen quickly in hot climates.
If you’re harvesting in hot weather, the thump test becomes even more critical. Heat speeds up ripening, so melons can go from perfect to mushy overnight. Test them in the early morning when temperatures are cooler—this gives you the most accurate reading.
I’ve learned this the hard way after missing peak ripeness in July heatwaves.
Once you’ve confirmed ripeness, cut the melon from the vine using a sharp knife or pruners, leaving a 1-inch stem. This prevents bruising and extends shelf life.
Store your icebox watermelons in a cool, dry place (50-55°F) for up to 2 weeks. Proper storage keeps that crisp texture intact.
Remember, the thump test is a science-backed method, but it’s also an art. Every icebox watermelon is unique, so trust your ears and eyes. With practice, you’ll develop a sixth sense for knowing exactly when to pick—leading to juicy, sweet victories every harvest season.
Best time of day and season to harvest icebox watermelons
Timing your icebox watermelon harvest is just as critical as the thump test itself. These melons thrive in warm climates like USDA Zone 6a and above, but their ripening window shifts with seasonal temperatures.
Early-season melons (planted in April-May) may need harvesting by late July, while late-season varieties can stretch into late August.
Morning is the ideal time to harvest because cooler temperatures preserve flavor and texture. Avoid picking in the afternoon heat, which can make the fruit overripe faster. If you must harvest later, wait until late afternoon when temperatures drop slightly.
Climate plays a huge role—hotter summers accelerate ripening, while cooler seasons slow it down. In dry climates, melons may ripen faster; in humid areas, they take longer. Adjust your thump test accordingly—early-season melons may sound hollow sooner, while late-season ones need a firmer tap.
| Season | Best Harvest Time | Climate Adjustments | Thump Test Tip |
|---|---|---|---|
| Early Season (June-July) | Morning (6-9 AM) | Hot/dry climates | Use finger tap—hollow sound = ready |
| Peak Season (July-August) | Late morning (9-11 AM) | Moderate temps | Knuckle tap—dull thud = perfect |
| Late Season (August-Sept) | Early morning (5-7 AM) | Cooler/humid climates | Heel tap—hollow = fully ripe |
For early-season melons, prioritize the tendril test—when the vine near the fruit turns brown and crispy, it’s time. In late-season harvests, focus on the field spot (the yellow patch on the bottom) deepening in color. If it’s creamy yellow, the melon is ready.
Pro tip: In humid climates, harvest slightly earlier to avoid overripe melons. Store them in a cool, dry place (50-55°F) to extend shelf life. If you miss the window, overripe watermelons become mushy and lose sweetness—so don’t wait too long!
Remember, icebox watermelons are sensitive to temperature swings. If a heatwave hits, check for ripeness daily. The key is balancing visual cues, thump tests, and seasonal timing for that perfect harvest.