
Plants
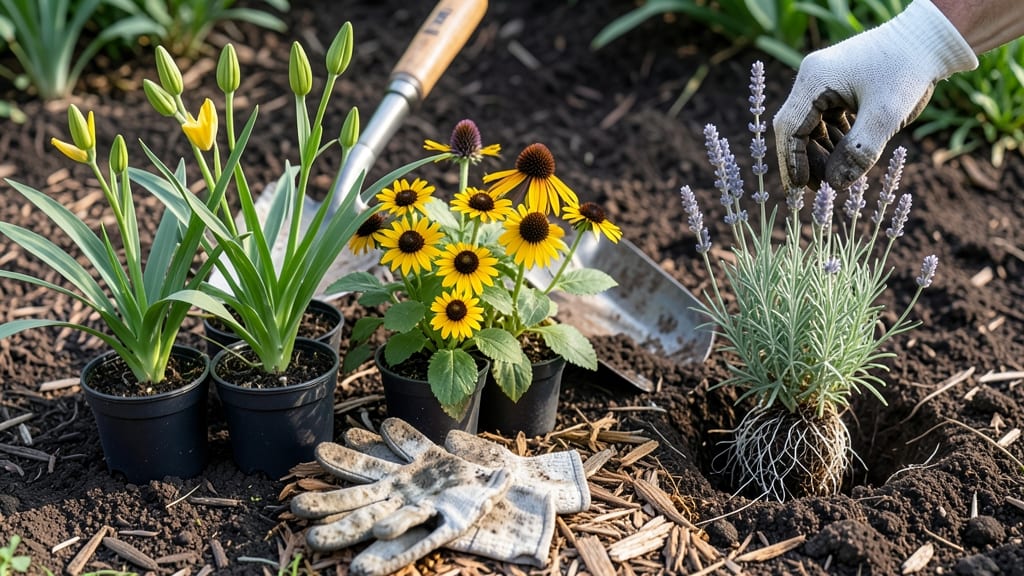
Planting perennials in spring as soon as the soil warms to 50°F and stays reliably frost-free is the golden rule for thriving plants. 🌱 I’ve learned the hard way—waiting too long means struggling with leggy, weak stems that never establish strong roots.
The key is timing it right after your last frost date, which varies wildly from zone 3’s late May to zone 10’s February. Your first step is checking your local frost-free date (I use the Almanac’s Frost Calculator), then prepping soil with compost or aged manure.
Perennials hate soggy soil, so if your spring is wet, wait until the ground drains well. Planting in the morning or on a cloudy day helps young roots settle in without stress.
📚 In This Guide
- What you need
- Instructions
- Tips and common mistakes
- Wrapping up and next steps
What you need
- ● Perennial plants: Choose healthy, disease-free starts or bare-root plants (quantity depends on your garden size). Opt for local nursery varieties adapted to your USDA Hardiness Zone.
- ● Garden trowel: A sturdy, 6–8-inch trowel for digging holes (1–2 units). Look for ergonomic handles for comfort.
- ● Garden fork or spade: For loosening soil (1 unit). A broadfork is ideal for aerating without disturbing roots.
- ● Compost or organic fertilizer: 5–10 lbs (depending on garden size). Use a balanced mix like 10-10-10 or composted manure.
- ● Mulch: 2–3 inches of organic mulch (e.g., shredded bark, straw, or wood chips) to retain moisture and suppress weeds.
- ● Watering can or hose with a gentle spray nozzle: For post-planting hydration. A 5-gallon capacity is ideal.
- ● Gloves: Heavy-duty gardening gloves to protect your hands from thorns or rough soil.
- ● Measuring tape or ruler: To ensure proper spacing (depth and width vary by plant type).
- ● Soil test kit: To check pH and nutrient levels (especially useful if your soil is unknown). Aim for a neutral to slightly acidic pH (6.0–7.0) for most perennials.
- ● Plant labels: Waterproof tags or a labeling system to track varieties and planting dates.
- ● Pruners: For trimming dead foliage or adjusting plant size before planting.
- ● Planting grid or staking system: For larger gardens or to maintain uniform spacing.
- ● Knee pads or a small stool: For comfort during long planting sessions.
- ● Organic pest control: Neem oil or diatomaceous earth (pre-mixed spray) to deter early-season pests.
Instructions: planting perennials at the perfect spring timing
Timing matters more than you think—plant too early and frost will kill them, too late and they’ll struggle to establish roots before summer heat.
📅 Step 1: Determine Your Last Frost Date
Find your USDA hardiness zone on the USDA Plant Hardiness Zone Map—this tells you when average spring frosts occur in your area. For most perennials, aim to plant 2-4 weeks after your last frost date. In Zone 5, that’s typically mid-to-late May; in Zone 8, early March. Check local weather forecasts for confirmation—sudden cold snaps happen even after frost-free predictions.
Here’s the thing—some perennials handle cooler soil better. Hardy varieties like peonies or lavender can go in as soon as soil is workable (around 50°F), while tender perennials like salvia or canna lilies need to wait until soil reaches 60°F. Dig a spade into the ground—if the soil crumbles easily, it’s ready.
🌱 Step 2: Prepare the Soil Before Planting
Test your soil’s pH and amend it 2-4 weeks before planting—perennials thrive in well-draining soil with a pH of 6.0-7.0. Mix in 2-3 inches of compost or aged manure to improve fertility, and work in 1 inch of perlite or coarse sand if your soil feels heavy or clay-like. Avoid fresh manure—it burns roots and can introduce weeds.
Loosen the soil to a depth of 12 inches with a garden fork or tiller. You’ll see roots spread deeper and establish faster in loose soil. If you’re planting in fall-prepared beds, skip this step—just refresh the mulch layer instead.
☀️ Step 3: Plant After Soil Warms and Daylight Increases
Wait until daytime temperatures consistently stay above 50°F—this ensures roots won’t shock from cold soil. Most perennials benefit from longer daylight hours (14+ hours), which boosts photosynthesis and helps them establish faster. In cooler climates, plant in morning sunlight to reduce stress; in hot zones, opt for late afternoon to avoid midday heat.
Dig holes twice as wide as the root ball but no deeper—planting too deep suffocates roots. Space perennials according to their mature size: 18-24 inches apart for small varieties, 3-4 feet for large shrubs. Water deeply before planting to encourage roots to expand into moist soil.
💧 Step 4: Water and Mulch for Strong Establishment
Water deeply immediately after planting—aim for 1 inch of water per week (more in hot/dry climates). Use a soaker hose or drip irrigation to keep moisture even and prevent fungal diseases from overhead watering. Check soil moisture by sticking your finger 2 inches deep—if it’s dry, water again.
Apply 2-3 inches of mulch (straw, shredded bark, or leaves) to retain moisture and regulate soil temperature. Keep mulch 2 inches away from plant stems to avoid rot. This step is non-negotiable—mulch reduces watering needs by 30-50% and protects roots from temperature swings.
⏰ Step 5: Monitor and Adjust for Local Conditions
Watch for new growth—this signals successful establishment. If leaves yellow or wilt, it’s often due to overwatering or poor drainage. Adjust your watering schedule based on rainfall: skip watering if you’ve had 1 inch of rain in the past week. In hot zones, water early morning to prevent evaporation.
Fertilize lightly 4-6 weeks after planting with a balanced, slow-release fertilizer (10-10-10). Avoid high-nitrogen feeds—too much greenery weakens roots. If your perennials look stressed (leggy stems, sparse foliage), they may need more sunlight or better soil drainage. Adjust their placement if needed.
Tips & tricks for perfect spring perennial planting
Getting the timing right with perennials can mean the difference between thriving plants and wasted effort. Here's what I've learned from years of trial and error in the garden.
Zone-Specific Flexibility: While the instructions give general guidelines, your actual planting window might shift slightly based on microclimates. For example, if you're in Zone 6 but have a south-facing slope that warms up faster, you might plant hardy varieties like daylilies or coneflowers 1-2 weeks earlier than the standard 2-4 weeks after last frost. Use your own backyard observations—if you've noticed daffodils blooming reliably by mid-April, that's your natural indicator for cooler-tolerant perennials.
Soil Temperature Test: The soil temperature check in Step 1 is your best friend. I always test soil temperature by inserting a soil thermometer 4-6 inches deep in the afternoon when the sun has warmed things up. For tender perennials, aim for 60°F consistently for 3-5 days before planting. Pro tip: If your soil is still cold but you're eager to plant, consider using black plastic mulch 1-2 weeks before planting—it warms the soil by 5-10°F faster than bare ground.
Root Ball Preparation: When you're digging those holes twice as wide as the root ball in Step 3, don't stop at just loosening the soil. I like to mix in a handful of mycorrhizal fungi (available at garden centers) directly into the planting hole. These beneficial fungi help establish a symbiotic relationship with your perennials' roots, improving nutrient uptake and drought resistance. It's especially helpful for new plantings in less-than-ideal soil.
Mulch Layer Strategy: The instructions mention applying 2-3 inches of mulch, but here's my preferred approach: Start with 1 inch of compost directly on the soil surface (this feeds the roots as it breaks down), then add your 2 inches of mulch on top. This two-layer system gives you the moisture retention benefits while also providing a slow-release nutrient boost. Just make sure to pull mulch back 2 inches from stems to prevent rot.
Pro Tips for When To Plant Perennials In Spring
- Getting the timing right with perennials can mean the difference between thriving plants and wasted effort. Here's wh...
- Zone-Specific Flexibility: While the instructions give general guidelines, your actual planting window might shift sl...
- Soil Temperature Test: The soil temperature check in Step 1 is your best friend. I always test soil temperature by in...
Frequently asked questions
Got questions about planting perennials in spring? You’re not alone! Here are answers to the most common concerns to help you feel confident and ready to dig in.
When is the exact best time to plant perennials in spring?
The golden rule is to wait until the soil is workable (around 60°F) and the last frost date has passed in your zone. For most regions, this lands between mid-April and early June. Check your local frost dates for precision—patience here prevents root shock!
Can I plant perennials too early if there’s still a chance of frost?
Yes, but with caution! Hardy perennials (like lavender or coneflowers) can handle light frost, but tender varieties (like cannas) will bolt or die. Use row covers or plant in containers for mobility. When in doubt, wait 2–3 weeks after the last frost warning.
What if I miss the spring planting window? Can I still plant perennials?
Many perennials thrive when planted in early fall (4–6 weeks before your first frost). This gives roots time to establish before winter. Just avoid planting in extreme heat or drought—water deeply to help them settle in.
Should I divide perennials in spring or wait until fall?
Both work, but spring is ideal for early bloomers (like irises or peonies) to establish before summer heat. Fall division suits late bloomers (e.g., daylilies) and reduces stress. If dividing, do it on a cool, cloudy day to minimize transplant shock.
My perennials look wilted after planting—what’s wrong?
Don’t panic! Wilting often means root shock or thirst. Water deeply (1–2 inches) and mulch to retain moisture. Avoid fertilizing right away—let roots recover for 2–3 weeks. If leaves yellow, check for overwatering or poor drainage.
Pro Tip:
Use a moisture meter or the "squeeze test" (soil should hold together but crumble when pressed) to gauge planting readiness. Happy planting—your garden will thank you!
Wrapping up and next steps
Planting perennials in spring is all about timing—aim for after the last frost and when soil is workable, but don’t wait too long! By checking your USDA Hardiness Zone and monitoring soil temperatures, you’ll set your garden up for vibrant, long-lasting blooms. 🌱
Ready to get started? Grab your gardening gloves, mark your calendar, and watch your perennials thrive—your future garden will thank you! For extra confidence, download our zone-specific planting guide to keep track of deadlines.