
Landscaping
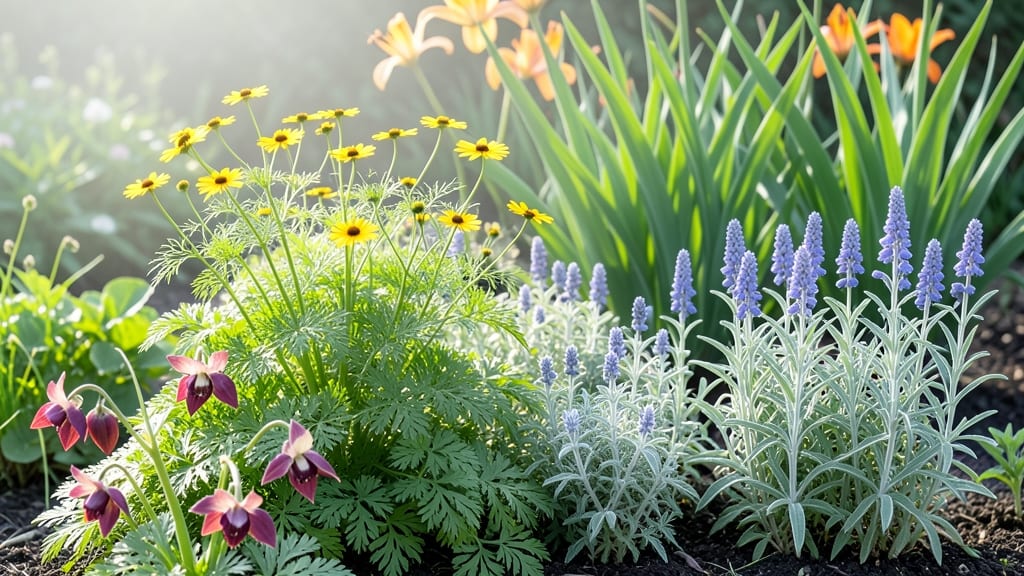
Cold-hardy rebloomers that stay lush through winter are the secret to a border that never looks tired. 🌱 I’ve spent years hunting for perennials that thrive in the front row—where they get stepped on, baked by afternoon sun, and still bounce back with color year after year.
The key is choosing plants that spread, self-clean, and handle tough conditions without fuss. My go-to lineup includes sedum ‘Dragon’s Blood’ for its deep red foliage, heuchera ‘Palace Purple’ for velvety texture, and ajuga ‘Chocolate Chip’ for its metallic leaves and blue flowers.
These stay compact (under 12 inches tall), handle foot traffic, and bloom from early spring through fall. The best part? They multiply every year, filling in gaps automatically. You’ll end up with a border that looks intentional, not fussy—year-round color, even when other plants are dormant.
Pair them with creeping thyme for ground cover and catmint ‘Walker’s Low’ for airy texture, and you’ve got a combo that’s both tough and beautiful. No dead zones, no weeding nightmares. Works in full sun or partial shade, for any climate zone. Once planted, they’ll outperform annuals every season.
Let’s design that low-maintenance edge!
📚 In This Guide
- What you need
- Instructions
- Tips and common mistakes
- Wrapping up and next steps
What you need
- ● Perennial plants: Choose cold-hardy rebloomers like Coneflower (Echinacea), Black-Eyed Susan (Rudbeckia), or Russian Sage (Perovskia). Buy 3–5 plants per variety for a full, layered look.
- ● High-quality potting soil or native soil mix: 1–2 cubic yards (depending on bed size). Opt for well-draining, organic-rich soil.
- ● Compost or aged manure: 1–2 bags to enrich soil and boost plant health.
- ● Mulch (pine straw, shredded bark, or wood chips): 2–3 bags to retain moisture and suppress weeds.
- ● Garden trowel or spade: For digging and planting.
- ● Garden fork: To loosen compacted soil.
- ● Pruners (bypass or felco): For shaping and deadheading.
- ● Wheelbarrow or bucket: 1–2 for hauling soil and tools.
- ● Garden hose with spray nozzle: For watering (or a soaker hose for efficiency).
- ● Measuring tape or string: To mark planting spacing (aim for 18–36 inches apart, depending on mature plant size).
- ● Sunlight assessment: Ensure your front border gets full sun (6+ hours/day) to partial shade—most rebloomers thrive in these conditions.
- ○ Soil test (optional but helpful): Check pH (aim for 6.0–7.0) and nutrient levels at your local extension office.
- ● Water source nearby: Perennials need 1–1.5 inches of water per week (more during droughts).
- ● Slow-release fertilizer: 1 bag (e.g., 10-10-10) for a nutrient boost at planting.
- ● Garden gloves: To protect your hands from thorns or rough soil.
- ● Plant labels: 10–20 to track varieties (especially useful for rebloomers!).
Step-by-Step guide to designing a low-maintenance front-of-border perennial display
Here's how to create a resilient, visually striking front border that thrives year after year with minimal intervention.
🌱 Step 1: Select Cold-Hardy Reblooming Species
Choose plants that combine Zone 3-5 hardiness with multiple bloom cycles. My go-to front-of-border performers include catmint (Nepeta), Russian sage (Perovskia), and coral bells (Heuchera)—each offers 3-4 weeks of continuous color and self-seeds minimally. Avoid tall grasses or late-blooming perennials that will overwhelm the space.
Look for cultivars with mounded growth habits (under 12 inches tall) that won't flop forward. I always check the USDA hardiness zone on the tag and verify reblooming tendencies—some "perennials" bloom once and fade. Plant in odd-numbered groupings of 3, 5, or 7 for natural visual flow.
☀️ Step 2: Prepare the Planting Site for Drainage and Sun
Front borders often suffer from poor drainage due to foot traffic or sloped terrain. Amend the native soil with 2-3 inches of compost mixed into the top 6 inches to improve structure. If your site stays soggy after rain, consider raised beds or mounded soil—1-2 inches higher than surrounding ground prevents waterlogging.
Position the border to receive at least 6 hours of sunlight daily. Most front-of-border perennials tolerate partial shade (3-6 hours of sun), but rebloomers like catmint and lavender will reward you with longer bloom seasons in full sun. Mark the planting area with stakes to visualize the 12-18 inch spacing between plants.
🪴 Step 3: Plant in Staggered Rows for Texture and Longevity
Arrange plants in two staggered rows to create depth and prevent crowding. Place taller varieties (like Russian sage) in the back row and shorter, spreading types (like creeping thyme) in front. This ensures every plant gets adequate airflow and light—critical for preventing fungal diseases that thrive in dense, humid conditions.
Dig holes twice as wide as the root ball but only as deep as the container. Gently remove plants from pots and tease apart roots if they're circling. Backfill with native soil mixed with a handful of bone meal for phosphorus to encourage strong root establishment. Water deeply immediately after planting to eliminate air pockets.
✂️ Step 4: Implement Minimal Care for Year-Round Interest
After establishment, the key to low-maintenance borders is seasonal pruning and mulching. In early spring, cut back dead foliage to 2-3 inches above ground level—this removes overwintering pests and encourages fresh growth. Apply 2-3 inches of shredded bark mulch to retain moisture and suppress weeds without smothering plants.
Deadhead spent blooms every 2-3 weeks during the growing season to redirect energy into new flowers. I use sharp pruners to snip just above the first set of healthy leaves—never cut into woody stems. In late fall, leave some seed heads for winter interest, but remove any diseased foliage immediately to prevent soil-borne pathogens from overwintering.
💧 Step 5: Water Strategically for Drought Tolerance
Newly planted perennials need 1 inch of water weekly for the first 2-3 growing seasons to establish deep roots. After that, most front-of-border perennials become drought-tolerant once established. Water deeply but infrequently—aim for 1-2 inches per week—to encourage roots to grow downward rather than staying shallow.
Water in the early morning to reduce evaporation and fungal risks. You'll know your border is properly hydrated when the soil 1-2 inches below the surface feels moist but not soggy. Avoid overhead sprinklers that can spread disease—use soaker hoses or drip irrigation instead. Once plants are established, you'll only need to water during prolonged dry spells.
Tips & tricks for perfect cold-hardy perennial borders
Creating a stunning front border that practically cares for itself takes a few strategic moves—and avoiding some common pitfalls. Here's what I've learned from years of trial (and a few too many overcrowded failures).
Plant Selection Wisdom: When choosing your Zone 3-5 perennials, prioritize plants with mounded growth habits under 12 inches tall—these won't flop forward like leggy varieties. I've found that odd-numbered groupings (3, 5, or 7 plants) create more natural visual flow than even numbers. Pro tip: Look for tags that specify "reblooming" rather than assuming all perennials will flower multiple times.
Soil Preparation Secret: The 2-3 inches of compost mixed into the top 6 inches of soil is non-negotiable for drainage, but here's what nobody tells you—if your site stays soggy after rain, create raised beds or mound soil 1-2 inches higher than surrounding ground. This simple elevation change prevents root rot that can silently kill your border before it even establishes. Test your soil's drainage by digging a hole, filling it with water, and watching how quickly it drains—if it takes more than 2 hours, you need to amend.
Staggered Planting Technique: The two-row staggered arrangement in Step 3 isn't just for looks—it's a disease prevention strategy. By placing taller varieties like Russian sage in the back and shorter types like creeping thyme in front, you create airflow channels that prevent fungal spores from lingering. When planting, dig holes twice as wide as the root ball but only as deep as the container—this prevents buried stems from rotting while allowing roots to spread naturally.
Pruning Precision: That 2-3 inch pruning height in early spring might seem arbitrary, but it's actually a growth regulator. Cutting back to this level removes overwintering pests while leaving enough foliage to photosynthesize for new growth. For deadheading, use sharp pruners and cut just above the first set of healthy leaves—never into woody stems, as this creates entry points for disease. I've seen borders thrive for years with this simple technique, while others struggle with over-pruning.
Pro Tips for Front Of Border Perennials
- Creating a stunning front border that practically cares for itself takes a few strategic moves—and avoiding some common pitfalls.
- Plant Selection Wisdom: When choosing your Zone 3-5 perennials, prioritize plants with mounded growth habits under 12 inches tall—these won't flop forward like leggy varieties.
- This simple elevation change prevents root rot that can silently kill your border before it even establishes.
Frequently asked questions
Got questions about front-of-border perennials?
You’re not alone! Here are answers to the most common queries to help you choose, plant, and maintain these low-maintenance, cold-hardy stars for your landscape.
What makes front-of-border perennials different from other perennials?
Front-of-border perennials are specifically chosen for their compact size, durability, and ability to thrive in challenging conditions like full sun, poor soil, or harsh winters. They often feature reblooming varieties (like Heuchera or Sedum) that offer seasonal color with minimal care, making them perfect for high-traffic or hard-to-maintain areas.
When is the best time to plant front-of-border perennials?
Plant them in early spring or early fall for the best root establishment. Avoid extreme heat or frost, as these can stress young plants. Pro tip: If planting in containers, water deeply before transplanting to reduce shock.
How cold-hardy are these perennials, and do they need winter protection?
Most front-of-border perennials are Zone 3-7 hardy, meaning they survive winters as low as -30°F (-34°C). However, tender varieties (like Clematis or Hellebores) may need mulch or microclimate protection. Check your plant’s tag for specifics!
Can I replace annuals with front-of-border perennials for year-round color?
Swap high-maintenance annuals for perennials like Catmint, Russian Sage, or Daylilies—they return yearly with reblooming flowers and zero replanting. Just ensure they match your light and soil conditions.
What pests or diseases should I watch for with front-of-border perennials?
Common issues include aphids, slugs, and powdery mildew (especially in humid climates). Preventative care: Space plants for airflow, remove debris, and use neem oil if pests appear. Most perennials are resilient—just act fast!
Are there drought-tolerant front-of-border perennials for low-water gardens?
Yes! Opt for Sedum (stonecrop), Lavender, Yarrow, or Sempervivum (hens-and-chicks). These thrive on weekly watering once established and add texture and color with minimal effort. Perfect for xeriscaping!
Wrapping up and next steps
Front-of-border perennials like cold-hardy rebloomers are a game-changer for low-maintenance, vibrant landscapes! 🌸 They thrive in tough conditions, bloom repeatedly, and demand minimal care—perfect for busy gardeners or beginners. Whether you’re revamping a yard or adding pops of color, these plants deliver year-after-year beauty with ease.
Ready to transform your space? Start small—pick 2-3 varieties that suit your climate and soil, then expand as you gain confidence. Your dream garden is just a shovel’s toss away! 🌱