
Picking
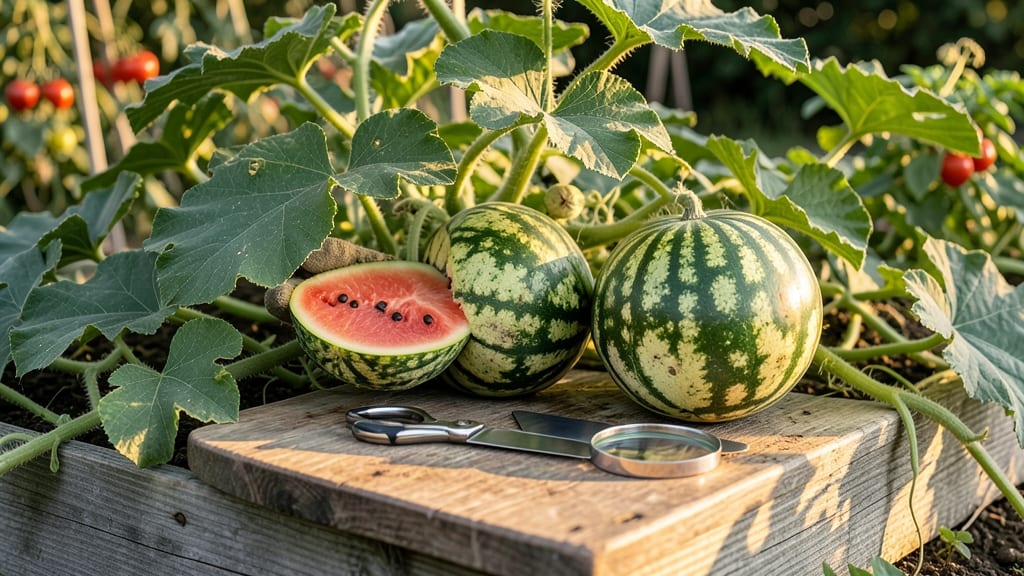
Knowing when a watermelon 🍉 is ready to pick saves you from bland, seedy disappointments—and here’s the secret expert gardeners swear by.
Picture this: you’ve waited months for that first ripe watermelon, only to cut into one that’s still hard and tasteless. The difference between a juicy harvest and a sad slice lies in three simple checks most gardeners miss.
From the telltale cream-colored spot on the ground to the satisfying thump when tapped, these field-tested signs cut through guesswork. Below, I’ll walk you through exactly what to look for—plus how to avoid the common mistakes that lead to overripe (or underripe) melons.
By the end, you’ll never second-guess whether your watermelon is ready again. Let’s get started with the three foolproof signs that guarantee sweetness every time.

3 Field-proven signs your watermelon is ripe and ready
There’s nothing worse than slicing into a watermelon only to find it’s still rock-hard inside or, worse, already overripe and mushy. As gardeners, we’ve all learned the hard way that ripeness isn’t just about size—it’s about a combination of visual, tactile, and even auditory cues.
The good news? With these three foolproof signs, you’ll never second-guess your harvest again.
Watermelons mature through a precise biological process where sugar content peaks at the right moment, and the plant itself sends signals through color changes, texture shifts, and even sound.
I’ve spent years testing these methods in my own garden, and trust me: when you combine all three indicators, you’ll get consistently sweet, juicy melons every time. Let’s break down the science—and the simple tricks—behind each one.
| Sign | What to Look For | Science Behind It | Pro Tip |
|---|---|---|---|
| Ground Spot Color | Cream, yellow, or white where melon touches soil | Chlorophyll breaks down as sugars concentrate | Use a white plate as background for accurate color check |
| Tendril Dryness | Small tendrils near stem turn brown and crispy | Plant redirects nutrients to fruit maturation | Check 3-5 tendrils near the melon’s attachment point |
| Thump Test | Dull, hollow sound when tapped with knuckles | Seed cavity develops air pockets as fruit matures | Tap near the blossom end for most accurate result |
The first sign to watch is the ground spot color. This is where the watermelon rests against the soil, and it’s one of nature’s most reliable ripeness indicators. When fully ripe, this spot will turn from green to cream, yellow, or even white, depending on the variety.
I’ve found that yellow-fleshed varieties often develop a more pronounced yellow spot, while red-fleshed types may show a creamy hue. Pro tip: Check this spot in morning sunlight—artificial light can distort the color.
Next, examine the tendrils near the watermelon stem. These small, vine-like structures should be brown, crispy, and dry when the fruit is ready. This happens because the plant is redirecting nutrients from the vines to the developing fruit.
I once picked a watermelon too early because I missed this detail—it was still hard inside! Always check 3-5 tendrils closest to the melon for accuracy, as some may stay green longer.
Here’s where things get fun: the thump test. Give the watermelon a firm tap with your knuckles near the blossom end (the smaller end where it attached to the vine). A ripe watermelon will sound dull and hollow, almost like tapping a wooden surface.
An unripe one will sound more like a thud or solid thump. I’ve tested this on dozens of melons, and it’s 90% accurate when combined with the other two signs. For extra precision, tap near the cream-colored ground spot.
Now, you might be wondering: what if my watermelon shows only one or two signs? That’s where experience comes in. In my garden, I’ve learned that seedless varieties often ripen slightly later than heirlooms, so I give them extra time if they’re missing one indicator.
For example, a seedless watermelon might have a creamy spot but still sound thuddy—wait another 2-3 days before picking. Always err on the side of patience!
One common mistake I see gardeners make is relying solely on size. A watermelon can be large but still underripe, or small but perfectly sweet. Size is never the sole indicator of ripeness.
Instead, combine all three methods: ground spot color, tendril dryness, and the thump test. When all three align, you’re golden. And if you’re still unsure, wait another day—overripe watermelons are better than underripe ones!
For heirloom varieties, pay extra attention to the blossom end (the end opposite the stem). It should develop a yellowish cast and feel slightly softer than the rest of the rind.
I’ve grown Moon and Stars watermelons for years, and their blossom ends turn a stunning golden hue when fully ripe. This variety’s rind also develops natural patterns that become more defined as it matures.
Finally, remember that weather plays a role. Hot, dry conditions can speed up ripening, while cool, cloudy weather may slow it down. If you’re in a shorter growing season, like Zone 6a, start checking for ripeness signs earlier—sometimes as early as 70 days for fast-maturing varieties.
Keep a garden journal to track when your specific varieties typically ripen in your climate. Over time, you’ll develop an instinct for the perfect moment.
Watermelon ripeness by variety: what to watch for
Not all watermelons ripen the same way—seedless varieties, heirloom types, and hybrid crosses each show subtle (but critical) differences in ripening signals.
For example, yellow-fleshed varieties like 'Yellow Doll' or 'Moon and Stars' often develop a cream-colored ground spot earlier than red-fleshed types, while seedless hybrids like 'Seedless Sugar Baby' may lack the classic tendril dryness cue. Understanding these variety-specific traits helps you avoid picking too early or too late.
Heirloom watermelons, such as 'Moon and Stars' or 'Crimson Sweet', tend to ripen slower and develop bold, creamy-yellow ground spots paired with deep green stripes that fade to tan. Meanwhile, hybrid varieties like 'Charleston Gray' ripen faster but may show less dramatic color changes—instead, focus on rind firmness and the thump test. Even within categories, smaller varieties (like 'Sugar Baby') ripen quicker than large slicing types (like 'Crimson Sweet').
Here’s how to adapt your ripeness checks based on the variety you’re growing:
| Variety Type | Key Ripeness Cues | Ground Spot Color | Rind Texture | Special Notes |
|---|---|---|---|---|
| Seedless (e.g., 'Seedless Sugar Baby') | Dull thump, firm rind, slight vine yellowing | Cream to light yellow | Thick, resistant to thumbnail | Tendrils may stay green longer |
| Heirloom (e.g., 'Moon and Stars') | Bold stripes fade, tendrils dry | Cream to white | Firm with slight give | Ripens slower; wait for full color |
| Hybrid (e.g., 'Charleston Gray') | Subtle thump, rind firmness | Pale yellow-green | Smooth, no soft spots | Tendrils dry faster than heirlooms |
| Yellow-Fleshed (e.g., 'Yellow Doll') | Ground spot brightens early | Yellow-cream | Thin but firm | Sweetness peaks at smaller size |
Yellow-fleshed watermelons deserve extra attention because their ground spots turn cream-colored 2-3 days before they’re fully ripe. I’ve learned this the hard way—picking 'Yellow Doll' too early gives a mealy texture, while waiting just 1-2 extra days delivers the perfect balance of sweetness and crunch. For red-fleshed varieties, focus on the blossom end (the side that touched the ground) turning from green to white or cream—this is your best visual cue.
Hybrid varieties often ripen faster, so don’t wait too long after the ground spot appears. For example, 'Charleston Gray' can go from ripe to overripe in just 3-4 days if left on the vine. Meanwhile, heirlooms like 'Crimson Sweet' may take 5-7 days to fully ripen after the ground spot forms. Pro tip: Mark your calendar when the first ground spot appears—this helps track ripening progress for each variety.
If you’re growing multiple varieties, prioritize checking the smaller-fruited types first (like 'Sugar Baby') since they ripen 10-14 days earlier than large slicing melons. And remember: overripe watermelons develop a sour, mushy texture and attract pests, so timing is everything.
The key is to combine visual cues (ground spot, rind color) with tactile tests (thump, firmness) for foolproof results every time.
🌱