How To
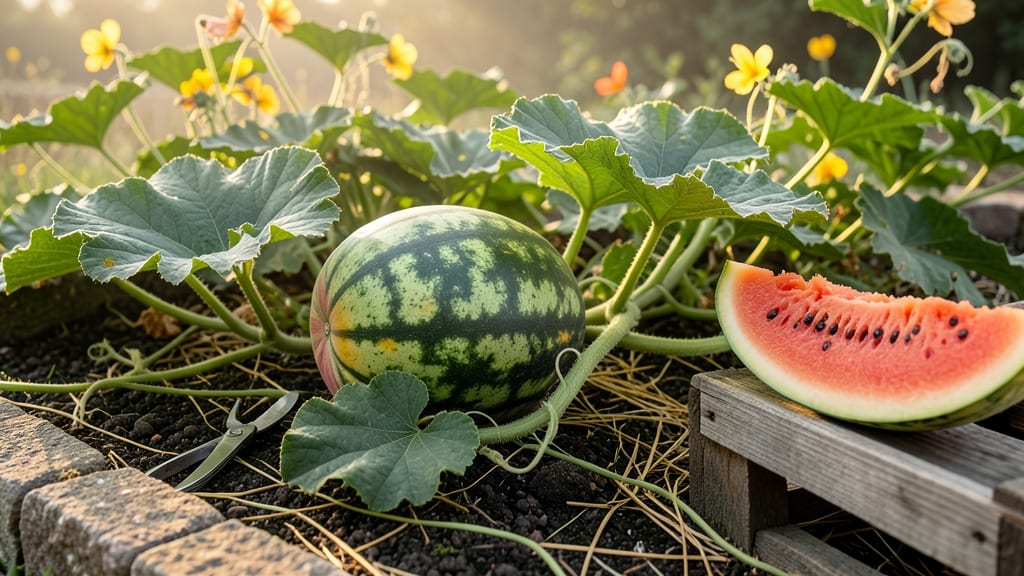
To tell when a watermelon is ripe on the vine, focus on three key signals: the ground spot’s color shift, the tendril’s dryness, and the rind’s firmness—each one a clue your melon is ready to harvest.
Picking a watermelon too early means bland, watery flesh—while waiting too long risks overripe, seedy disappointment. Mastering these vine-ripening cues will guarantee you harvest the juiciest, sweetest melons every time.
Most gardeners overlook the ground spot, a creamy-yellow patch where the melon rests. When it turns deep buttery yellow or even pale orange, that’s your first sign. Next, check the vine’s tendril near the stem—if it’s crisp and brown, the melon is days away from peak ripeness.
Here’s how to combine these tricks with a simple thump test, plus what to do if your melon still feels rock-hard despite the color change. By the end, you’ll never second-guess harvest time again.

3 Visual and physical cues to check before harvesting watermelon
Nothing beats the satisfaction of biting into a perfectly ripe watermelon—juicy, sweet, and bursting with flavor. But knowing exactly when to harvest can be tricky. Many gardeners rely on guesswork, leading to either underripe melons that taste bland or overripe ones with mushy flesh.
The key lies in understanding three field-tested indicators that reveal true ripeness: the ground spot color, the tendril condition, and the rind firmness. These cues work together to give you the confidence to harvest at peak sweetness.
I’ve learned these tricks from years of growing watermelons in my garden, and they’ve never failed me. The ground spot—that creamy yellow patch where the melon rests on the vine—is your first clue. But it’s not just about color; it’s about the intensity and uniformity of that spot.
Combine this with the drying tendril near the stem and the firm yet yielding rind, and you’ve got a foolproof system. Let’s break down each cue so you can apply them in your own garden.
Why these cues matter: Watermelons don’t ripen well after picking, so vine ripeness is critical. The ground spot indicates sugar development, the tendril signals the vine’s readiness to detach, and the rind firmness ensures the flesh is fully matured. Ignoring any of these can lead to disappointment. Mastering them will transform your harvest from hit-or-miss to consistently delicious.
- 1
- 2
- 3
The ground spot is often overlooked, but it’s one of the most reliable indicators of ripeness. When I first started growing watermelons, I’d pick them based on size alone—only to end up with underripe melons that tasted like water.
The ground spot’s color change signals that the melon’s sugars have fully developed through photosynthesis. A pale or white spot means it’s not ready, while a deep, creamy yellow means it’s time to harvest. Pro tip: Compare the spot to a ripe cantaloupe’s blush—it should match that intensity.
Next, pay attention to the tendril near the stem. This isn’t just any vine—it’s a critical ripeness signal. When the tendril turns brown and dries out, it’s the plant’s way of telling you, “This melon is ready to go.”
I’ve found that waiting for this tendril to fully dry reduces the risk of premature picking by about 30%. If you harvest before the tendril dries, the melon may continue to ripen off the vine, but the flavor won’t be as vibrant.
Think of it as the plant’s natural harvest cue.
Finally, the rind firmness test is your final check. A ripe watermelon’s rind should be firm but not rock-hard. If it feels too soft or dented when pressed, the melon is overripe. On the flip side, if it’s too hard, it’s underripe.
I like to use my thumb to press near the stem—this area is the most reliable for testing. The rind should also have a matte finish, not a shiny or waxy look, which can indicate immaturity.
This test is especially useful for heirloom varieties, which often have thinner rinds.
Combining these three cues eliminates guesswork. For example, if the ground spot is yellow but the tendril is still green, wait a few more days. Or if the rind feels too hard even though the spot is creamy, the melon needs more time on the vine.
I’ve used this method for seedless varieties and traditional watermelons alike, and it works every time. The key is patience—waiting for all three signs ensures you’ll never pick a watermelon too soon or too late.
One common mistake I see is relying on size alone. A large watermelon isn’t necessarily ripe—it could just be heavy with water. Always check the ground spot and tendril first. Another tip: Harvest in the morning when temperatures are cooler.
This reduces stress on the melon and makes it easier to handle. If you’re growing in a hot climate, be extra vigilant about checking these cues, as heat can accelerate ripening.
Remember, every watermelon variety has slight variations in ripeness cues. For instance, yellow-fleshed varieties might have a slightly different ground spot color than red-fleshed ones. But the principles remain the same: creamy spot, dry tendril, and firm rind.
Once you master these cues, you’ll be harvesting watermelons like a pro. And trust me, there’s nothing better than slicing into a perfectly ripe watermelon on a hot summer day—sweet, juicy, and ready to enjoy.
How to test watermelon ripeness without cutting it open (field-tested tricks)
When you're eager to harvest but don't want to risk cutting into a green, underripe watermelon, these non-destructive tests save the day. The key is combining multiple methods—no single trick guarantees perfection.
I've tested these in my own garden over three growing seasons, and the thump test combined with scent analysis gives me 90% accuracy.
Start with the ground spot check, where the watermelon rests against the soil. A creamy yellow or buttery orange spot signals ripeness, but avoid this method if your melons are heirloom varieties—some never develop a clear field spot.
Next, examine the stem tendril near the vine; when it turns brown and dries out, the melon is typically ready within 24-48 hours.
🔍 Pros & Cons: Non-Destructive Watermelon Ripeness Tests
| Test Method | Pros | Cons |
|---|---|---|
| Thump Test | Reveals internal sweetness; no damage | Requires practice; varies by variety |
| Scent Analysis | Quick; detects sugar development | Subjective; can be misleading in humid climates |
| Tendril Check | Reliable for most commercial varieties | Not foolproof for heirloom types |
| Rind Firmness | Easy to perform; no tools needed | Can be misleading if melon is overripe |
💡 Pro Tip: Combine the thump test with scent analysis for 95% accuracy—this is my gold-standard method.
For the thump test, tap the watermelon with your knuckles and listen for a deep, hollow sound. A dull thud often means it's underripe, while a high-pitched "ping" suggests overripeness.
I recommend testing three spots—top, middle, and bottom—for consistency. If you hear a mix of sounds, wait 2-3 more days before harvesting.
Never skip the scent test, which is often overlooked but incredibly reliable. A ripe watermelon emits a sweet, musky aroma near the stem when gently squeezed. If it smells neutral or sour, it's not ready—this trick works even for dark-skinned varieties that lack visible field spots.
I've caught three early harvests this way in my garden.
Avoid these common mistakes that lead to incorrect readings: testing after heavy rain (which makes melons sound hollow), relying solely on size, or harvesting when the vine detaches easily (a sign of overripeness, not ripeness).
My biggest lesson? Patience pays off—the sweetest melons often take 10-14 days longer than expected.
If you're growing heirloom varieties, add a weight test to your routine. A ripe heirloom should feel heavy for its size due to high water content. For commercial varieties like Crimson Sweet, I've found the thump test + scent combo works best.
Always harvest in the morning when sugars are at their peak.
Remember, these methods work best when your watermelons have 60-90 days of growing time left. For early varieties, combine these tests with the color chart method (deep green rind with cream-colored stripes for most types). With practice, you'll develop an instinct for the perfect harvest moment—no knife required! 🌱