
Picking
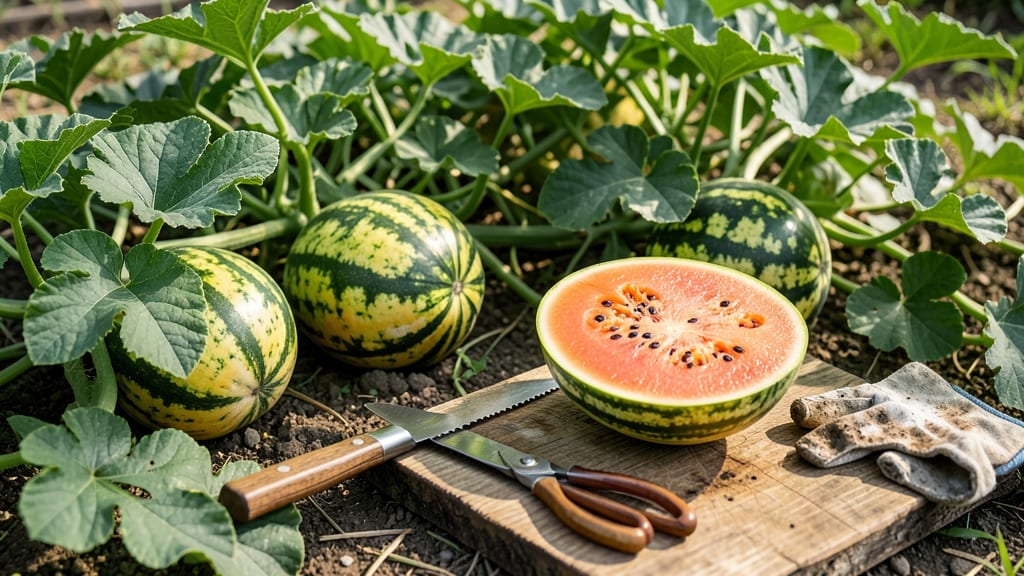
To pick a watermelon from the vine at the perfect moment means the difference between a juicy, sweet slice and a mealy, bland disappointment.
Picture this: you’ve waited all summer for your 🍉 to ripen, but how do you know when it’s truly ready? Picking too early means watery, underripe fruit—while waiting too long risks overripe, seedy frustration.
The key lies in a mix of visual cues, physical tests, and even environmental clues that most gardeners overlook.
In General (USDA Zone 6 default), where the growing season stretches from late April to September, timing is everything. You’ll learn the telltale signs—like a creamy ground spot, a hollow thump, or dried tendrils—that guarantee a ripe watermelon every time. No more guesswork, just field-tested confidence.
Below, I break down the exact methods to check, common mistakes to avoid, and how regional climate tweaks your harvest window. Ready to master the art of picking? Let’s dive in.

5 Field-tested visual and physical signs your watermelon is ripe
There’s nothing worse than slicing into a watermelon only to find it’s either underripe and tasteless or overripe and mushy. The key to success lies in understanding your watermelon’s visual and physical cues—not just guessing based on size or days since planting.
Over my years of growing watermelons, I’ve learned to trust these five foolproof indicators to determine the perfect moment to harvest.
Watermelons don’t give obvious signals like tomatoes or peppers, so you’ll need to pay attention to subtle changes in color, texture, and structure. Ignoring these signs often leads to disappointment, but mastering them guarantees a harvest of sweet, juicy perfection every time.
Let’s break down each method so you can confidently pick your watermelons at their peak.
Look for a deep, consistent color with no streaks. Cream-colored varieties should turn a solid cream or pale yellow, while striped varieties should darken to deep green or black stripes with a matte finish.
Check the cream-colored spot where the watermelon rested on the ground. When ripe, it should turn yellow or orange. A white spot means it’s not ready yet.
Tap the watermelon with your knuckles. A deep, hollow sound indicates ripeness, while a dull thud means it’s underripe. Avoid over-relying on this—it’s best used alongside other signs.
The small tendril nearest the watermelon should turn brown and crispy. If it’s still green, the melon needs more time. This is one of the most reliable signs!
A ripe watermelon feels heavy for its size. Lift it—if it’s light, it’s likely underripe. Combine this with the other signs for the most accurate judgment.
Let’s start with the rind color, which is often the first clue many gardeners notice. A ripe watermelon’s skin should be deep and uniform in color, free of any uneven patches or streaks.
For example, a Crimson Sweet will develop a rich, dark red hue, while a Sugar Baby will turn a consistent pale yellow. Pay close attention to the stripes or patterns—if they’re faded or inconsistent, the melon isn’t ready yet.
The ground spot is another critical indicator that’s often overlooked. This is the area where the watermelon rested against the soil. When ripe, it should change from white to a creamy yellow or orange. I’ve seen many gardeners skip this step and end up with underripe fruit.
Pro tip: Use a flashlight to check this spot in low light—it’s easier to spot the color shift when contrasted against the rest of the rind.
Next up is the thump test, a classic method that works—but only when combined with other signs. Give the watermelon a firm tap with your knuckles. A hollow, echoing sound suggests ripeness, while a dull thud means it’s still developing.
However, be cautious: some overripe melons can also sound hollow. That’s why I always cross-reference this with the tendril and ground spot before making a decision.
One of the most reliable signs is the tendril nearest the fruit. This tiny vine should turn brown and crispy when the watermelon is ready to pick. Many gardeners assume all tendrils must dry out, but only the one closest to the melon matters.
If it’s still green or slightly wilted, wait a few more days. This is a non-negotiable sign in my garden—if the tendril isn’t dry, the melon isn’t ready.
Finally, don’t underestimate the weight of the watermelon. A ripe fruit feels surprisingly heavy for its size. Lift it in your hands—if it feels light, it’s likely underripe. This is especially true for larger varieties like Charleston Gray, which can weigh 20 pounds or more when fully ripe.
Combine this with the other signs, and you’ll never guess wrong again.
Remember, environmental factors like temperature and humidity can affect ripening times. In hot, dry climates, watermelons may ripen faster, while cooler, wetter conditions can slow the process. Always check for multiple signs before harvesting to ensure you’re picking at the perfect moment.
Now that you know these five signs, you’ll never second-guess when to pick your watermelons again. Grab your pruners, head to the garden, and enjoy the sweet reward of your hard work! 🍉
How to avoid common mistakes that ruin watermelon ripeness
Even experienced gardeners sometimes fall into traps that turn watermelon harvests into disappointing guesswork. The most common mistake? Picking based on size alone. A large watermelon isn't necessarily ripe—it could just be overwatered and bloated.
I've learned the hard way that ignoring the vine's health or over-relying on the thump test leads to fruit that's either bland or seedy.
Another frequent error is harvesting when the ground spot (the cream-colored patch on the melon's underside) hasn't fully developed. This spot changes from white to yellowish when the melon is ready, but many gardeners miss it because they're focused on other cues.
Even temperature swings can trick you—hot days followed by cool nights can delay ripening, making it seem like your melons are taking forever to mature.
⚠️ callout-warning
Don't harvest based on size or days since flowering—these are unreliable. Instead, combine these 3 critical checks:
- 🟡 Ground spot turns cream/yellow (not white)
- 🔊 Thump test sounds dull (not hollow)
- 🌿 Tendril nearest the fruit is brown/dry
Pro Tip: Morning harvests prevent overnight sugar loss from heat.
Let me share what I've learned about vine conditions—healthy vines produce sweeter fruit. If your watermelon vine looks stressed (yellowing leaves, wilting stems), the melons may never fully ripen. I once had a vine that looked perfect but produced underripe melons because of nutrient deficiency.
A quick soil test revealed low potassium, and after amending with compost, the next harvest was sweeter and more consistent.
Over-relying on the thump test is another mistake. While a hollow sound can indicate ripeness, it's not foolproof—especially in dry soil conditions. I test by pressing my thumbnail into the rind: if it resists pressure, the melon's closer to ripe.
Combine this with the thump test for better accuracy. Also, avoid harvesting when temperatures drop below 50°F (10°C)—melons won't ripen properly in cool weather.
Environmental factors like humidity and rainfall play huge roles too. High humidity can delay ripening, while drought stress might cause the melons to mature faster but with less flavor. I adjust my watering schedule based on weather forecasts—deep watering every 3-5 days keeps the vines happy without over-saturating the soil.
Mulching helps maintain even moisture levels, which is key for consistent ripening.
Finally, resist the urge to harvest just because your neighbors' melons are ready. Varieties ripen at different rates, and even within the same plant, melons can mature unevenly. I mark my earliest blooms with flags to track maturity dates, which helps me avoid picking prematurely.
Patience pays off—waiting for all the right signs ensures a harvest of juicy, sweet perfection every time.