
Picking
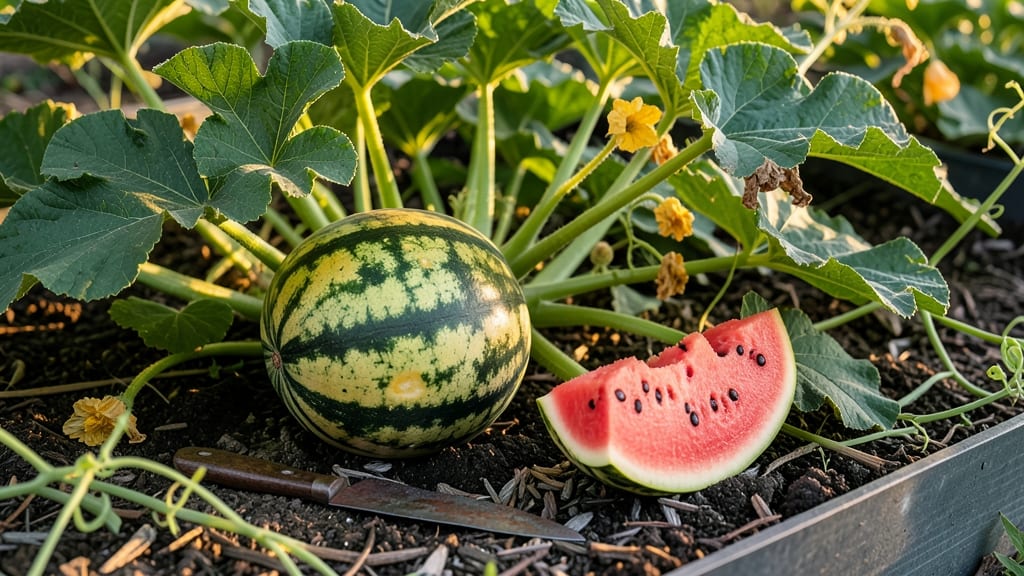
To pick watermelons at the perfect time means catching them when their sweetness peaks—and missing it means a meal of bland, seedy disappointment.
Picture this: you’ve nurtured your 🍉 plants all season, and now the fruits are heavy on the vine. But how do you know if they’re ready—or if you’ve waited too long?
The answer lies in three simple checks that save you from cutting into a watermelon that’s still rock-hard or already overripe.
From the classic "thump test" to the telltale yellow spot on the rind, these visual and physical cues take the guesswork out of harvest time. Whether you’re growing heirloom varieties or seedless types, knowing these signs means you’ll always pull a watermelon that’s juicy, sweet, and ready to eat.
Below, I’ll walk you through the most reliable ways to test ripeness—plus common mistakes that even experienced gardeners make. By the end, you’ll know exactly when to grab your knife and slice into summer’s sweetest reward.
3 Visual ripeness signs to harvest watermelons at peak sweetness
There’s nothing quite like biting into a perfectly ripe watermelon—juicy, sweet, and bursting with flavor. But how do you know when your homegrown watermelons are ready? Relying on days-to-maturity alone can lead to disappointment.
Instead, trust these three foolproof visual cues that tell you when it’s time to harvest. These signs work for seedless varieties and heirloom types alike, so you’ll never miss the sweet spot again.
Watermelons don’t ripen further after picking, so timing is everything. The key is checking the field spot, the tendril near the stem, and the rind hardness. Each of these clues works together to confirm ripeness.
I’ve learned the hard way that ignoring these signs can mean a watermelon that’s either underripe and bland or overripe and mealy. Let’s dive into how to read these visual cues like a pro.
-
1. Field Spot Color
Look for a creamy yellow patch where the watermelon rested on the ground. This spot should be deep and consistent, not pale or dull. A ripe watermelon’s field spot often turns tan or brown as it matures. -
2. Tendril Dryness
The small vine (tendril) nearest the watermelon should be brown and crispy. If it’s still green, the fruit needs more time. This tendril acts like a countdown timer—once it dries, the watermelon is ready within days. -
3. Rind Hardness
Press your thumbnail into the watermelon’s rind near the field spot. If it doesn’t dent, the fruit is firm and ripe. A soft spot means it’s overripe, while a hard rind that resists pressure signals it’s not ready yet.
Let’s start with the field spot, the most reliable indicator of ripeness. This is the area where the watermelon sat on the ground while growing. A ripe watermelon will have a creamy yellow or tan spot that’s deep and even in color.
If the spot is still pale or green, the watermelon needs more time. I once picked a watermelon with a faint yellow spot, only to find it was watery and unsweet. Always wait for that spot to darken—it’s your best clue!
The tendril near the watermelon’s stem is another game-changer. This small vine should be brown and dry when the fruit is ripe. If it’s still green and flexible, the watermelon isn’t ready. I remember one year, I ignored this sign and picked a watermelon with a green tendril.
The result? A hard, seedy, and tasteless disappointment. Give the tendril time to dry out completely before harvesting.
Finally, the rind hardness test is a classic trick that never fails. Press your thumbnail into the watermelon’s rind near the field spot. If your nail doesn’t leave a dent, the watermelon is ripe.
A soft spot means it’s overripe, while a rind that resists pressure signals it’s not ready yet. This test is especially useful for seedless varieties, which can be trickier to judge by color alone.
Here’s a bonus tip: Listen for a hollow sound when you tap the watermelon with your knuckles. A ripe watermelon will produce a deep, echoing thud. This sound comes from the seeds rattling inside, confirming the fruit is fully developed.
I use this test as a final check before cutting into my harvest—it’s a great way to double-check your visual cues.
Regional differences can affect ripeness timing, too. In hotter climates, watermelons may ripen faster, so check these signs every 2-3 days once they’re near full size. In cooler regions, give them extra time, especially if nights are chilly.
I’ve grown watermelons in USDA Zone 6a, and I always adjust my harvesting schedule based on the weather. If frost is forecasted, don’t wait—pick your watermelons even if they’re not fully ripe.
One common mistake is assuming size alone determines ripeness. A watermelon can reach its full size but still be underripe and bland. Always combine the field spot, tendril, and rind tests for the best results.
I’ve learned that patience pays off—waiting an extra day or two for the perfect signs is worth the sweet reward.
Once you’ve confirmed ripeness, harvest your watermelon by cutting the stem with a sharp knife or pruners. Leave a 1-inch stem attached to help the fruit last longer in storage. Store ripe watermelons in a cool, dry place (around 50-55°F) for up to two weeks.
If you’ve picked them at peak ripeness, you’ll enjoy that perfect balance of sweetness and juiciness every time.
Now that you know these three visual ripeness signs, you’re ready to harvest watermelons like a seasoned gardener. Trust your eyes, your fingers, and your ears—these cues will never steer you wrong. Happy harvesting, and may your watermelons be as sweet as they are plentiful! 🌞
How to tap (literally) and thump: the sound test for perfect watermelon ripeness
Every gardener knows the frustration of cutting into a watermelon that’s still hard and bland inside—just days too early. The classic thump test isn’t just folklore; it’s a science-backed way to check if the seeds have fully developed and the flesh has reached peak sweetness.
When combined with field spot analysis, this method gives you a foolproof way to know exactly when to harvest.
The thump test works because ripe watermelons develop air pockets inside as the seeds mature and sugars concentrate. A hollow, deep sound means those pockets are fully formed, while a dull thud signals underripe fruit.
But here’s the secret: combine this with visual cues like the creamy yellow field spot and dry tendrils for the best results.
🌱
💡 Pro Tip for Perfect Timing
Thump watermelons near the blossom end (the smaller side) for the most accurate sound. A ripe melon will produce a deep, hollow "thump"—like knocking on a wooden door. If it sounds more like a drum, it’s not ready yet!
For even better accuracy, pair the thump test with a field spot check. The creamy yellow or orange spot where the watermelon rested on the ground should be fully developed and slightly soft to the touch.
This spot indicates the fruit has been absorbing sunlight and ripening evenly. If it’s still pale or greenish, wait a few days.
Don’t forget to inspect the stem near the fruit. When it turns brown and dries out, that’s your final green light to harvest. This natural drying process signals the plant has stopped sending nutrients to the melon, locking in its sweetness.
Pro tip: Harvest in the morning when temperatures are cooler to preserve freshness.
Regional differences matter too! In hotter climates, watermelons may ripen faster, so check them every 2-3 days once they reach full size. In cooler areas, extend your checks to 4-5 days** between tests. Always use a clean, sharp knife or pruners to avoid damaging the vine when harvesting.
Once you’ve mastered the thump test and field spot analysis, you’ll never second-guess watermelon ripeness again. The key is patience and consistency—just like we’ve learned from years of gardening mistakes (and sweet successes!). Now go enjoy that perfectly ripe, juicy slice you’ve earned.
🍉