
Size
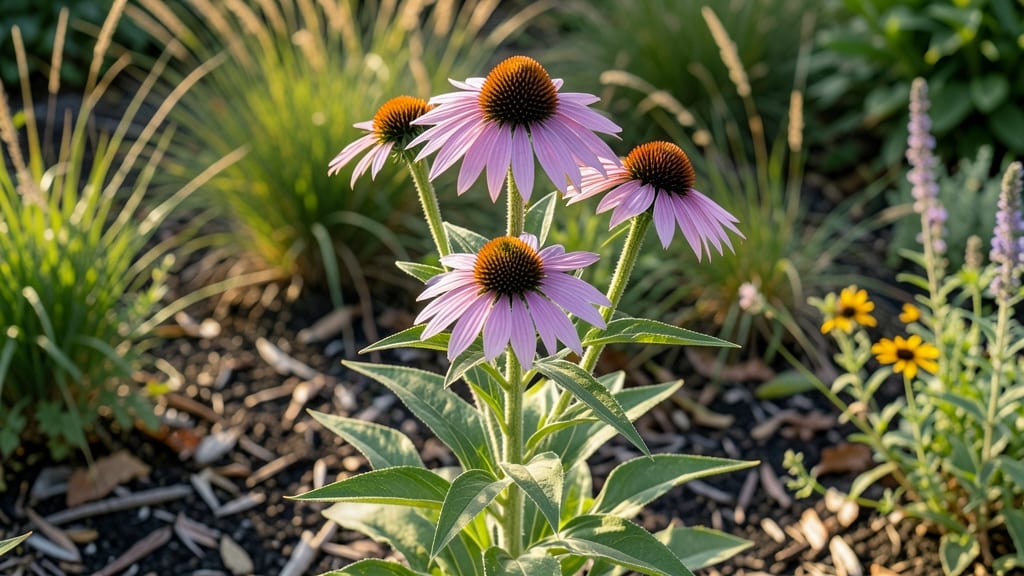
Tall part-sun perennials transform shady corners into dramatic backdrops—I’ve used them to add 6+ feet of vertical interest where nothing else would grow. 🌿 These plants handle 3-6 hours of sunlight daily, thriving in spots where sun-loving perennials would crisp.
The best part? They demand almost no winter prep beyond a light mulch, and their foliage stays striking even when flowers fade.
Think bold textures like the feathery plumes of Joe Pye weed or the architectural stems of giant hyssop. Pair them with shorter perennials like asters or ferns to create depth, and they’ll anchor your garden like natural obelisks.
My go-to combo? Black-eyed Susans in front of culver’s root—the golden blooms pop against the deep purple spikes, and both handle partial shade effortlessly.
You’ll get season-long drama: early blooms from bee balm, midseason height from ironweed, and late-season structure from switchgrass. Even in winter, their dried seed heads add texture. The key is spacing—give them 2-4 feet apart depending on the variety, and they’ll fill in beautifully without crowding.
Works for woodland gardens, mixed borders, or even container arrangements—just ensure good drainage. Here’s how to make them the star of your shade garden without the fuss.
📚 In This Guide
- What you need
- Instructions
- Tips and common mistakes
- Wrapping up and next steps
What you need
- ● Tall part-sun perennials: 3–5 plants per variety (e.g., Joe Pye Weed, Coneflower, Black-Eyed Susan, or Russian Sage)
- ● Choose mature plants (1–2 years old) for faster, fuller growth
- ● Well-draining soil: Amend with 2–3 inches of compost or organic matter (e.g., leaf mold, aged manure)
- ● Mulch: 2–3 inches of shredded bark, straw, or pine needles to retain moisture and suppress weeds
- ○ Slow-release fertilizer (optional): 10-10-10 or 5-10-10 (apply at planting and mid-season)
- ● Garden trowel or transplant spade (for digging holes)
- ● Garden gloves (to protect hands from thorns or rough foliage)
- ● Watering can or hose with a gentle spray nozzle (avoid heavy pressure)
- ● Pruners or shears (for cleanup or dividing clumps)
- ● Measuring tape or ruler (to space plants 18–36 inches apart, depending on variety)
- ○ Stakes or plant supports (optional) for taller varieties like Joe Pye Weed (3–4 ft plants)
- ● Sunlight: 4–6 hours of part sun (morning sun + afternoon shade works best)
- ● Hardiness zone: Check your USDA Zone (5–9) for cold tolerance
- ● Planting time: Spring: After last frost (April–May)
- ○ Fall (optional): 6–8 weeks before first frost (September–October)
- ● Water access: Drip irrigation or soaker hose for consistent moisture (especially in first growing season)
How to design a stunning tall part sun perennial border
Let's create a dramatic, low-maintenance garden that thrives in partial shade while providing seasonal interest.
🌱 Step 1: Select Your Foundation Plants
Start with 4-6 tall perennials that handle 4-6 hours of sunlight daily and reach 4-6 feet mature height. My go-to choices are Joe Pye weed (Eutrochium purpureum) for summer blooms, Culver's root (Veronicastrum virginicum) for vertical spikes, and Ironweed (Vernonia lettermannii) for late-season color. These plants deliver bold foliage and flowers even when sunlight is limited.
Space them 2-3 feet apart—this gives them room to establish strong root systems before competing for light. I always plant the tallest varieties at the north or west edge of the border to prevent shading out shorter plants. Dig holes twice as wide as the root ball but only as deep as the container level.
☀️ Step 2: Layer With Mid-Height Accents
Fill the gaps with 3-4 medium-height perennials (2-3 feet tall) that complement your foundation plants. Astilbe (Astilbe spp.) adds feathery texture, while Japanese painted fern (Athyrium niponicum) provides lush, arching foliage. These plants need 3-5 hours of sunlight and thrive in the dappled light beneath taller varieties.
Plant these 12-18 inches apart and slightly deeper than their container level—this encourages root growth downward where moisture lingers. I always mix in one variegated foliage plant (like Hosta 'Francee') to add contrast and prevent the border from looking too uniform.
🪴 Step 3: Add Ground Cover and Mulch
Complete the design with low-growing perennials that suppress weeds and retain soil moisture. Creeping phlox (Phlox subulata) or ajuga (Ajuga reptans) work beautifully in 6-8 inches of sunlight, spreading to fill gaps naturally. Plant these 8-12 inches apart and water deeply after installation to settle roots.
Apply 3-4 inches of mulch (shredded bark or leaf mold) over the entire area, keeping it 2 inches away from stems to prevent rot. This layer insulates roots through winter and reduces watering needs by 50%. I refresh mulch annually in early spring before new growth appears.
✂️ Step 4: Prune Strategically for Year-Round Interest
Cut back tall, woody stems (like Joe Pye weed) to 12-18 inches in early spring when new shoots emerge. This encourages bushier growth and prevents flopping. For fern-like foliage (like Culver's root), remove only the dead flower stalks—leave the stems for winter interest and early spring structure.
Deadhead spent blooms throughout summer to extend flowering seasons. I always prune in morning hours when plants are hydrated and less stressed. Avoid cutting into old growth—this removes next year's flower buds in many perennials.
💧 Step 5: Water and Fertilize for Long-Term Health
Water deeply once weekly during the first growing season to establish roots, then reduce to every 10-14 days once established. Check soil moisture by pushing your finger 2 inches deep—water when dry. These plants tolerate drought once established, but young transplants need consistent moisture to prevent transplant shock.
Apply a balanced, slow-release fertilizer (10-10-10) in early spring at half the recommended rate. Too much nitrogen produces lush foliage at the expense of flowers. I top-dress with compost annually in late fall to improve soil structure without risking burn.
Tips & tricks for perfect tall part sun perennial borders
Creating a stunning part sun perennial border takes thoughtful planning—here's how to elevate your design beyond the basics.
Sunlight Strategy: When selecting plants for your 4-6 hours of sunlight, pay close attention to the specific microclimates in your garden. The north or west edge of your border will receive less direct sunlight than the south or east sides—this is why I always position the tallest varieties (like Joe Pye weed) on these cooler sides. The extra height helps capture what little sunlight reaches while preventing shading of shorter plants. Consider using a simple light meter or observing your garden throughout the day to map these variations before planting.
Root Zone Secrets: The instructions mention planting mid-height perennials slightly deeper than their container level, but here's the deeper insight: this technique works because it encourages roots to grow downward where moisture lingers. For plants like astilbe that struggle in dry conditions, I take this a step further by adding a handful of compost to the bottom of each planting hole. This creates a moisture-rich zone exactly where new roots will establish first, giving them a head start during those critical first weeks.
Mulch Mastery: That 3-4 inches of mulch isn't just for looks—it's a game-changer for winter care. I've found that applying mulch in early fall (not spring) gives plants an extra layer of protection against freeze-thaw cycles that can heave roots. For even better results, mix your shredded bark with a thin layer of leaf mold at the soil interface. This combination improves soil structure while maintaining consistent moisture levels, which is especially important for young transplants during their first growing season.
Pruning Precision: The early spring pruning of tall woody stems to 12-18 inches might seem drastic, but there's method to this madness. I've learned this works because it forces new growth from lower buds that are often more vigorous and bushier. For plants like Culver's root with fern-like foliage, I mark the stems with twine before winter to identify where to cut in spring—this prevents accidental removal of next year's growth. The key is timing: always prune when you see the first signs of new growth emerging from the base.
Pro Tips for Tall Part Sun Perennials
- Creating a stunning part sun perennial border takes thoughtful planning—here's how to elevate your design beyond the basics.
- Sunlight Strategy: When selecting plants for your 4-6 hours of sunlight, pay close attention to the specific microclimates in your garden.
- For plants like astilbe that struggle in dry conditions, I take this a step further by adding a handful of compost to the bottom of each planting hole.
Frequently asked questions
Got questions about tall part-sun perennials? You’re not alone!
Here are answers to the most common queries to help you pick, plant, and maintain these low-maintenance stars for your garden.
What’s the best time to plant tall part-sun perennials?
Spring and early fall are ideal! Plant in spring after the last frost (when soil is workable) or in early fall (6-8 weeks before your first frost). This gives roots time to establish before winter. Avoid planting in extreme heat or cold—roots need stable conditions to thrive.
How much sun do “part-sun” perennials really need?
Part-sun typically means 3–6 hours of direct sunlight daily, with dappled shade or afternoon shade in hotter climates. Check your garden’s microclimate—some spots may get more sun than others. If leaves scorch, they’re getting too much sun; if they stretch leggy, they need more light.
Do tall part-sun perennials need winter protection?
Most are hardy, but young plants or tender varieties (like Hellebores or Astilbes) benefit from a 2–3 inch mulch layer (straw or shredded leaves work great). Avoid heavy mulch that smothers roots. In extreme cold zones, add a cloche or burlap wrap for extra safeguarding.
What are some low-maintenance tall alternatives to high-water plants?
Try drought-tolerant picks like Joe Pye Weed (Eutrochium), Russian Sage (Perovskia), or Black-Eyed Susan (Rudbeckia). These thrive in part-sun, handle dry spells, and attract pollinators. Pair them with Sedum or Lavender for a zero-fuss, colorful border.
Why are my tall perennials flopping over? How do I fix it?
Flopping often means weak stems or overcrowding. Stake tall varieties like Coneflowers or Bee Balm early with bamboo stakes or rings. For leggy growth, prune back by ⅓ in early spring to encourage bushier, stronger stems. Ensure they’re not competing for water—deep, infrequent watering helps.
Can I divide tall perennials to spread them around my garden?
Divide clump-forming perennials like Hostas or Daylilies every 3–4 years in early spring or fall. Cut through the center with a spade, replant sections, and water well. Avoid dividing woody-stemmed plants (like Sedum)—they’re better left undisturbed.
Wrapping up and next steps
Ready to transform your garden into a year-round showstopper with minimal effort? Tall part-sun perennials are your secret weapon—offering bold colors, easy care, and stunning height while thriving in less-than-sunny spots.
Whether you’re a seasoned gardener or just starting out, these plants make it simple to add drama and structure without the fuss.
🌱 Next steps: Pick your top 3 favorites from this list, grab some gloves, and get planting! With the right prep and a little love, you’ll be enjoying low-maintenance, high-impact blooms for seasons to come. Happy gardening! 🌸